Note:Ifthe3or9o’clocksideis1.6to6.0mm
(0.060to0.240inch)higherthanthenewfront
heightthennoadjustmentisneededforthat
side.Adjusttheothersidetowithin±2.2mm
(0.090inch)ofthecorrectside.
7.Adjusttherightand/orleftheight-of-cutbrackets
byrepeatingsteps1through4.
8.Securethecarriageboltsandangenuts.
9.Verifythe12,3,and9o’clockheights.
RemovingandInstalling
theCutting-UnitBlade(s)
Replacethebladeifithitsasolidobject,isout
ofbalance,orisbent.AlwaysusegenuineToro
replacementbladestoensuresafetyandoptimum
performance.
1.Parkthemachineonalevelsurface,raisethe
cuttingunittothehighestposition,engagethe
parkingbrake,shutofftheengine,andremove
thekey.
Note:Blockthecuttingunittopreventitfrom
accidentallyfalling.
2.Grasptheendofthebladeusingaragor
thickly-paddedglove.
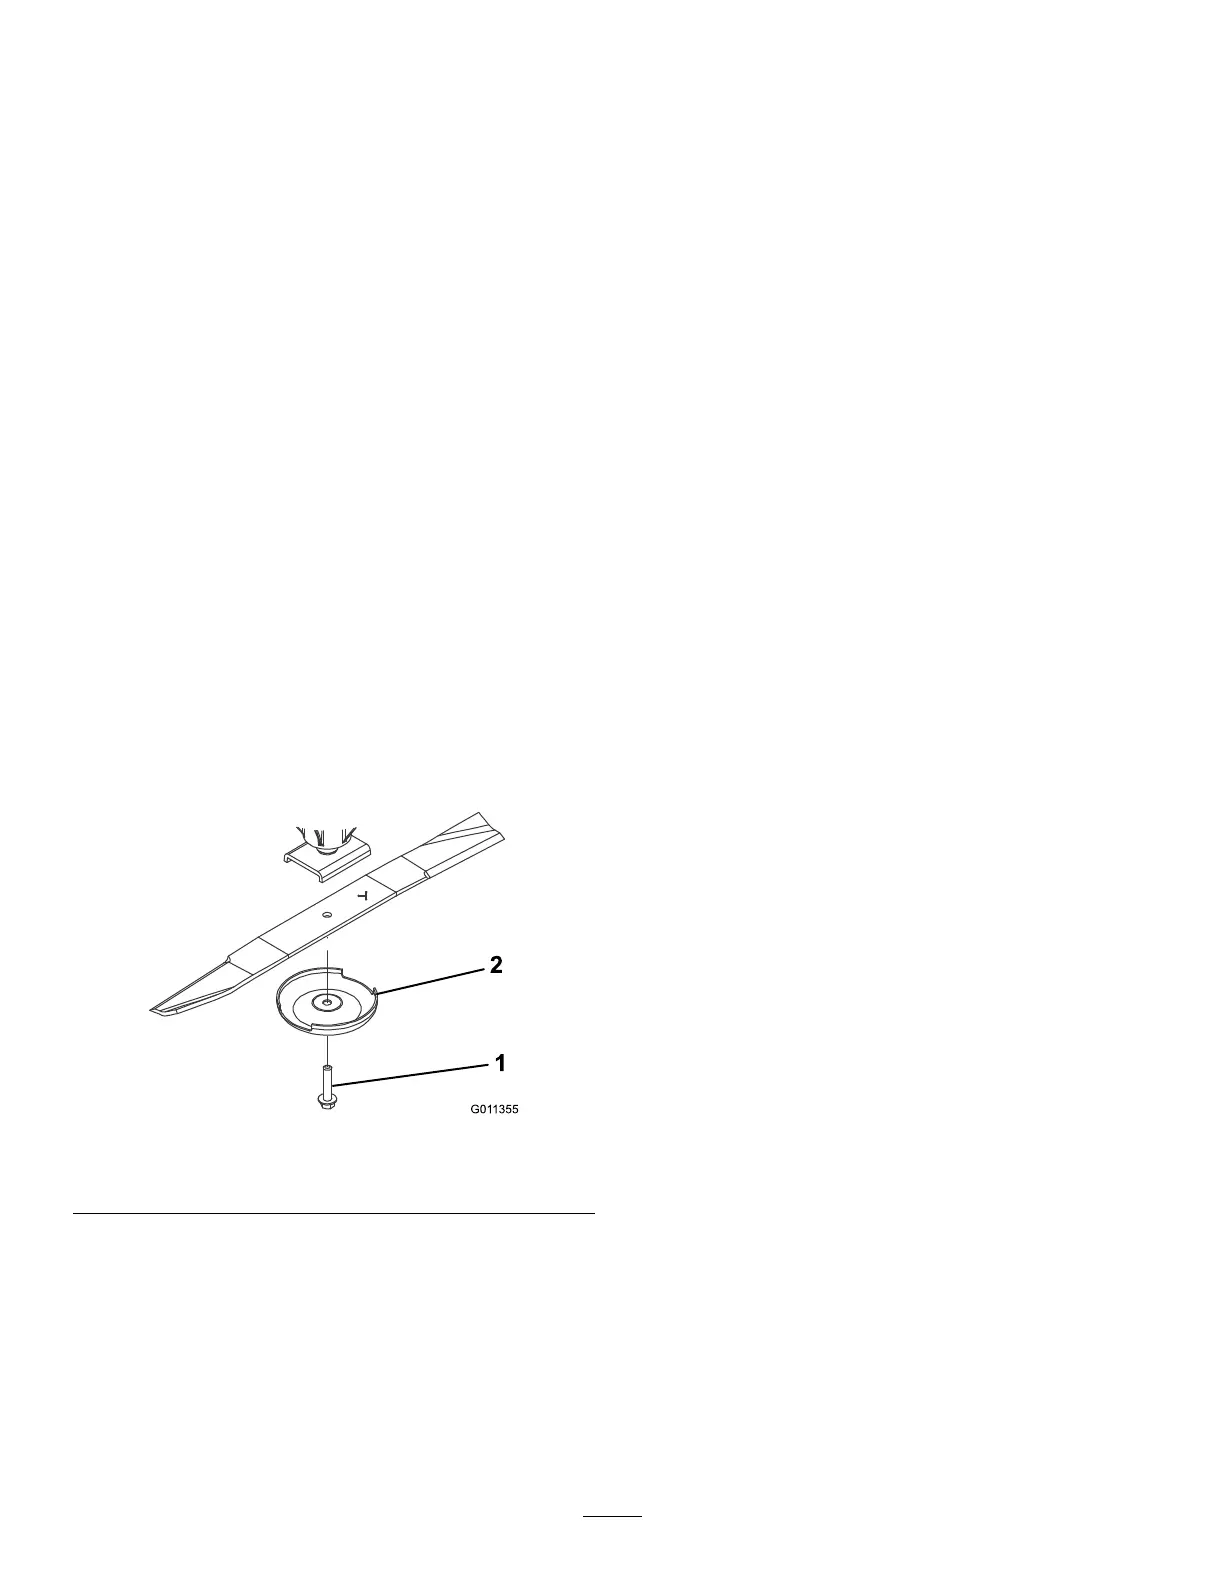
3.Removethebladebolt,anti-scalpcup,and
bladefromthespindleshaft(Figure124).
g011355
Figure124
1.Bladebolt2.Anti-scalpcup
4.Installtheblade,anti-scalpcup,andbladebolt
andtightenthebladeboltto115to149N∙m(85
to110ft-lb).
Important:Thecurvedpartoftheblade
mustbepointingtowardtheinsideofthe
cuttingunittoensurepropercutting.
Note:Afterstrikingaforeignobject,torqueall
spindle-pulleynutsto115to149N∙m(85to110
ft-lb).
InspectingandSharpening
theCutting-UnitBlade(s)
Boththecuttingedgesandthesail,whichisthe
turned-upportionoppositeofthecuttingedge,
contributetoagoodqualityofcut.Thesaillifts
thegrassupstraight,therebyproducinganeven
cut.However,thesailgraduallywearsdownduring
operation,loweringthequalityofcuteventhoughthe
cuttingedgesaresharp.Thecuttingedgeoftheblade
mustbesharpsothatthegrassiscutratherthantorn.
Adullcuttingedgeleavesthetipsofthegrassbrown
andshredded.Sharpenthecuttingedgestocorrect
thiscondition.
1.Parkthemachineonalevelsurface,raisethe
cuttingunits,engagetheparkingbrake,putthe
tractionpedalinNEUTRAL,putthePTOlever
intheOFFposition,shutofftheengine,and
removethekey.
2.Examinethecuttingendsofthebladecarefully,
especiallywheretheatandcurvedpartsofthe
blademeet(Figure125).
Note:Becausesandandabrasivematerial
canwearawaythemetalthatconnectstheat
andcurvedpartsoftheblade,checktheblade
beforeusingthemachine.Ifyounoticewear,
(Figure125),replacetheblade.
79