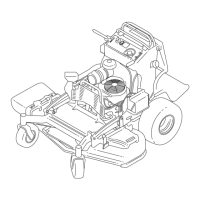
Mower Deck
Maintenance
Blade Safety
A worn or damaged blade can break, and a piece of
the blade could be thrown toward you or bystanders,
resulting in serious personal injury or death.
• Inspect the blades periodically for wear or damage.
• Use care when checking the blades. W rap the
blades or wear gloves, and use caution when
servicing the blades. Only replace or sharpen the
blades; never straighten or weld them.
• Always inspect the machine to ensure that the
blades and blade bolts are not worn or damaged.
Replace worn or damaged blades and bolts in sets
to preserve balance.
• On multi-bladed machines, take care as rotating 1
blade can cause other blades to rotate.
Servicing the Cutting
Blades
T o ensure a superior quality of cut, keep the blades
sharp. For convenient sharpening and replacement,
keep extra blades on hand.
Before Inspecting or Servicing the
Blades
1. Park the machine on a level surface, disengage
the PT O, and engage the parking brake.
2. Shut of f the engine, remove the key , and
disconnect the spark-plug wires from the spark
plugs.
Inspecting the Blades
Service Interval : Before each use or daily
1. Inspect the cutting edges ( Figure 74 ).
2. If the edges are not sharp or have nicks, remove
and sharpen the blade; refer to Sharpening the
Blades ( page 51 ) .
3. Inspect the blades, especially in the curved area.
4. If you notice any cracks, wear , or a slot forming
in this area, immediately install a new blade
( Figure 74 ).
g006530
Figure 74
1. Cutting edge 3. W ear/slot forming
2. Curved area 4. Crack
Checking for Bent Blades
1. Rotate the blades until the ends face forward
and backward.
2. Measure from a level surface to the cutting
edge, position A , of the blades ( Figure 75 ).
g000975
Figure 75
1. Measure here from blade
to hard surface
2. Position A
3. Rotate the opposite ends of the blades forward.
4. Measure from a level surface to the cutting edge
of the blades at the same position as in step 2
above.
Note: The dif ference between the dimensions
obtained in steps 2 and 3 must not exceed 3 mm
(1/8 inch).
Note: If this dimension exceeds 3 mm
(1/8 inch), replace the blade.
50
 Loading...