CAUTION
Thebulbsbecomeextremelyhotwhenin
operation.Handlingahotbulbcancause
severeburnsandpersonalinjury.
Alwaysallowenoughtimetoforthebulbs
tocoolbeforereplacingthem.Usecare
wheneverhandlingthebulbs.
Specication:SeeyourPartsCatalog.
1.Disconnectthebattery;refertoDisconnecting
theBattery(page38).
2.Openthehood.
3.Disconnecttheelectricalconnectorforthe
harnessfromtheconnectorofthelamp
assemblyatthebackoftheheadlighthousing
(Figure42).
g036872
Figure42
1.Headlighthousing3.Harness-electrical
connector
2.Lampassembly
4.Rotatethelampassembly1/4turn
counterclockwiseandmovingitrearward,
outoftheheadlighthousing(Figure42).
5.Insertthenewlampassemblyandheadlight
housingandalignthetabsinthelampassembly
withtheslotsintheheadlighthousing(Figure
42).
6.Securelampassemblybyturningit1/4turn
clockwise(Figure42).
7.Connecttheelectricalconnectorfortheharness
totheconnectorofthenewlampassembly
(Figure42).
8.Connectthebatteryandclosethehood;referto
ConnectingtheBattery(page39).
ReplacingtheHeadlight
1.Disconnectthebattery;refertoDisconnecting
theBattery(page38).
2.Openthehood;refertoClosingtheHood(page
30).
3.Disconnecttheelectricalconnectorforthe
harnessfromtheconnectorofthelamp
assembly(Figure43).
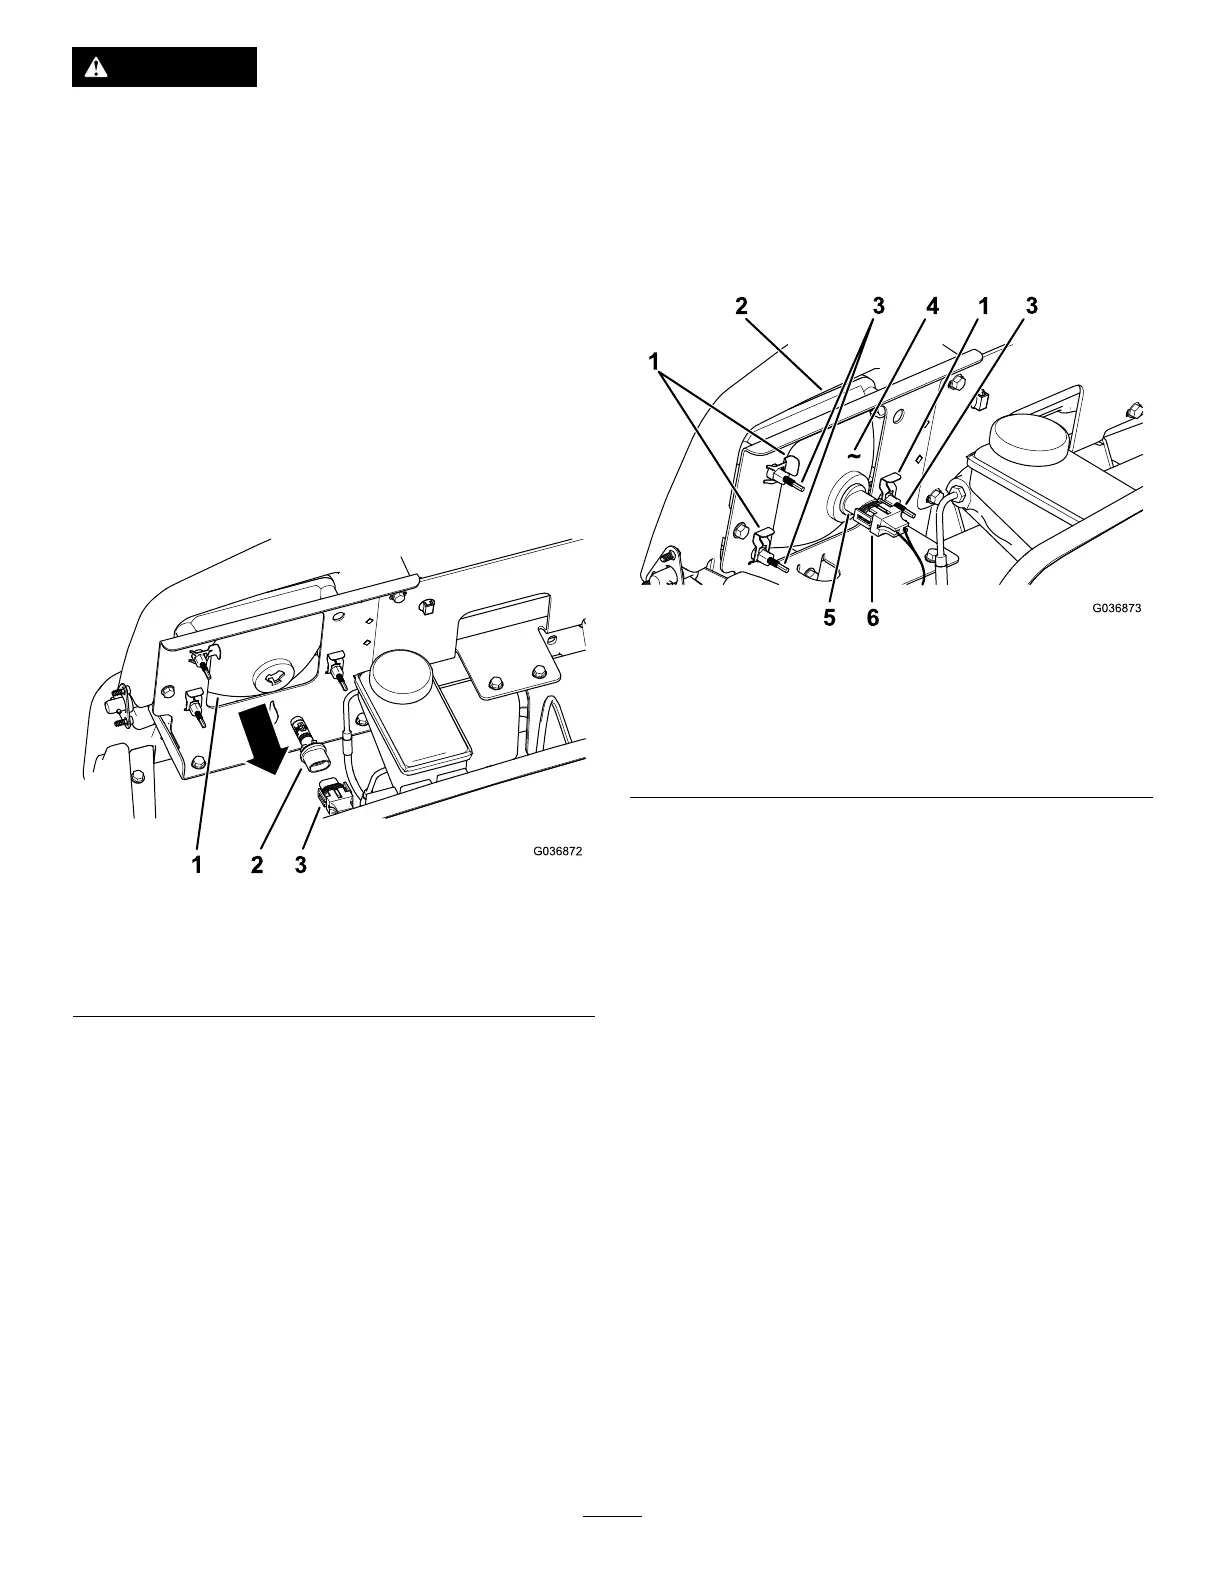
g036873
Figure43
1.Speedclip
4.Headlight
2.Openinginthebumper
5.Lampassembly
3.Adjustmentscrew6.Harness-electrical
connector
4.Removethespeedclipsthatsecurethe
headlighttotheheadlightbracket(Figure43).
Note:Retainallpartsforinstallationofthenew
headlight.
5.Removetheheadlightassemblybymovingit
forwardthroughtheopeninginthefrontbumper
(Figure43).
6.Installthenewheadlightthroughtheopeningin
thebumper(Figure43).
Note:Ensuretheadjustmentpostsarelinedup
withtheholesinthemountingbracketbehind
thebumper.
7.Securetheheadlightassemblywiththespeed
clipsthatyouremovedinstep4.
8.Connecttheelectricalconnectorfortheharness
totheconnectorofthelampassembly(Figure
43).
9.Adjusttheheadlightstodirectthebeamsto
thedesiredposition,refertoAdjustingthe
Headlights(page41).
40