Setting up from TopAccess 143
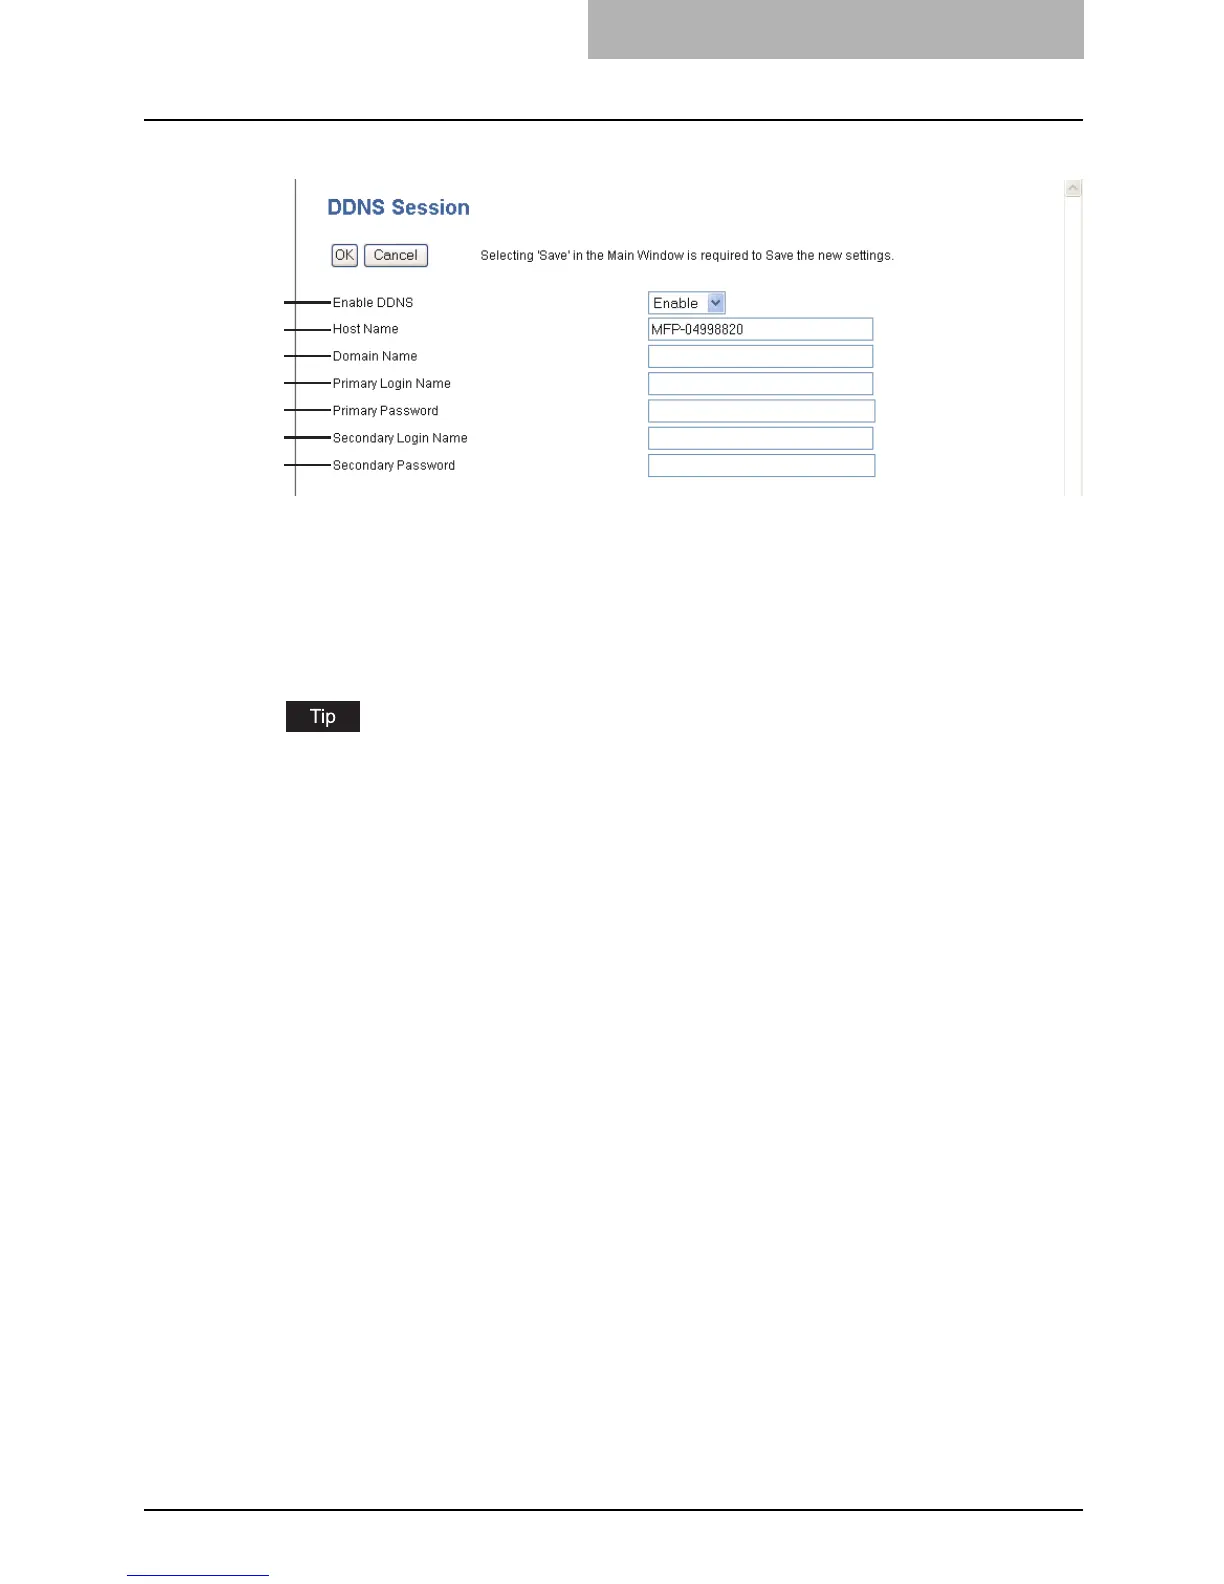
1) Enable DDNS
Select whether the dynamic DNS service is enabled or disabled.
2) Host Name
Enter the host name that will be added to the DNS server using DDNS.
3) Domain Name
Enter the domain name that will be added to the DNS server using DDNS.
When the “Obtain a Domain Name automatically” option is enabled in the TCP/IP settings,
the domain name can be obtained using the DHCP server.
P.132 “Setting up the TCP/IP”
4) Primary Login Name
Enter the primary login name for the dynamic DNS service.
5) Primary Password
Enter the primary password for the dynamic DNS service.
6) Secondary Login Name
Enter the secondary login name for the dynamic DNS service.
7) Secondary Password
Enter the secondary password for the dynamic DNS service.
1
2
3
4
5
6
7

 Loading...


