25
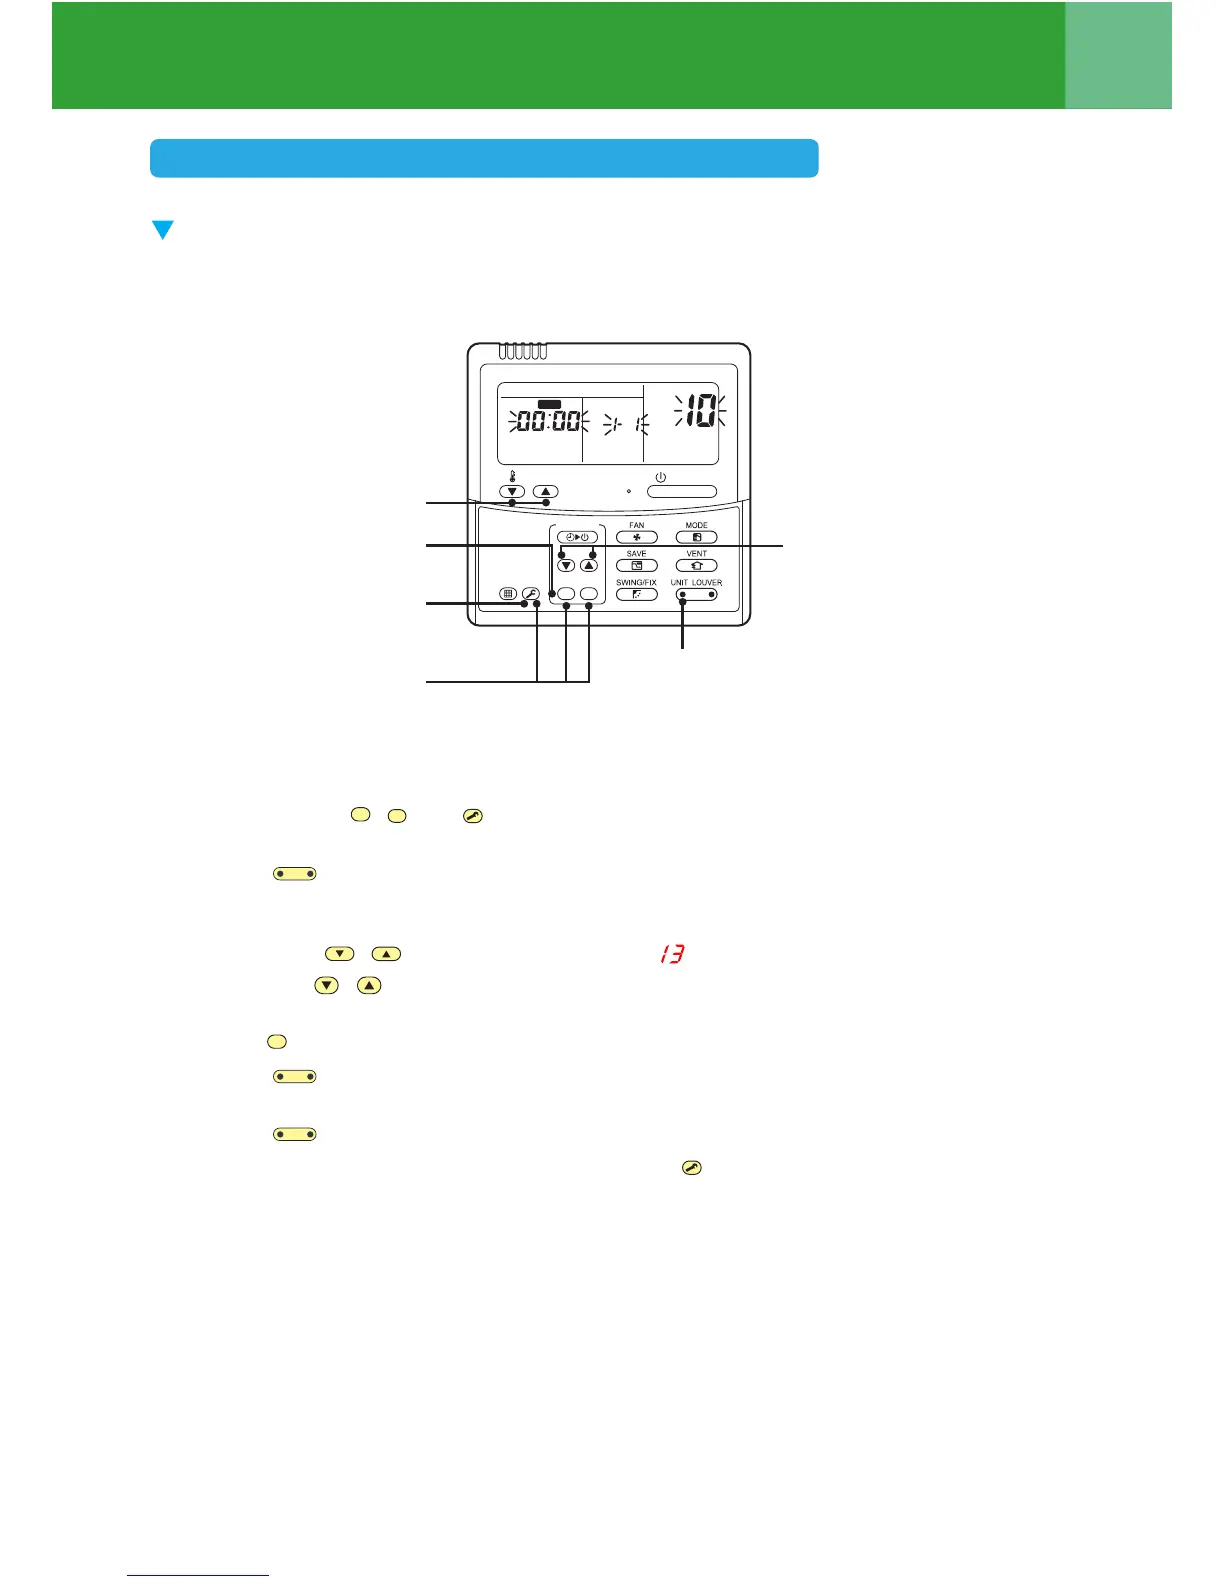
Address Setup
To change an indoor unit address using a wired remote controller.
The method to change the address of an individual indoor unit (the indoor unit is paired with a
wired remote controller one-to-one), or an indoor unit in a group.
(The method is available when the addresses have already been set automatically.)
(Execute it while the units are stopped.)
1 Push and hold the
SET
,
CL
, and
TEST
buttons at the same time for more than 4 seconds.
(If 2 or more indoor units are controlled in a group, the first indicated UNIT No. is that of the head unit.)
2 Push the
UNIT LOUVER
button (left side of the button) repeatedly to select an indoor unit number to change if 2
or more units are controlled in a group. (The fan and louvers of the selected indoor unit are activated.)
(The fan of the selected indoor unit is turned on.)
3 Push the TEMP. / buttons repeatedly to select for CODE No..
4 Push the TIME / buttons repeatedly to change the value indicated in the SET DATA section to that
you want.
5 Push the
SET
button.
6 Push the
UNIT LOUVER
button (left side of the button) repeatedly to select another indoor UNIT No. to change.
Repeat steps
4 to 6 to change the indoor unit addresses so as to make each of them unique.
7 Push the
UNIT LOUVER
button (left side of the button) to check the changed addresses.
8 If the addresses have been changed correctly, push the
TEST
button to finish the procedure.
3
5
8
1
4
2, 6, 7
ON / OFF
TEMP.
TIME
SET CL
FILTER
RESET
TEST
TIMER SET
CODE No.
UNIT No.
SETTING
DATA
SET
R.C. No.
Finish
Change the indoor unit address using a remote controller