44
Chapter 8
Customize Your Network
8. You can add up to 32 keywords for either Blacklist or Whitelist.
Below are some sample entries for your reference.
• For Whitelist: Enter a web address (e.g. wikipedia.org) to allow access
only to its related websites. If you wish to block all Internet browsing
access, do not add any keyword to the
Whitelist.
•
For Blacklist: Specify a web address (e.g. wikipedia.org), a web address
keyword (e.g. wikipedia) or a domain suffix (eg. .edu or .org) to block
access only to the websites containing that keyword or suffix.
Now you can control your children’s internet access as needed.
8. 3. Specify Wireless Settings
8. 3. 1. Change Wireless Settings
The Controller’s Wi-Fi network name (SSID) and password, and security option are
preset in the factory. The preset SSID and password can be found on the product label.
You can customize the wireless settings according to your needs.
1. Visit
http://tplinkwifi.net, and log in with the password you set for the Controller.
2. Go to
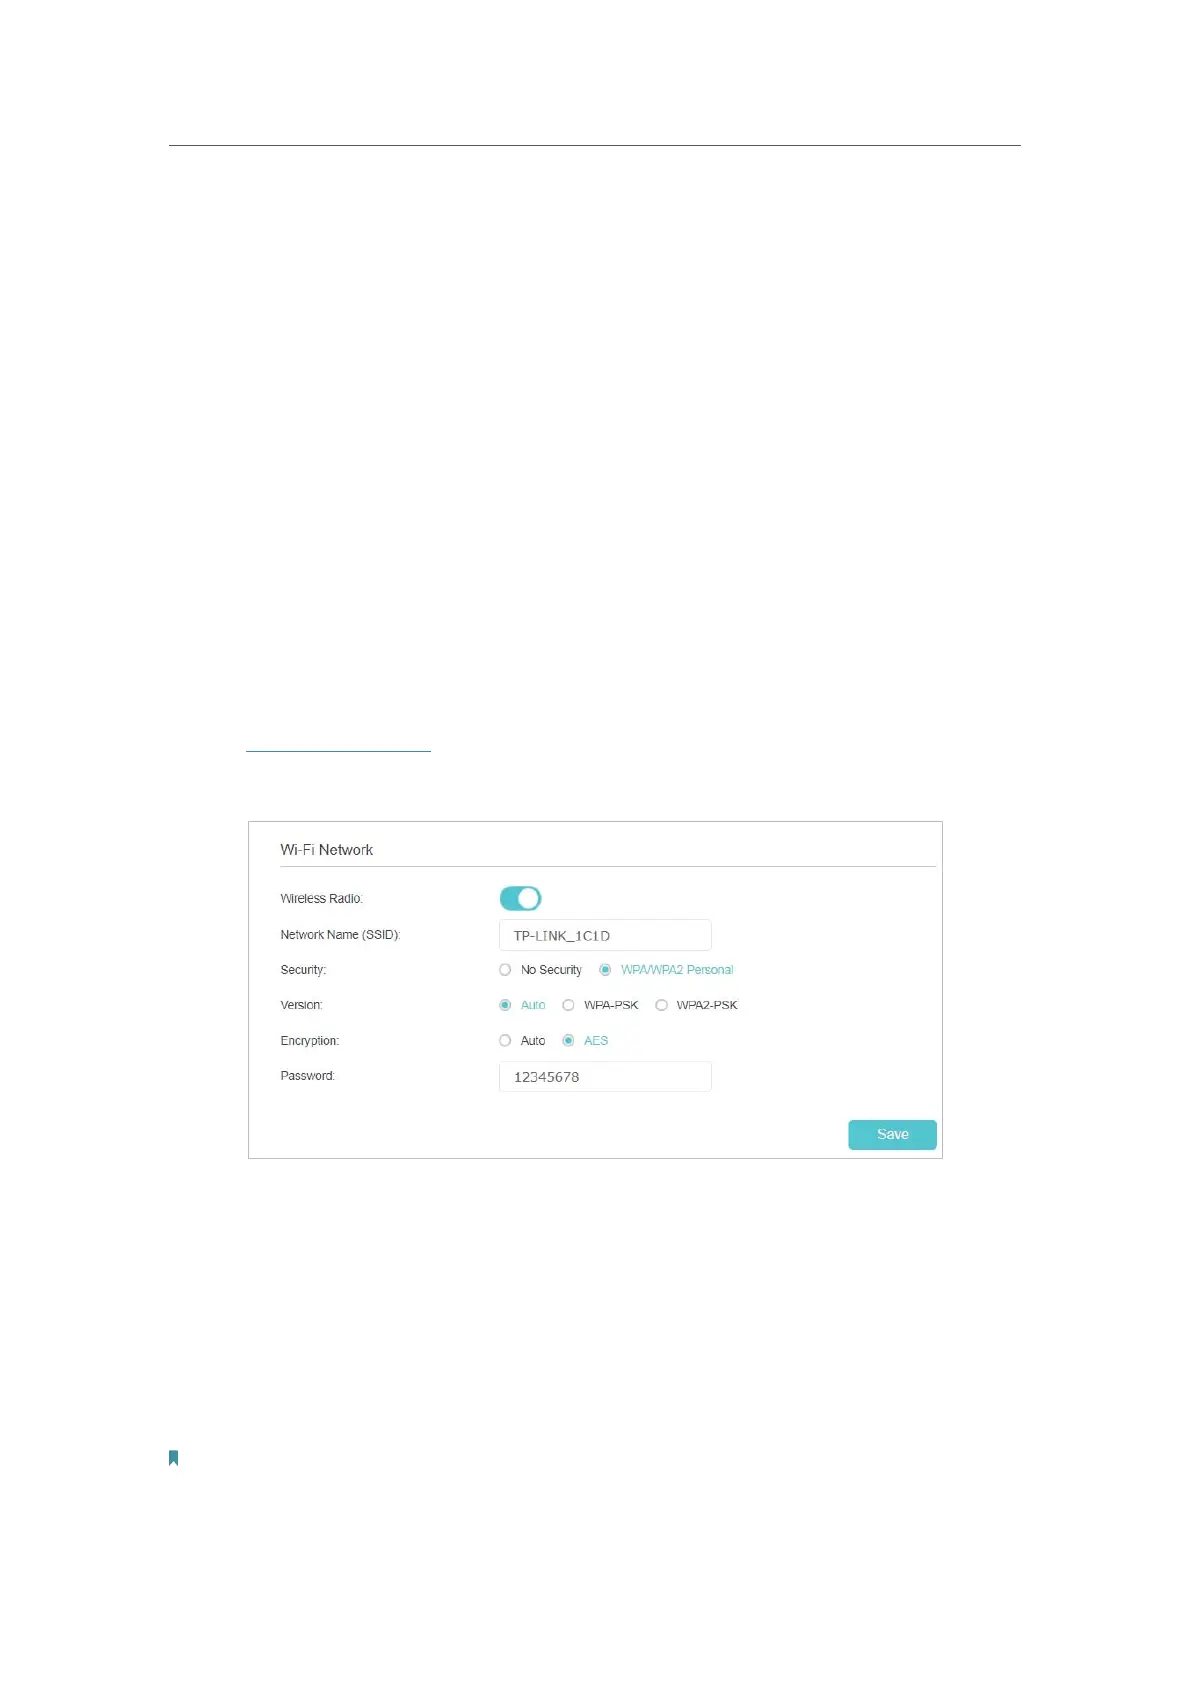
Settings > Wireless > Wi-Fi Network.
¾ To enable or disable the wireless function:
Turn on the
Wireless Radio to enable the wireless network. If you don’t want to use the
wireless function, just turn off this option. And then click
Save to make the settings
effective.
¾ To change the wireless network name (SSID) and wireless password:
Enter a new SSID (32 characters at most) and password and click
Save. The SSID and
password are case-sensitive.
Note:
If you use a wireless device to change the wireless settings, you will be disconnected after the new settings are effective.
Please write down the new SSID and password for future reference.
Done!
 Loading...