24
Chapter 4
Configure the Router in Wireless Router Mode
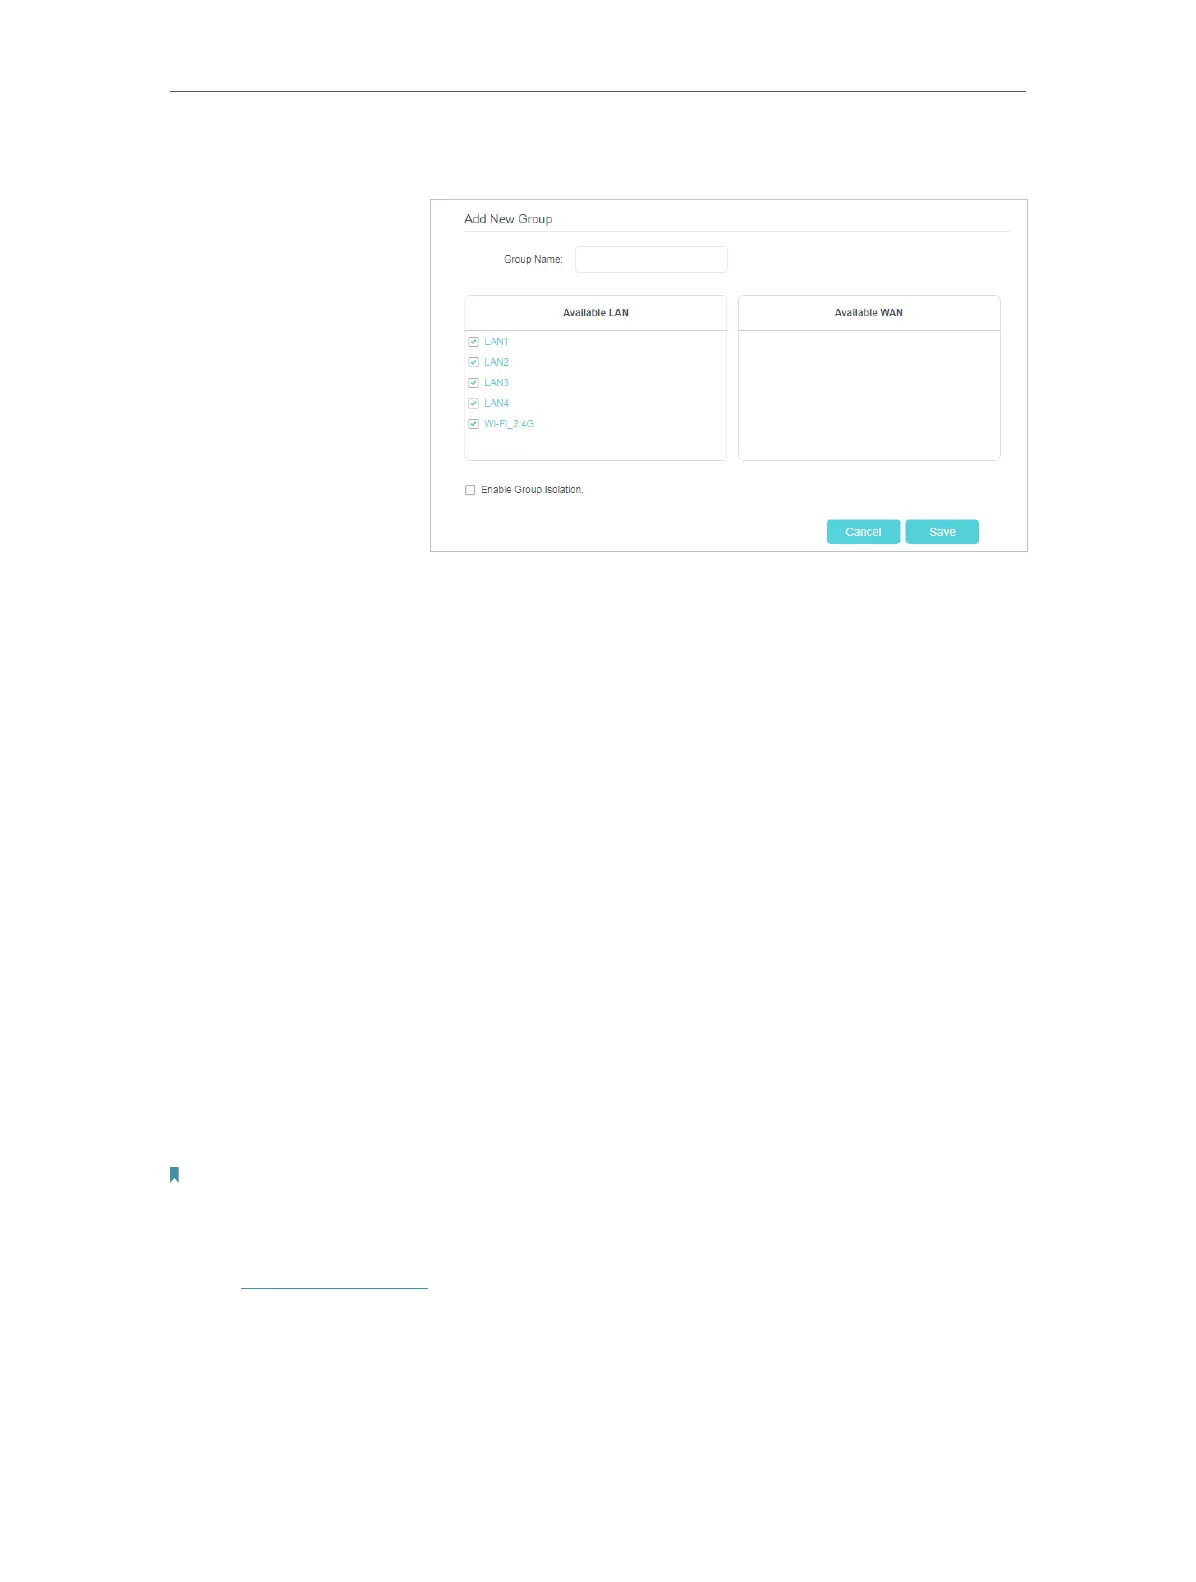
3. Click to Add a new group.
4. Name the group.
5. Check the boxes of LAN1 and LAN3 in Available LAN. Here
Wi-Fi 2.4G network network is viewed as a LAN interface
respectively.
6. Click Enable Group Isolation to isolate working devices and
disallow other devices from communicating with them.
7. Click Save to save the settings.
Now your working devices connected to LAN1 and LAN3 are in
an isolated group!
4. 3. 6. Set Up a Dynamic DNS Service Account
Most ISPs (Internet service providers) assign a dynamic IP address to the router and
you can use this IP address to access your router remotely. However, the IP address
can change any time and you don’t know when it changes. In this case, you might need
the DDNS (Dynamic Domain Name Server) feature on the router to allow you and your
friends to access your router and local servers (FTP, HTTP, etc.) using domain name, in
no need of checking and remembering the IP address.
Note:
DDNS does not work if the ISP assigns a private WAN IP address (such as 192.168.0.x) to the router.
To set up DDNS, please follow the instructions below:
1. Visit http://tplinkwifi.net, and log in with the password you set for the router.
2. Go to Network > Internet > Dynamic DNS page.
3. Select the DDNS service provider (Dyndns and NO-IP).
Done!
 Loading...