QUICK INSTALL
Trace Engineering Co. Inc. Tel (360) 435-8826 Part Number 3179
5916 195
th
Street, NE Fax (360) 435-2229 Effective August 6, 1998
Arlington, WA 98223 USA www.traceengineering.com Page
19
Quick Install
Experienced installers, licensed electrical contractors, and knowledgeable laymen may follow the
installation overview in this section. All others are urged to read the entire Installation section before
installing the inverter/charger.
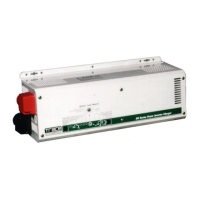
1. Unpacking – Before beginning, unpack the inverter/charger,
record the serial number on the inside cover of this booklet
and on the warranty card. Retain packing materials for
future use. Ensure that all components listed on the
Packaging Materials sheet are included. If any
components are missing, please call Customer
Service at (360) 435-8826.
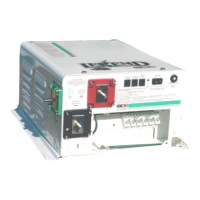
2. Mounting – Mount the unit securely in a horizontal
position in a clean, dry, ventilated enclosure. Do
not mount the unit in the same enclosure as vented
or maintenance-free type vented batteries. Bolt the
unit down securely. Allow adequate clearance to allow
access to the front panel.
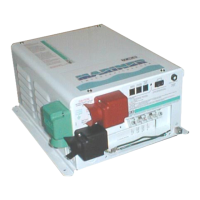
3. DC Cabling
• Ensure that the On/Off switch on the front panel of the inverter is in the Off position before you
begin the installation.
• Connect a cable from the positive terminal of the battery or battery bank to the battery positive
(red) terminal of the inverter. See Minimum Recommended Battery Cable Size (In free air) in
Appendix C to determine the proper size cable to use for the inverter model and length of run
needed for your specific application. The National Electric Code (NEC) requires the use of a DC
fuse or disconnects in this cable within 18-inches of the batteries. See Appendix C to determine
the correct size fuse or breaker to use.
• Connect an appropriate sized cable from the battery’s negative terminal to the negative (black)
terminal on the inverter. Torque all terminals to 12 foot-pounds.
• Connect a cable from the Vehicle Chassis Ground (green terminal) on the inverter to chassis
ground (usually the frame of the vehicle).
4. DC Loads
• Connect a cable from the positive battery terminal to the positive buss of your DC load center.
• Ground all of your DC loads to your vehicle’s chassis, or connect a cable from the ground bus of
the DC load center to the vehicle chassis.