2.0
Operation
2.1.1
Set up
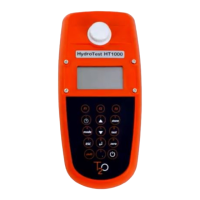
Before working with the photometer it may be necessary to insert the batteries if supplied
separately. See chapter 2.1.2
Saving data – Important information, 2.1.3 Replacement of
batteries.
Before using the photometer perform the following settings in the Mode-Menu:
•
MODE 10:
select language
•
MODE 12: set date and time
•
MODE 34: perform “Delete data“
•
MODE 69: perform “User m. init” to initialise the userpolynomial system
See chapter 2.4 Photometer settings.
2.1.2
Saving data – Important Information
During replacement of the battery the data in the HT1000 is saved for 2 minutes. If the
change time exceeds 2 minutes all stored data and settings are lost. It is recommended to have
the replacement batteries to hand to expediate fitment.
2.1.3
Replacement of batteries
See chapter 2.1.2 "Saving data - important Information" before replacing batteries.
1.
Switch the instrument off.
2.
If necessary remove vial from the sample chamber.
3.
Place the instrument upside down on a clean and even surface.
4.
Unscrew the four screws (A) of the battery compartment cover (B).
5.
Lift off battery compartment cover at the notch (C).
6.
Remove old batteries (D).
7.
Insert 4 new batteries ensuring the correct polarity!
8.
Replace the battery compartment cover.
Check the seal ring (E) of the notch to make sure it is a tight fit. If the seal appears
stretched or damaged then a replacement should be obtained to ensure the waterproof
seal is maintained.
9.
Tighten the screws carefully.
.