RLC-SVX09Q-EN
67
4. Install hoist ring on to the lifting connection on the
waterbox. Torque to 28 ft-lbs (37 Nm).
5. Disconnect water pipes, if connected.
6. Remove waterbox bolts.
7. Lift the waterbox away from the shell.
Waterbox Removal Procedure - Method 2
This selection applies to the units and condenser side
waterboxes. See Table 27, p. 67.
Table 27. Waterbox removal procedure — method 2
Size Hz Effic Condenser
Waterbox
150, 160, 180, 200, 220,
250
60 HIGH Return
150, 160, 180, 200 60 PREM Return
CAUTION
Risk of Injury!
Failure to follow handling instructions below could
result in minor to moderate injury.
Do not place hands or fingers between waterbox and
condenser tubesheet.
1. Select the proper lift connection device from Table 29,
p. 68. The rated lifting capacity of the selected lift
connection device must meet or exceed the published
weight of the waterbox. See Table 25, p. 66 for
waterbox weights.
2. Confirm the lift connection device has the correct
connection for the waterbox. Example: Thread type
(course/fine, English/metric), Bolt diameter (English/
metric).
3. Disconnect water pipes, if connected.
4. Remove the two bolts with drill point mark. Install the
long bolts into these two holes until threads are fully
engaged, and hand tight. The long bolts are located on
the two thread holes just above the waterbox. See
Figure 32, p. 67.
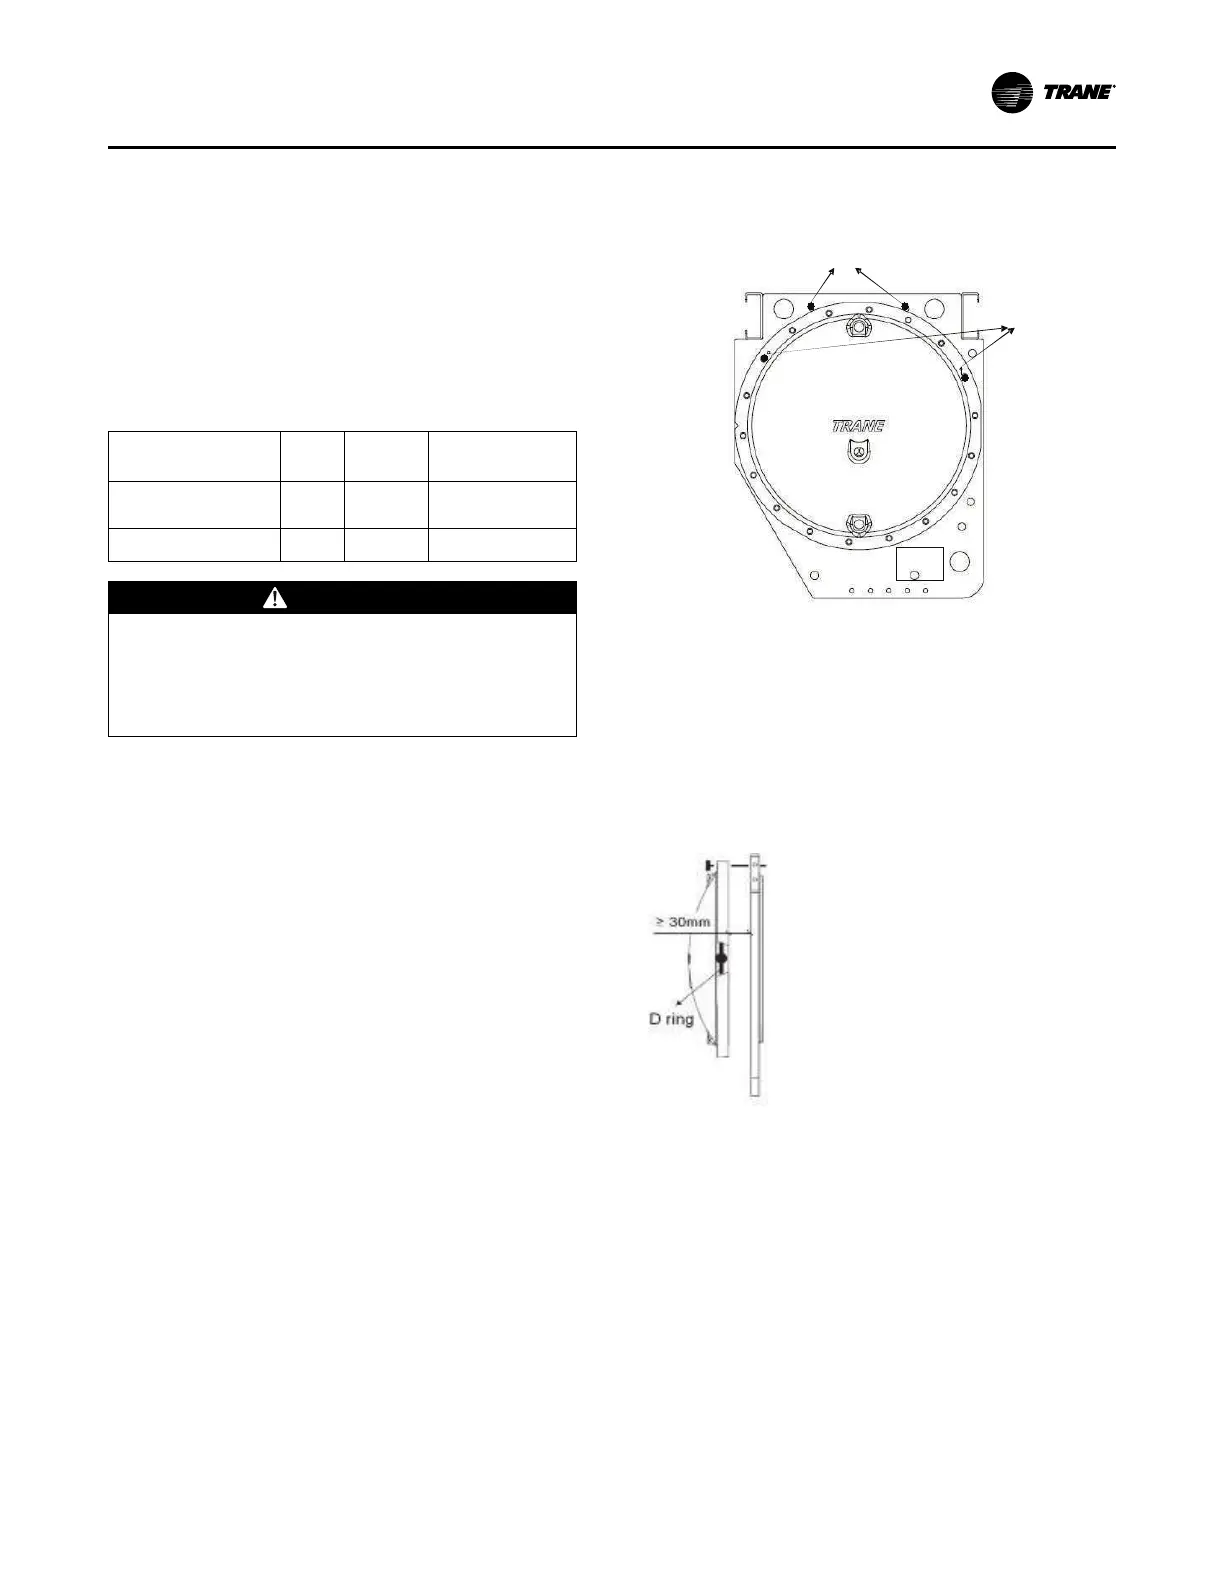
Figure 32. Waterbox removal – remove bolts
long bolt
drill point m ark
La b el
long bolt
drill point m ark
La b el
5. Remove the remaining bolts. Slide the waterbox out
about 30 mm through two long bolts. Install the Safety
Hoist ring (D ring) connection device into the tap drill
hole located on waterbox right side (face to waterbox
convex). See Figure 33, p. 67.
Figure 33. Waterbox removal - slide out, install safety
hoist ring
6. Remove the left long bolt while supporting waterbox
from outside of waterbox. Swing the waterbox
outboard. Put lifting chain on Safety Hoist ring and
remove the remaining long bolt. See Figure 34, p. 68.
Maintenance