24
If installing the Digital Controller onto a tiled wall, always mount the
xing bracket on the surface of the tiles. NEVER tile up to the Digital
Controller.
Digital Controller fitting (Wired connectivity only)
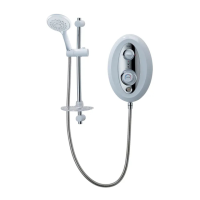
Remove the Battery Compartment Cover on the rear of the Digital Controller by undoing
the two fixing screws (Fig 17).
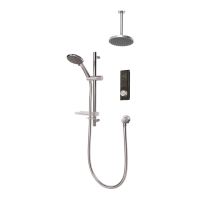
Using a pair of side cutters remove from the Battery Compartment Cover the small plastic
tag as shown in (Fig 18).
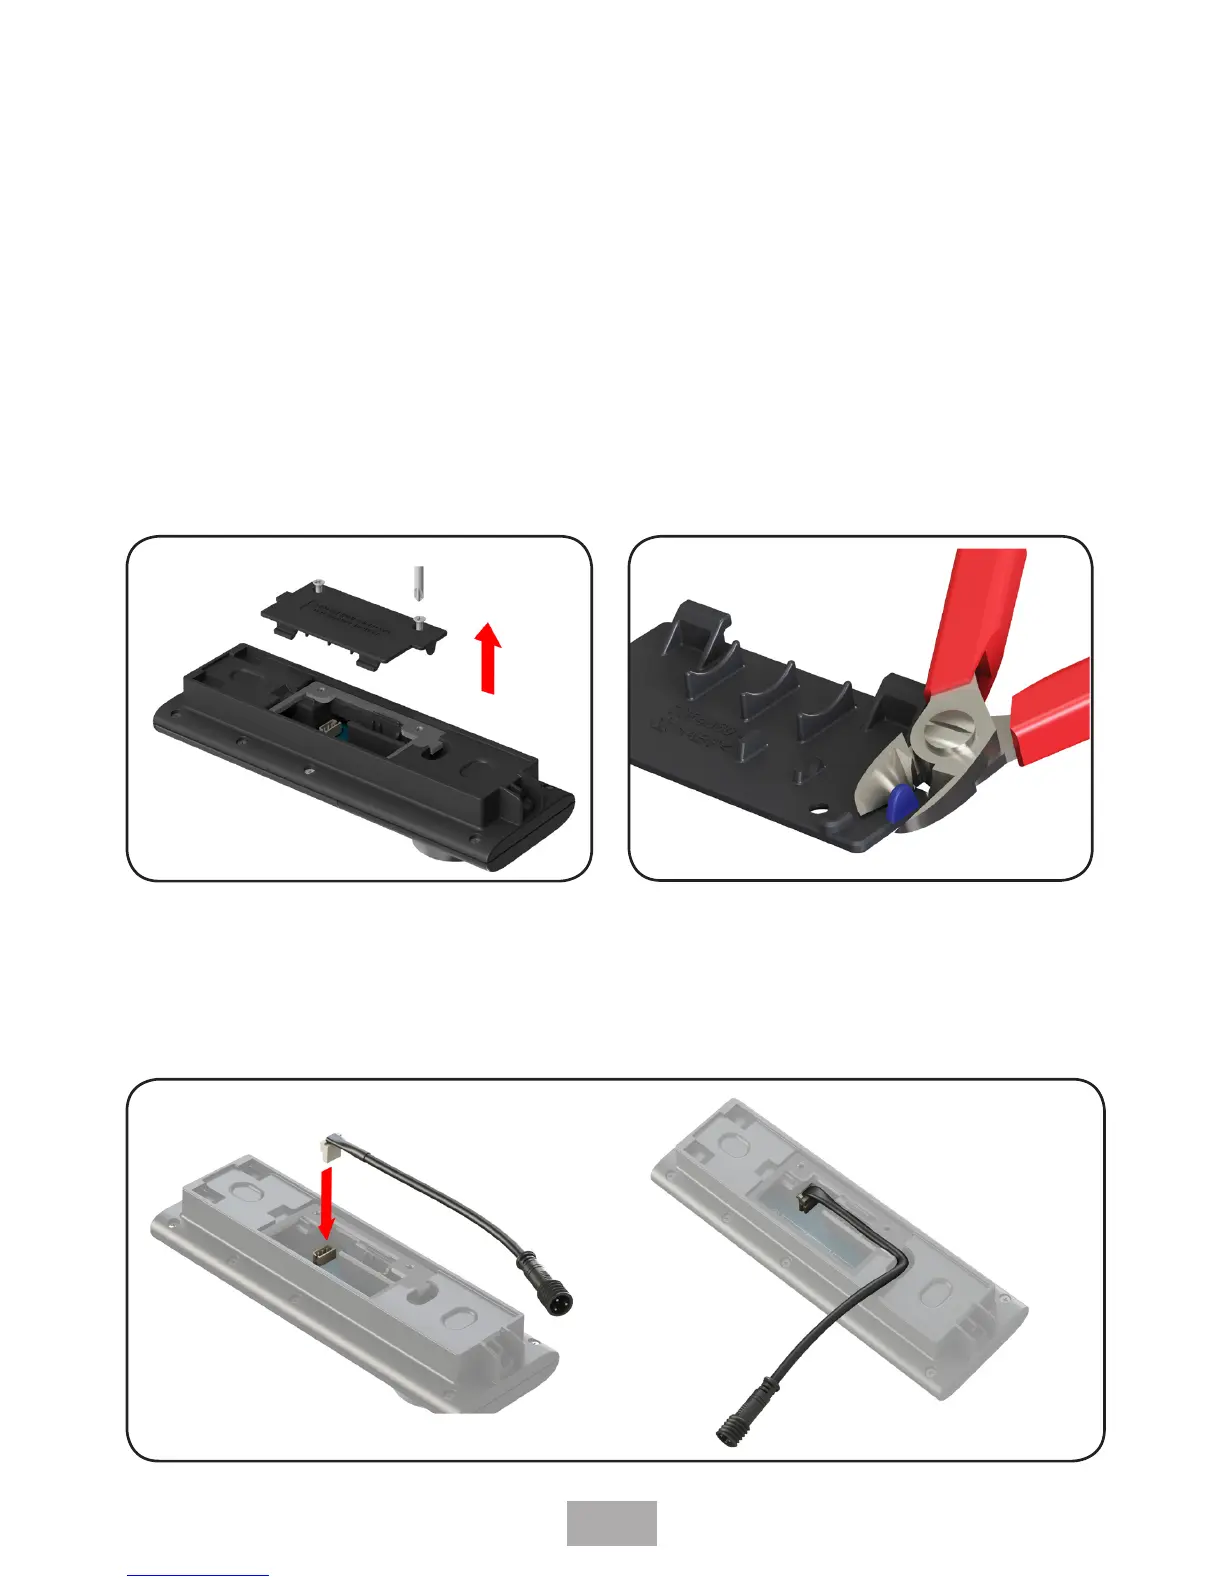
Connect the 3 pin coupler of the Data Cable Connector Lead into the connector located on
the PCB within the Digital Controller. Taking care, push the connector lead in to the grooves
and slot of the Battery Compartment (Fig 19).
The 3 pin coupler can ONLY be tted one way into the PCB connector,
take care with assembly to avoid damage.
Fig. 19
Fig. 17
Fig. 18
Digital controller
installation
 Loading...