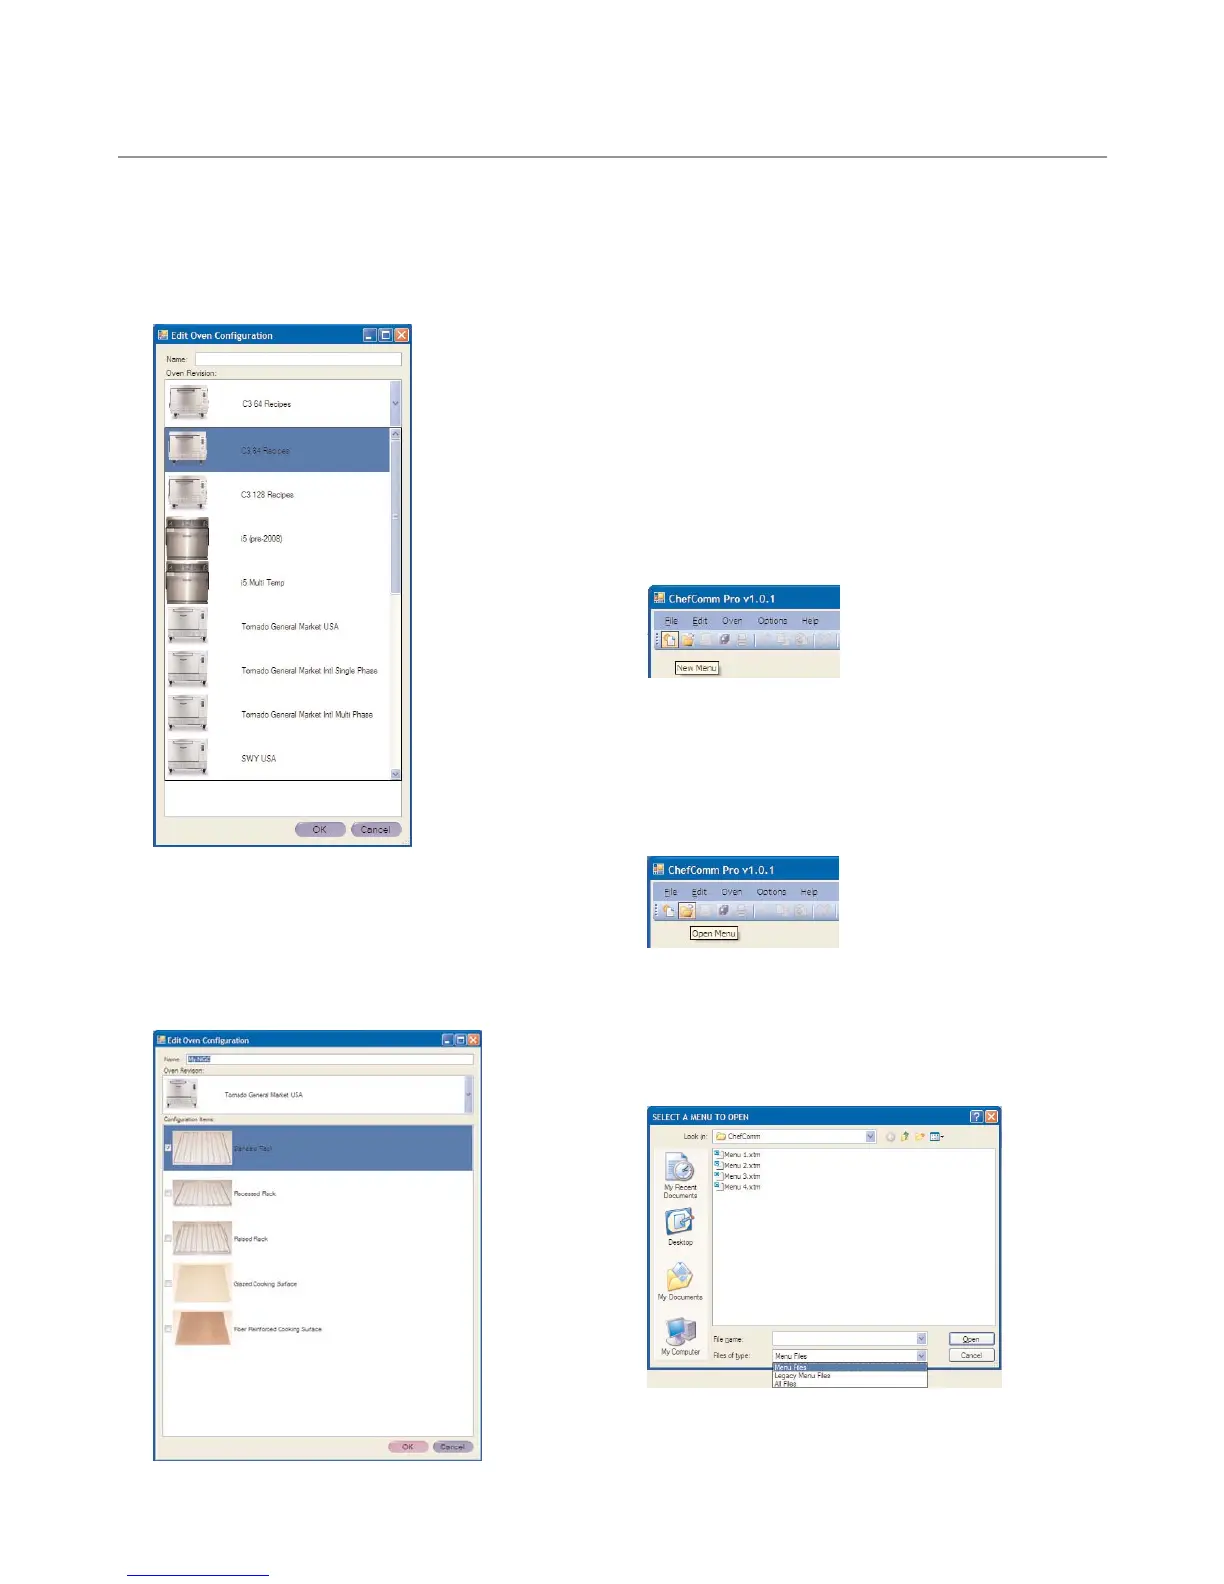
3. All TurboChef products will be listed. Click the
“expand” arrow in the Oven Revision pane and
locate your oven from the list (Figure 10).
4. If desired, select your oven’s rack and cooking
surface (Figure 11) for reference when developing
menus. This setting is not required when creating a
new oven type.
5. Enter the name of the new oven type. In Figure
11, the name is My NGC.
6. Click OK to confirm the new oven type.
7. Click Close to exit the Oven Configuration Wizard.
Creating a New Menu
1. From the main ChefComm window, set the
New Menu Configuration to match the type of
menu you are working with (Figure 7, page 3).
2. Click the “New Menu” icon (Figure 12).
Opening an Existing Menu
1. From the main ChefComm window, click the
Open Menu icon (Figure 13).
2. In the “files of type” field, select “Menu Files”
(Figure 14). All ChefComm menu files (XTM
files) within the folder will be displayed.
3. Locate the file and select Open.
4 BUILDING/MODIFYING A MENU
Figure 11: Select the Rack and Cook Surface
Figure 12: New Menu
Figure 13: Open Menu
Figure 10: Locate and Select Your Oven Type
Figure 14: Open an Existing Menu