BUILDING/MODIFYING A MENU
3
Splash Screen Options
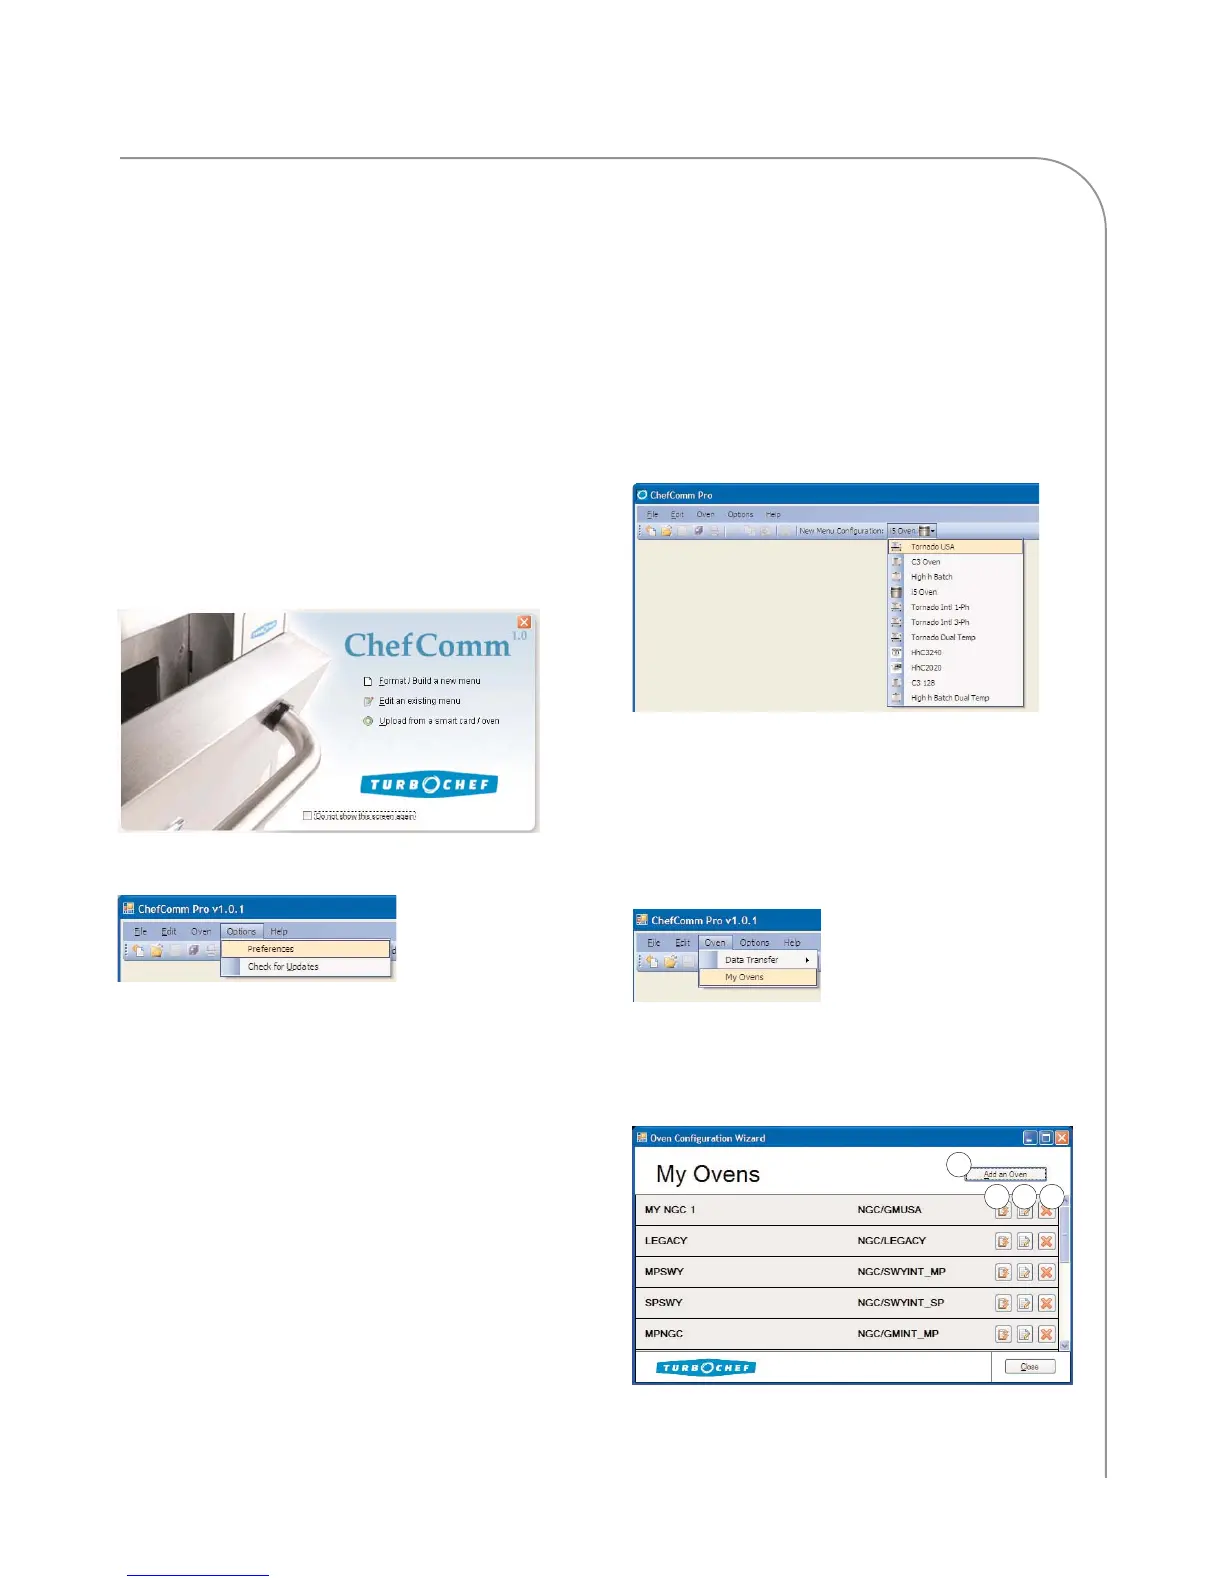
By default, the splash screen will display (Figure 5)
when you launch ChefComm. It provides quick
access for:
- Formatting/building a new menu (ChefComm
Pro only, page 4)
- Opening an existing menu (page 4)
- Uploading from a smart card/oven (page 10)
To turn off the splash screen, select Do not show this
screen again. You can also turn it off from the main
ChefComm window via Options > Preferences
(Figure 6).
NOTE: The first time ChefComm is opened, the
user may be required to bypass the splash screen, as
an oven type must first be configured before any of
the splash screen options can be performed. See
below for more details.
Specifying “New Menu Configuration”
(or Oven Type)
An oven type must be specified to:
- Create a new menu
- Import a menu from a smart card.
Specifying an oven type is not required to:
- Open an existing menu file.
- Export a menu to a smart card.
To specify an oven type:
1. To view a list of preset oven types, click the oven
icon adjacent to “New Menu Configuration”
(Figure 7)
2. Select the oven type that matches your menu. If
you do not see your oven type listed, perform an
update (page 15). You can also specify your oven
by creating a new oven type (see below).
Creating a New Oven Type
1. From the main ChefComm window, select
Oven > My Ovens (Figure 8).
2. From the My Ovens screen, click Add an Oven
(Figure 9, Item A).
NOTE: You can also edit (Item B) or delete (Item C)
existing oven configurations, as well as set one as the
default when ChefComm opens (D).
Figure 5: Splash Screen
Figure 6: Options > Preferences
Figure 8: Oven > My Ovens
Figure 9: My Ovens
Figure 7: Locate and Select Your Oven Type
A
D
B
C