IMPORTING/EXPORTING A MENU
11
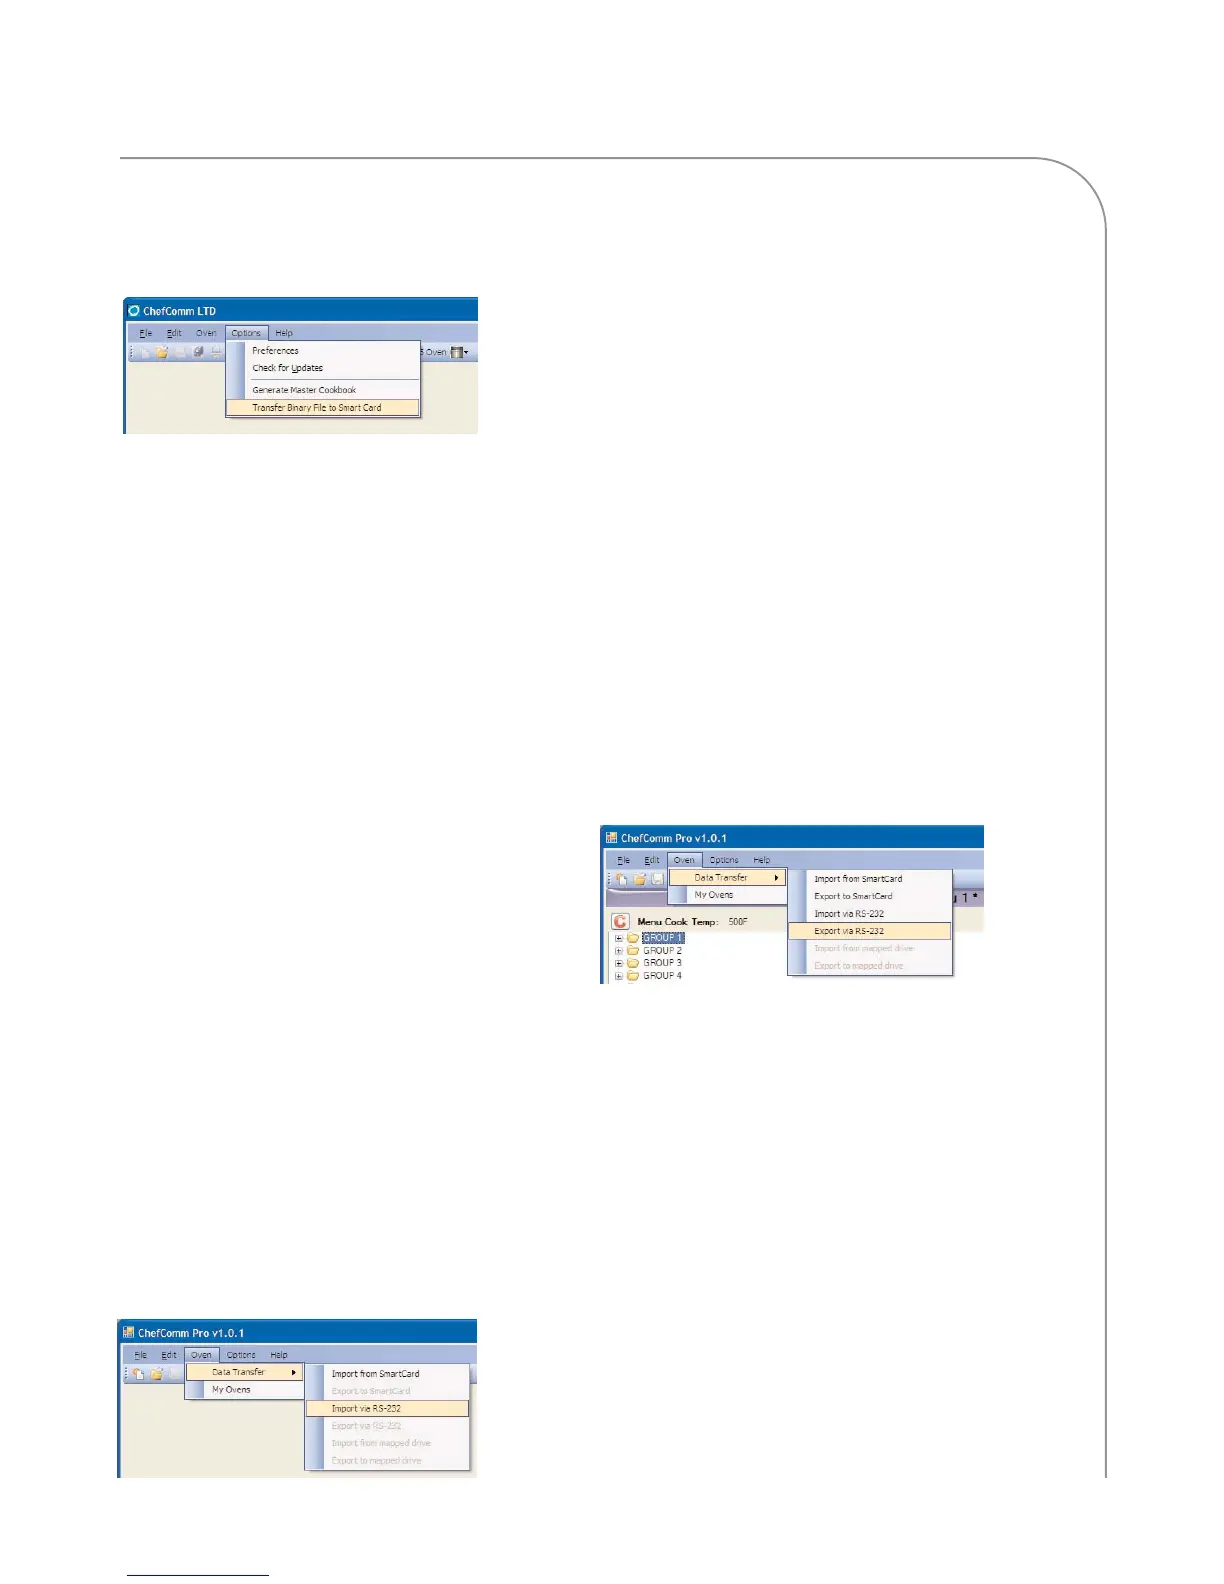
1. In ChefComm, go to Options > Transfer Binary
File to Smart Card (Figure 33).
NOTE: Some versions of ChefComm may read
“Write File to Smart Card.”
2. A browser window will pop up. Locate the
firmware update (binary) file and select “Open”.
3. Insert a high-density smart card into the USB
smart card reader/writer, with the gold chip
facing up and leading in.
4. Press OK. The reader will begin flashing a green
light. After approximately one minute, a
confirmation message will inform you the data
transfer is complete.
5. If the firmware update is for an i-Series oven,
repeat steps 2 and 3 for the second data file.
6. Update the oven firmware by following the
instructions provided in the Owner’s or Service
Manual. For additional help, contact TurboChef
at 1-800-90TURBO or +1 214-279-6000.
Importing a Menu via RS-232
1. Set up the black box (page 2).
2. Press and hold the synchronization button
(Figure 2, page 2).
3. In the main ChefComm window, select
Oven > Data Transfer > Import via RS-232
(Figure 34).
4. Select the com port and click OK.
NOTE: The port is usually COM 1.
5. Click OK to acknowledge that the import was
successful (Figure 31, page 10).
NOTE: If the export was unsuccessful, see page 16
for troubleshooting.
Exporting a Menu via RS-232
1. Set up the black box (page 2).
2. In ChefComm, make sure the menu is selected,
as indicated by the purple title bar. Other open
menus that are not selected have gray title bars
(Figure 26, page 8).
3. On the black box, press and hold the
synchronization button (Figure 2, page 2).
4. In ChefComm, select Oven > Data Transfer >
Export via RS-232 (Figure 35).
5. Select the com port and click OK.
NOTE: The port is usually COM 1.
6. Click OK to acknowledge that the export was
successful (Figure 31, page 10).
NOTE: If the export was unsuccessful, see page 16
for troubleshooting.
Figure 34: Import Menu via RS-232
Figure 35: Export Menu via RS-232
Figure 33: Transfer Binary File