Programming Recipes
Programming options include:
o
A
djusting the temperature set point
o
Modifying recipes
o
Loading a menu fr
om a smart card
o
Saving a menu to a smart card
o
Checking the r
ecipe counter
For accessibility to programming options, the oven
must be either cooling do
wn or off
.
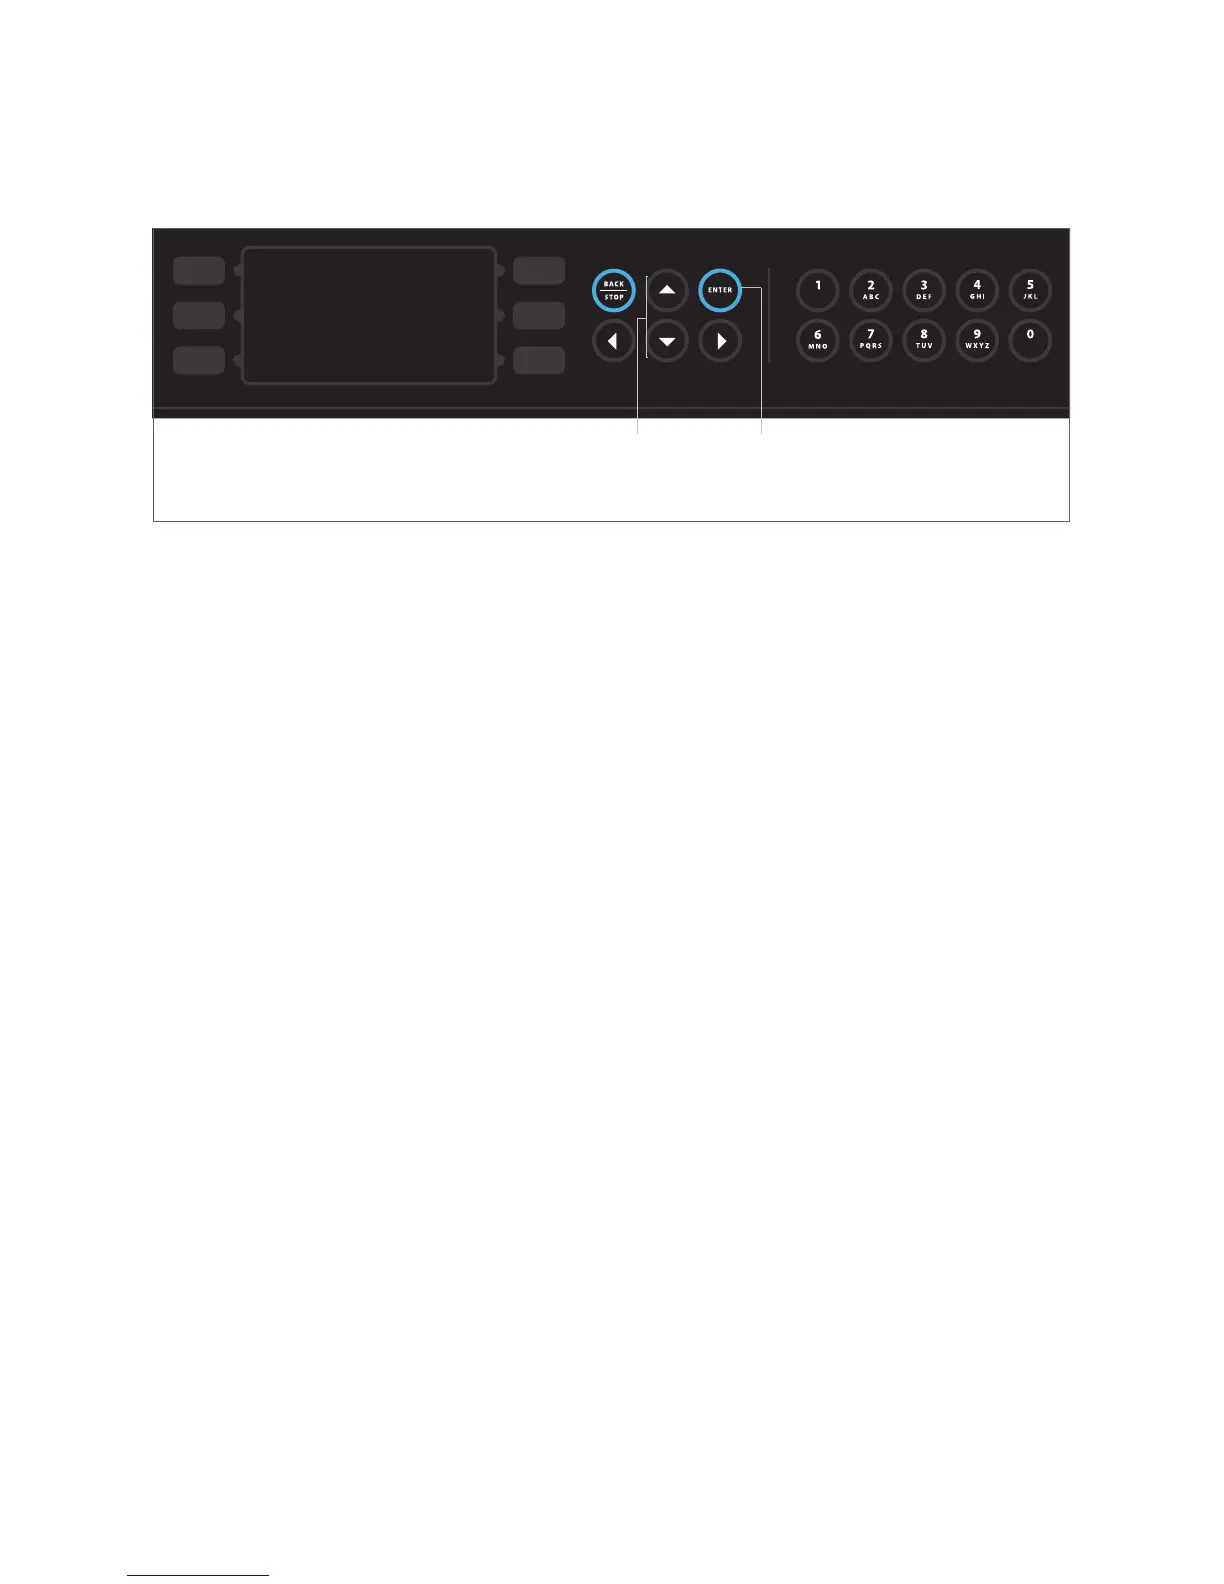
A
djusting the C
ook Cavity Temperature
R
eference Figure 18.
1. Ensure the oven is either cooling down or off.
2. Verify the EDIT menu is enabled (for
instructions, see page 15).
3.
Press and hold the UP key for 1 second.
4.
A
djust the cook cavity temperature in 25°F
(15ºC) increments using the UP and DOWN keys.
5. Press ENTER to confirm the change and proceed
to editing individual recipes, or press the
BA
CK/STOP key to cancel.
M
odifying R
ecipes (Figures 19-21)
T
o modify a food item:
1. Ensure the oven is either cooling down or off.
2. Verify the EDIT menu is enabled (for
instr
uctions, see page 15).
3.
Press and hold the UP key for 1 second.
4. Adjust the cook cavity temperature in 25°F
(15ºC) increments using the UP and DOWN keys.
5. Press ENTER to confirm the change and proceed
to editing individual recipes.
6.
Select the food group that contains the item to
be modified (Figure 19).
7.
Select the food item to be modified (Figure 20).
8. From FOOD ITEM screen (Figure 21):
a.
Press the LEFT or RIGHT key to move
from one field to another. The field selected
to be modified will be bracketed.
b. Press the top-left and top-right soft keys to
move from one character to another.
c. Change the food group and item names using
the number keys or the UP and DOWN keys.
NOTE: Pressing the UP and DOWN keys will
clear the field of its current content unless you
first pr
ess either the top-left or
top-right soft key.
d. Set the cook time by pressing the UP and
DOWN keys (5-second increments).
e.
T
urn rack oscillation on or off by pressing the
UP
or
DOWN key.
f. Enter cook time percentage per event (total
must equal 100%) using the number keys.
g.
Enter % air per event using the number
keypad (r
ounds to nearest 5, with minimum
setting of 10%).
9.
To test settings before saving, press the
bottom-left soft key
. The oven will initiate a
cook cycle to the new settings specifications.
10. To save settings, press ENTER. “Settings Saved”
will be displayed.
11.
Press the BACK/STOP key to exit the menu
(doing so befor
e saving settings will discard
changes).
SET TEMP 475°F
PRESS “ENTER”
FIGURE 18: Adjusting the Cook Cavity Temperature
Step: 5
Step: 3 & 4
18
OPERATING THE OVEN