____________________________________________________________________________________________
Page 14/63 UltraGauge™ EM User Manual www.ultra-gauge.com
Ave
MPH
MAF
DTE
Gen
dst
Inst MPG Ave MPG
Start-up & Configuration
When UltraGauge is first attached to the vehicle’s OBD-II connector it is immediately powered, as the vehicle’s OBD-II connector is
always powered. Once connected UltraGauge will begin scanning the interface to determine the vehicle’s protocol. The vehicles
ignition must be in the RUN position in order for UltraGauge to communicate with the vehicle’s Electronic Control Module (ECM).
The ignition must remain in the RUN position during both scanning and gauge discover.
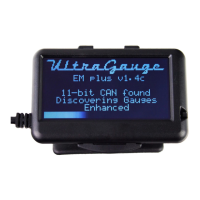
The scanning process typically completes in 1 to 6 seconds. As UltraGauge
scans it continues to print asterisks to the screen. If after 12 seconds
UltraGauge has not found the protocol in use, it is likely that the ignition is not
in the RUN position. If UltraGauge fails to detect the vehicle’s protocol,
UltraGauge will enter a low power mode after 2 minutes. In this mode the
Backlight is turned off. UltraGauge will stay in this mode until either the UP
or DOWN key is pressed.
When UltraGauge successfully determines the vehicle’s protocol, it replaces
“SCANNING” with the identified protoco
l.
The possible Protocols are:
Protocol Manufacturer
J1850 VPM GM & Chrysler
FORD Early Ford
9141 Chrysler & Foreign
KWP 2000 Rare, various
11-bit CAN Most 2008 and newer
29-bit CAN Most 2008 & newer Honda, Volvo
Once the protocol is identified, UltraGauge will remember the protocol and
should UltraGauge become unplugged, it will try this protocol first.
UltraGauge will then begin the process of discovering the gauges supported by
the vehicle. Again, the ignition must remain in the RUN position during
discovery; otherwise UltraGauge will print “Comm Lost, restarting”.
Once complete, the number of discovered gauges is briefly displayed at the
bottom of the screen. If “Comm Lost, restarting” persists, please see the
Enhanced and Safe mode Gauge Discovery section.
If UltraGauge has yet to be configured, you will be prompted for your
vehicle’s engine and fuel tank size. Use the UP/DOWN keys to set the engine
and tank size. Press MENU to store each value.
Once the engine and tank size are entered, a warning screen is presented.
Press enter to continue
UltraGauge is now up and running
Pressing DOWN advances the screen to the next page of gauges.
By default, several gauges are pre-assigned to each page. Alternate gauges can
be selected via the menu system. The available gauges are described in the
GAUGES section.
** WARNING **
Never use the Menu
while operating
the vehicle
Injury or Death
may occur
UltraGauge
v1.4c
SCANNING *
UltraGauge
v1.4c
29-bit CAN
UltraGauge
v1.4c
29-bit CAN
Discovering
Gauges: 31
ET ENGINE SIZE
(Liters)
0.1
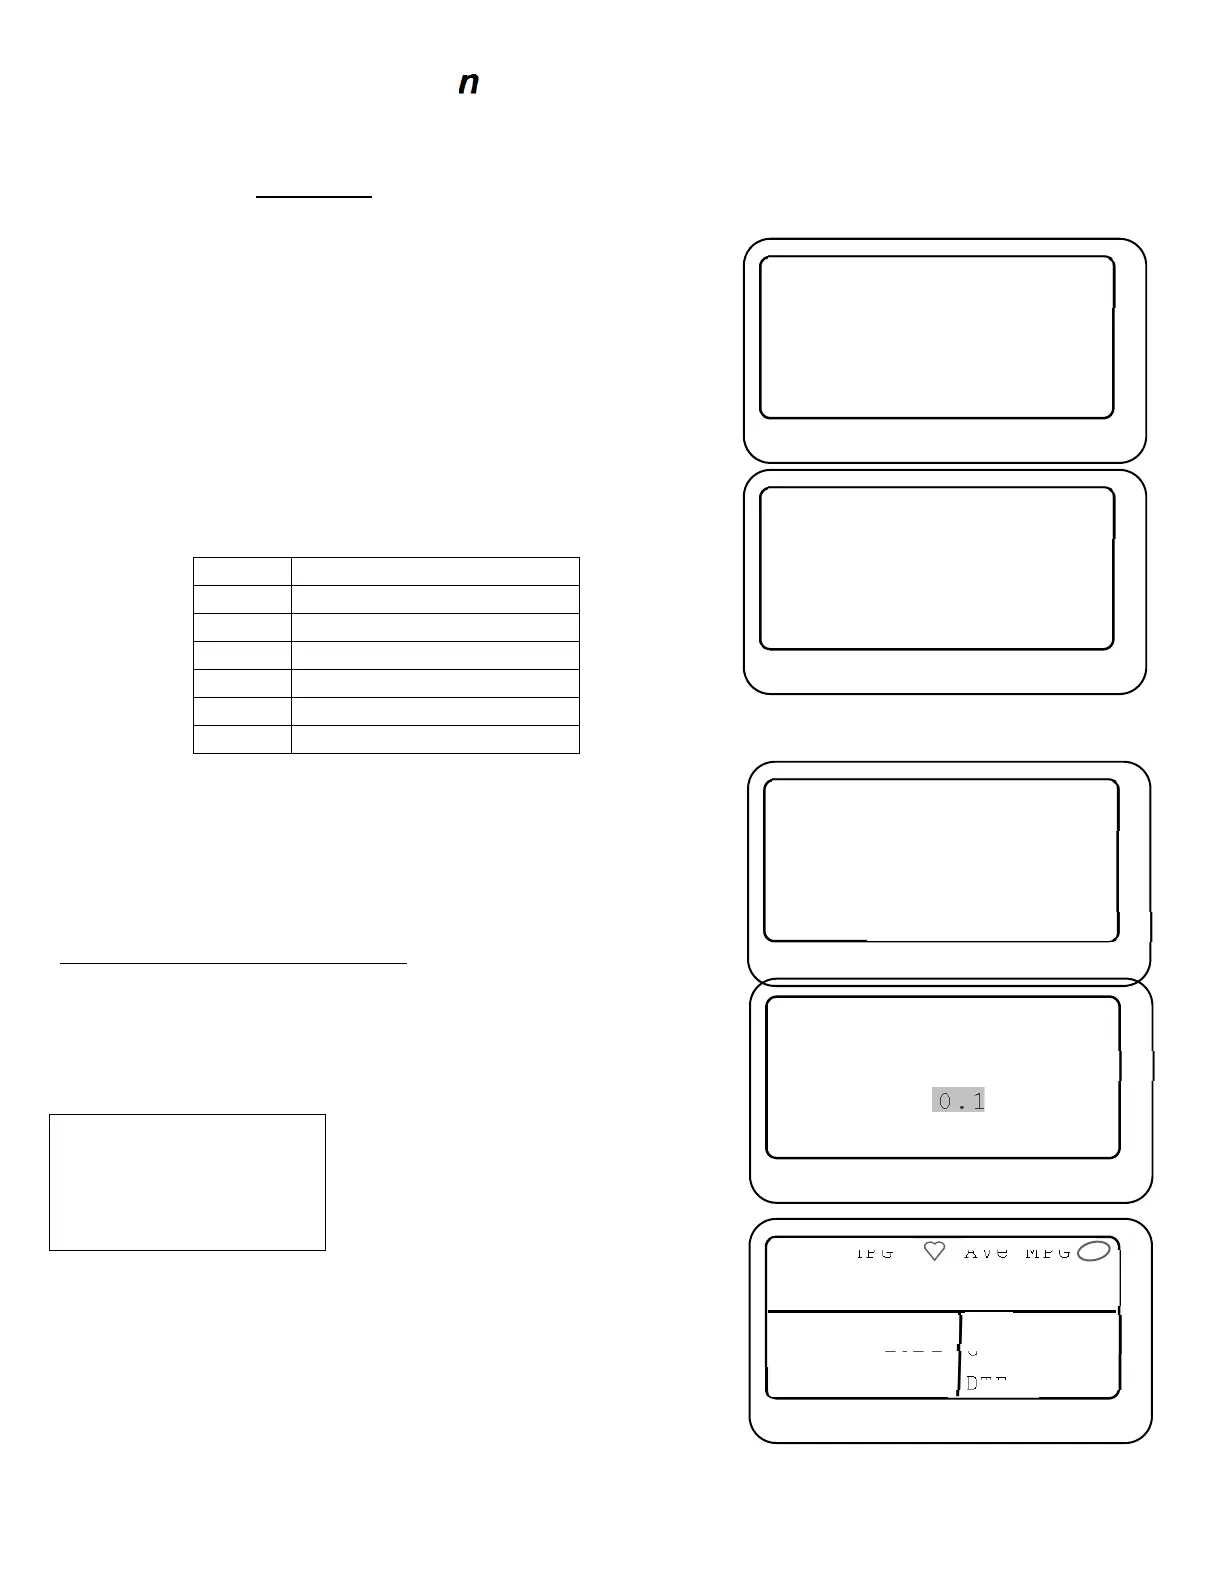 Loading...