____________________________________________________________________________________________
Page 11/63 UltraGauge™ EM User Manual www.ultra-gauge.com
Installation:
It is advisable to slightly radius or round the corners with scissors, as shown above. This will reduce the likelihood of lifting
The surface to which the fastener is attached must be clean, dry, and oil and grease free.
Apply only after the surface and the tape have reached a temperature range of 70F to 90F.
Avoid leaving the adhesive exposed for longer than 3 minutes after removing the protective backing.
The adhesive is pressure sensitive. Apply roughly 5lbs of force per square inch for 5 seconds.
After application, and for maximum adhesion, allow the adhesive to set for 1 hour before us
WARNING: Improper application of the Hook & Loop fastener may cause adhesive failure and result in damage to UltraGauge.
Impact damage is not covered by the warranty.
It is also possible to place slugs or washer behind the UP, DOWN and MENU keys such that pressing the front of UltraGauge
depresses the switches, thus effectively converting the switches to the front. Examples can be found on the UltraGauge forum.
Windshield Mount
Before selecting a mounting position, check state and local laws and ordinances to determine permissible mounting locations.
Generally the preferred and optimal location is the left lower corner of the windshield, as this location is the least obstructive,
generally closest to the OBD-II connector of the vehicle, semi-shaded, and is least visible from outside the vehicle. This
location also will not block the use of a windshield sun-shade
.
WARNING:
Do not leave UltraGauge exposed to extreme dash temperatures on hot days. Damage to the LCD can occur.
Remove UltraGauge from the dash when leaving the vehicle or use a sun shade protector.
Locking Ring
:
Over tightening the ring will lock the ball and attempted adjustments to the position of UltraGauge can result
in damage.
1. Before attaching the mount to the windshield, mold the neck of the windshield mount as necessary to the slope of your
windshield and for the desired position of UltraGauge.
Never attempt to mold the neck of the windshield mount by grasping the mounting bracket or UltraGauge.
Damage to UltraGauge and/or the mounting bracket may occur, as the neck while flexible is relatively rigid.
Clean the windshield mounting area. This is crucial as any grease, dust, dirt or moisture will ultimately cause the
attachment to fail. Make sure the surface is completely dry before
proceeding.
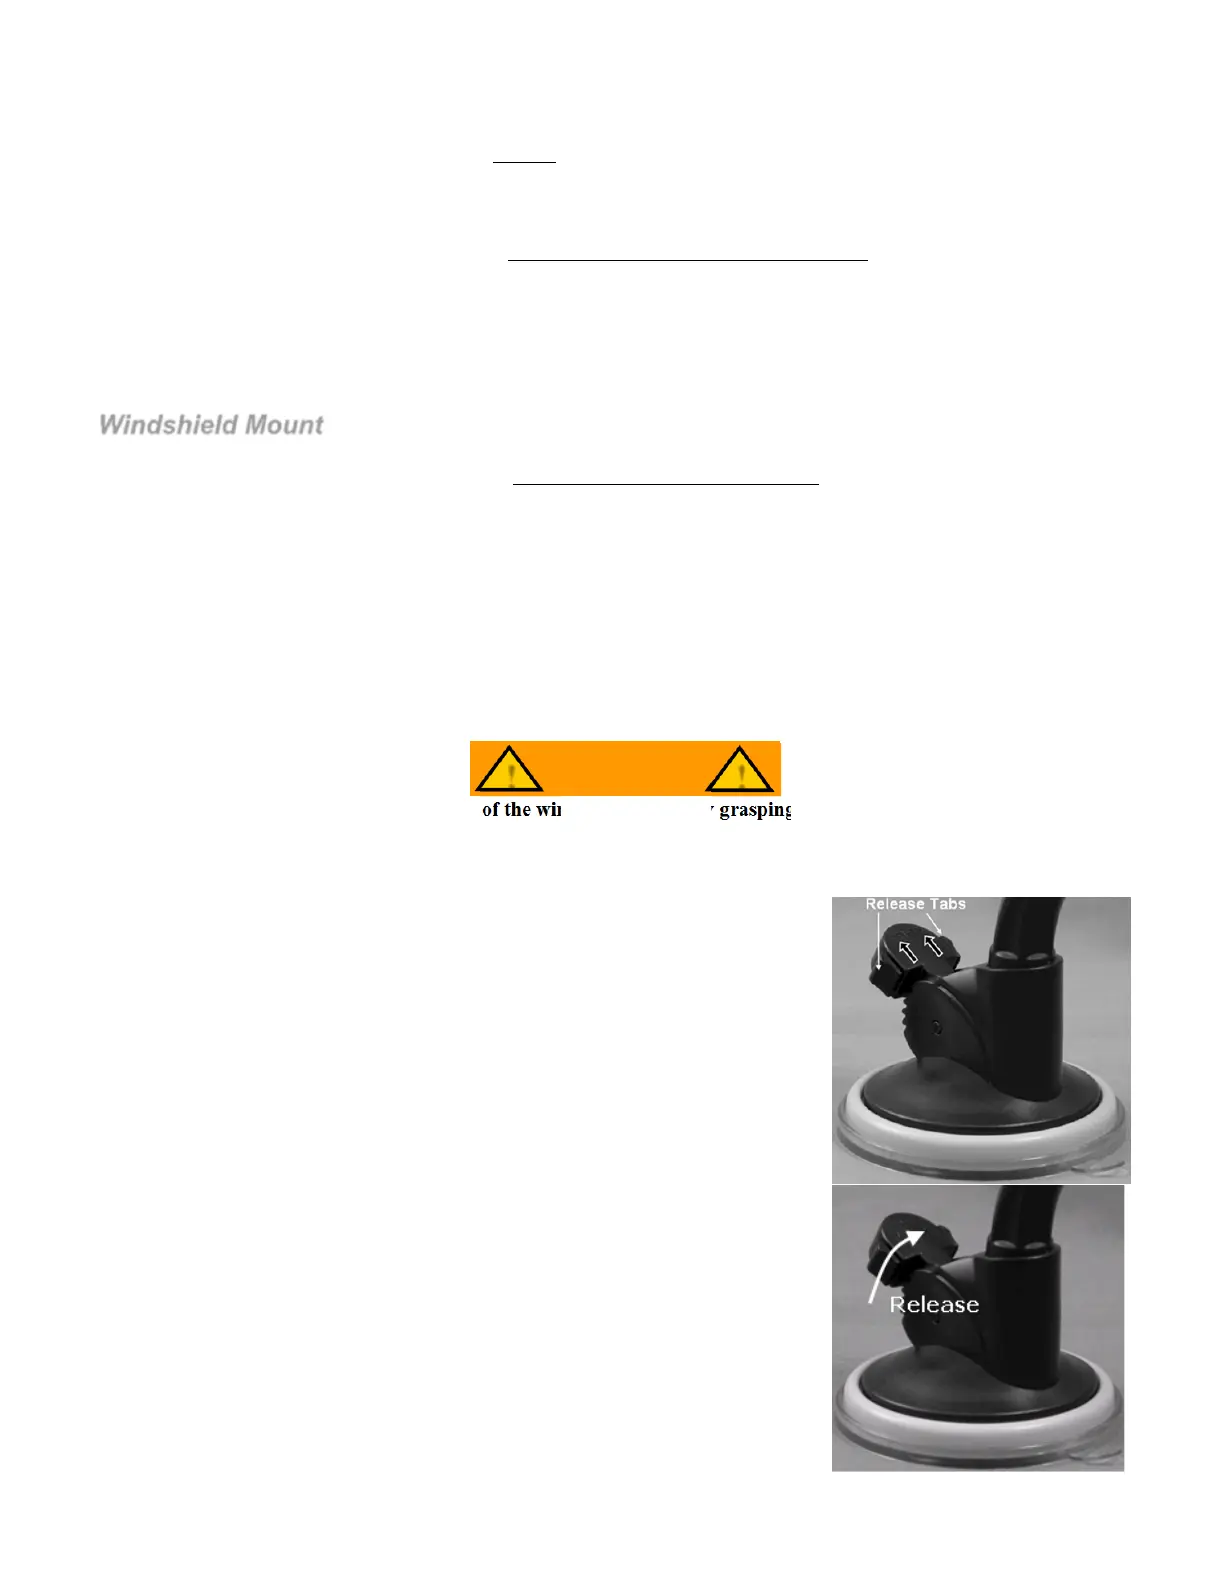
Make sure the Windshield Mount locking arm is fully released. Do not force
the arm. There are two release tabs as shown. Grip the release tabs with
your thumb and index finger, and pull the release tabs in the direction of
the arrows imprinted on the release arm. This will release the locking
arm.
Once released, move the locking arm towards the Windshield Mount’s
neck, as shown, to release the suction cup.
WARNING
!
!
 Loading...