Step 5
• The primary pump (P3) is turned on and remains on
Step 6
• The Boiler contact is turned on for 10 seconds
• After 10 seconds, the Boiler and Boil P3 contacts are shut off
NOTE: The control can only be paused in
step 6 if there is a boiler or mixing demand.
Step 7
• If PUMP is selected in DHW THRU item, DHW P6/Vlv contact
is closed for 10 seconds
• If VLV is selected in DHW THRU item, DHW P6/Vlv and
Boil P3 contacts are closed for 10 seconds.
• If NONE is selected in DHW THRU item, N/A is displayed
in the LCD
NOTE: The control can only be paused
in step 7 if there is a DHW demand.
Step 8
• After test sequence is completed, the word COMPLETE
is displayed for 1 second and control resumes normal operation
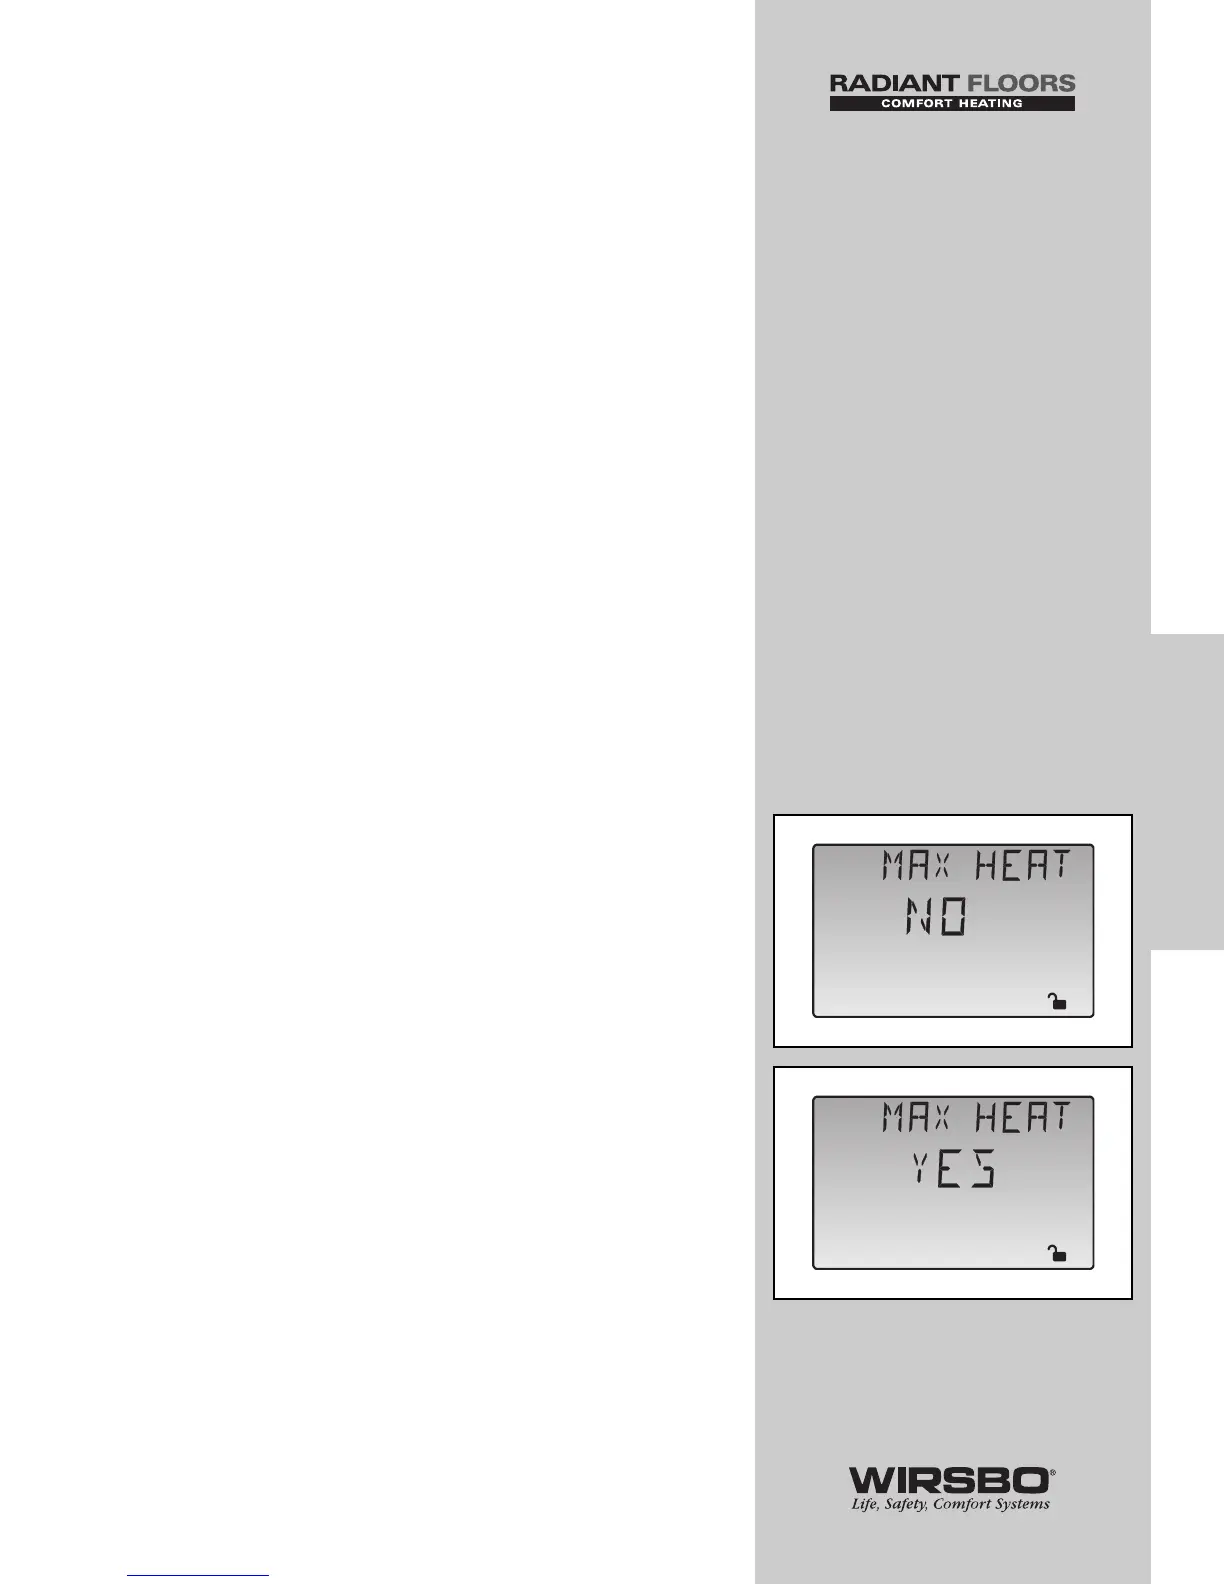
MAX HEAT (See fig. a & b)
The SYSTEMpro 311 has a function called Max Heat. In this
mode, the control turns on and operates the system up to the
maximum set temperatures, and the mixing device at the set
percentage, as long as there is a demand for heat.
• This mode may be used for running all circulators during
system start-up in order to purge air from the piping
• Once started, control continues to operate in MAX HEAT
mode for up to 24 hours or until either the Item, Menu or Test
button is pressed
• To enable the Max Heat feature, use the following procedure:
1) Press and hold the Test button for more than 3 seconds.
At this point, control displays the words MAX HEAT and the
word NO
2) Using the up and down buttons, select the word YES. After
3 seconds, the control flashes the word MANUAL and the
number 100. This number represents the desired output
from the mixing device
3) Set desired output of mixing device by using the up and/or
down buttons on the control.
4) To cancel Max Heat mode, press either Item, Menu, or
Test button
5) Once Max Heat mode ends or is cancelled, control resumes
normal operation
57
PROGRAMMING
PROGRAMMING - Step 2 - Test Sequence