Section
3-8 AB46 Work Platform
Maintenance
3.8 Hydraulic Manifold
(Figure 3-10)
It is not necessary to remove the manifold to perform all
maintenance procedures. Prior to performing mainte-
nance, determination if the manifold needs to be
removed.
REMOVAL
1. Disconnect the battery.
2. Tag and disconnect the solenoid valve leads from
the terminal strip.
3. Tag, disconnect and plug hydraulic hoses.
4. Remove the bolts that hold the manifold to the
mounting bracket.
5. Remove manifold block.
DISASSEMBLY
NOTE: Mark all components as they are removed
so as not to confuse their location during assembly.
Refer to Figure 3-8 often to aid in disassembly and
assembly.
1. Remove coils from solenoid valves.
2. Remove spool valve cover and spool valve.
3. Remove solenoid valves, lift relief valve, counter-
balance valves and divider combiner valve.
4. Remove fittings, plugs, springs, balls and orifices.
CLEANING AND INSPECTION
1. Wash the manifold in cleaning solvent to remove
built up contaminants and then blow out all pas-
sages with clean compressed air.
2. Inspect the manifold for cracks, thread damage and
scoring where O-rings seal against internal and
external surfaces.
3. Wash and dry each component and check for
thread damage, torn or cracked O-rings and proper
operation.
4. Replace parts and O-rings found unserviceable.
ASSEMBLY
NOTE: Lubricate all O-rings before installation to
prevent damage to O-rings. Seat all balls in manifold
block by lightly tapping on the ball with a brass drift
punch.
1. Install fittings, plugs, springs, balls and orifices. Use
one drop of Locktite #242 on each screw-in orifice.
2. Install solenoid valves, lift relief valve, counter
balance valves, divider combiner valve, and spool
valve.
3. Install coils on solenoid valves.
INSTALLATION
1. Attach manifold assembly to mounting plate with
bolts.
2. Connect Solenoid leads to terminal strip (as previ-
ously tagged).
3. Connect hydraulic hoses. Be certain to tighten
hoses to manifold.
4. Reconnect the battery.
5. Operate each hydraulic function and check for
proper operation and leaks.
6. Adjust lift relief and counterbalance valve pressures
according to instructions in Section 3-10.
3.7
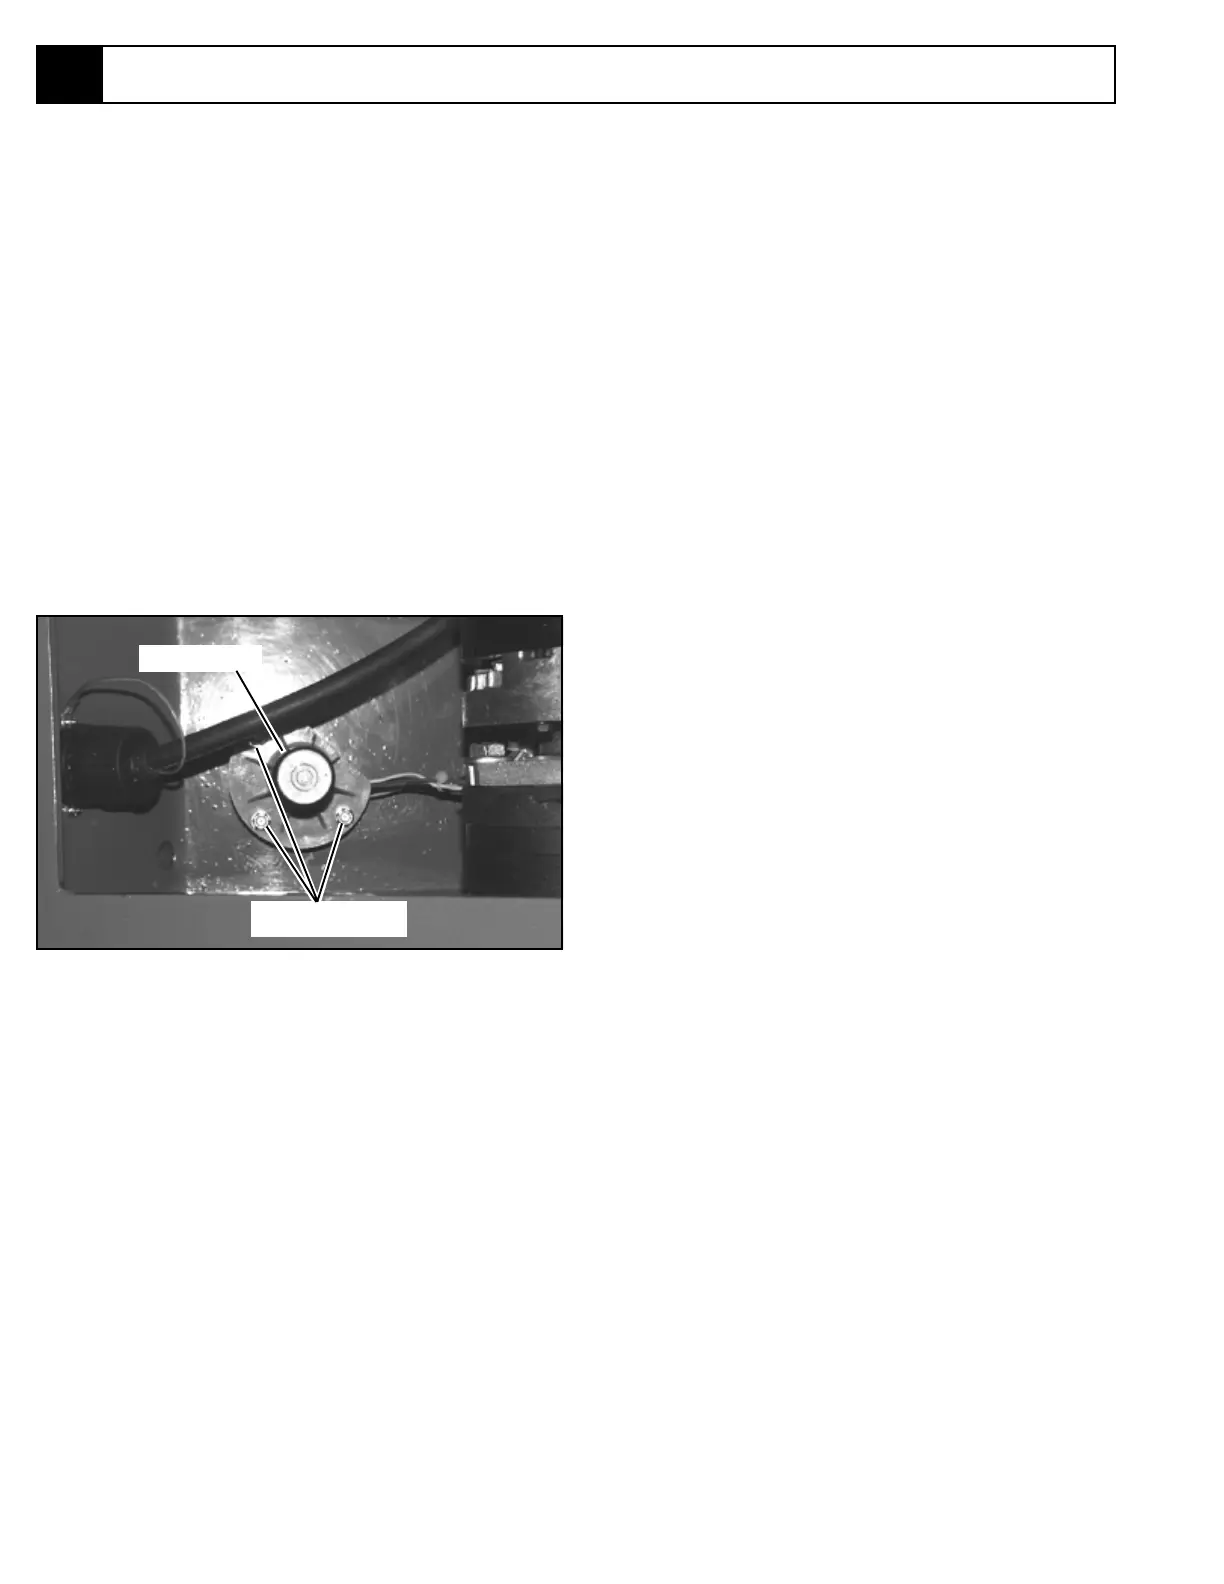
3.7 Tilt Sensor (Figure 3-7)
The Tilt Sensor has four wires; red-power (12V in),
black-ground, white-output (12v out) and green (to
controller). To verify the sensor is working properly
there are two LED's under the sensor; green indicates
the sensor is on (has power), red indicates the sensor is
level and the white wire is 'hot' (12v out).
1. Check tires for proper pressure.
2. Place machine on firm level surface ± ¼°.
3. Use Inclinometer to ensure that the front and rear of
the chassis are level within± ¼°.
4. Adjust the three leveling locknuts until the bubble is
centered in the circle on the attached bubble level.
5. Elevate the platform until down limit switch opens
and push the tilt sensor base to test the alarm
circuit. Alarm should sound.
Figure 3-7: Tilt Sensor
Adjustment Nuts
Bubble Level