CONTROL KEYPAD vacon • 91
24-hour support +358 (0)201 212 575 • Email: vacon@vacon.com
9
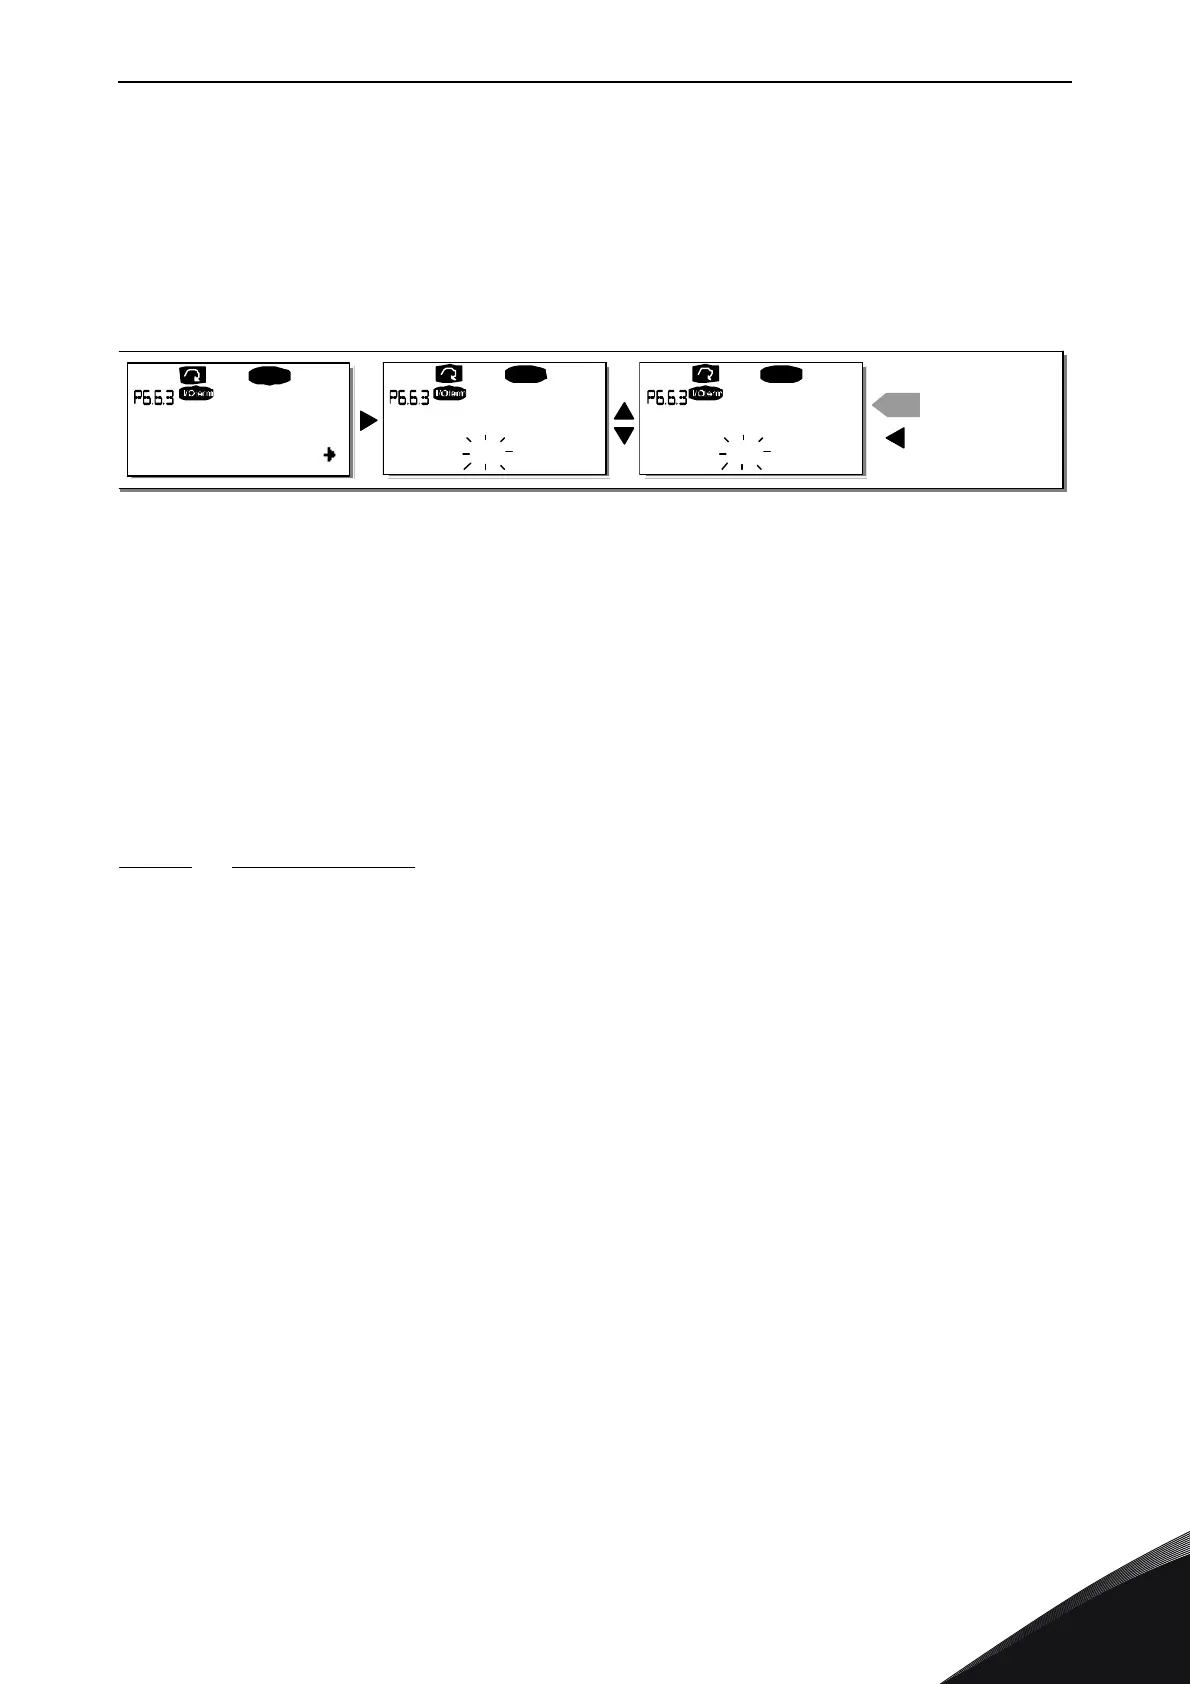
Timeout time (P6.6.3)
The Timeout time setting defines the time after which the keypad display returns to the Default page
(P6.6.1) see above.
Move to the Edit menu by pressing the
Menu button right
. Set the timeout time you want and confirm
the change with the
Enter button
. You can return to the previous step anytime by pushing the
Menu
button left
.
Figure 61. Timeout time setting
NOTE! If the
Default page
value is 0 the
Timeout time
setting has no effect.
Contrast adjustment (P6.6.4)
In case the display is unclear you can adjust its contrast through the same procedure as that for the
timeout time setting (see above).
Backlight time (P6.6.5)
Giving a value for the
Backlight time
, you can determine how long the backlight stays on before
going out. You can select here any time between 1 and 65535 minutes or
'Forever'
. For the value
setting procedure see Timeout time (P6.6.3).
9.3.6.7 Hardware settings
NOTE! The
Hardware settings submenu
is protected with a password (see Chapter Password
(S6.5.1). Store the password in a safe place!
In the
Hardware settings submenu
(S6.7) under the
System menu
you can further control some
functions of the hardware in your frequency converter. The functions available in this menu are
Internal brake resistor connection, Fan control, HMI acknowledge timeout and HMI retry.
Internal brake resistor connection (P6.7.1)
With this function you can tell the frequency converter, whether the internal brake resistor is
connected or not. If you have ordered the frequency converter with an internal brake resistor, the
default value of this parameter is
Connected.
However, if it is necessary to increase braking
capacity by installing an external brake resistor, or if the internal brake resistor is disconnected for
another reason, it is advisable to change the value of this function to
Not conn.
in order to avoid
unnecessary fault trips.
Enter the edit mode by pushing the
Menu button right
. Use the
Browser buttons
to change the
internal brake resistor status. Accept the change with the
Enter button
or return to the previous
level with the
Menu button left
.
NOTE! The brake resistor is available as optional equipment for all classes. It can be installed
internally in classes FR4 to FR6.
90 s
READY
READY READY
90 s.
enter
60 s.
Timeout time
Timeout time Timeout time
CANCEL
CONFIRM CHANG