Replacing components
Installation and maintenance instructions ecoTEC plus 0020116700_01 77
14
1
2
3
4
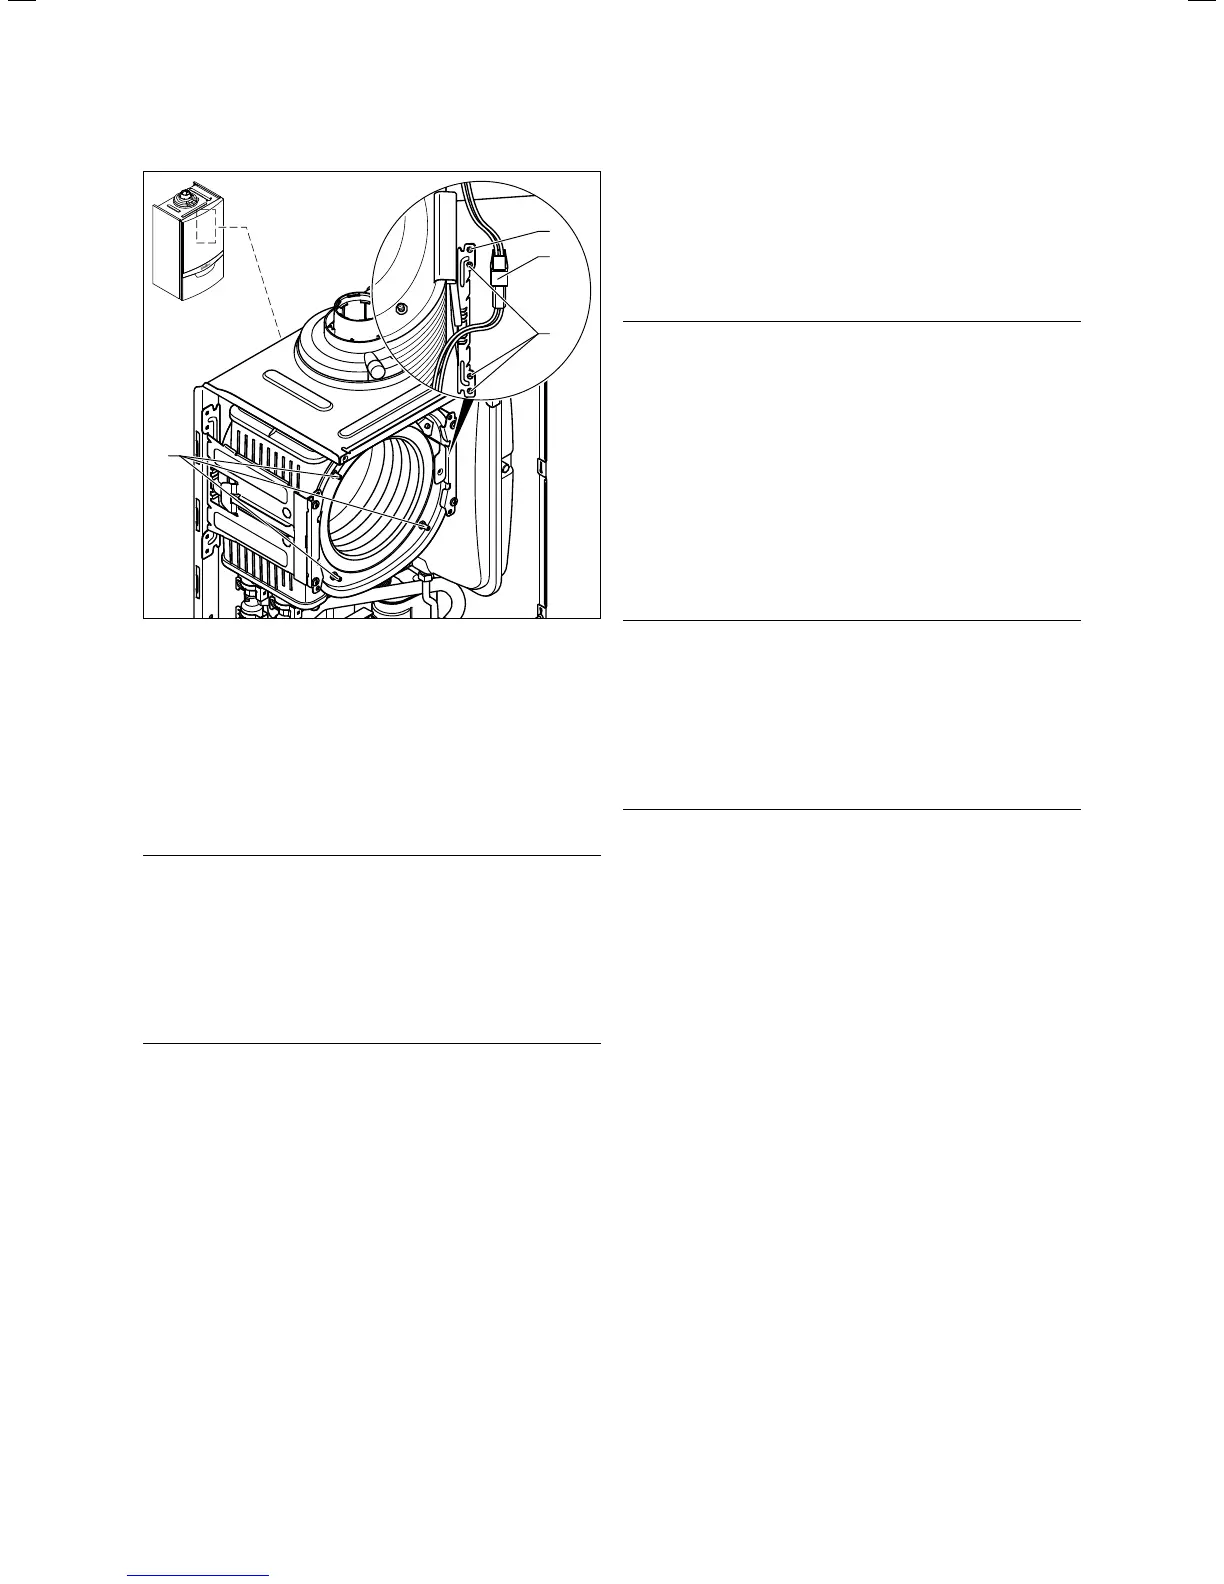
14.13 Heat exchanger brackets
> Disconnect the plug connection (2, ¬fig.14.13) of the
thermal fuse in the heat exchanger.
> Remove the bottom three screws (3, ¬fig.14.13) from
the rear part of the heat exchanger bracket.
> Swivel the bracket around the top screw (1, ¬fig.14.13)
to one side.
> Pull the heat exchanger downwards and to the right, and
remove it from the boiler.
b
Caution.
Risk of damage to the boiler.
Mineral oil-based lubricants may damage
the seals. The seals should therefore not be
lubricated.
> Only use water or commercially available
soft soap, if necessary, to assist with
installation.
i
With the new heat exchanger, ensure that you
use the cable with the coding resistance and the
correct plug.
> Install the new heat exchanger in the reverse order.
> Replace the seals.
> Insert the flow and return connections into the heat
exchanger as far as they will go.
i
Make sure that the brackets are seated correctly
on the flow and return connections.
> Re-install the expansion vessel (¬section14.6).
> Reinstall the compact thermal module.
(¬section12.4.6).
> Fill and purge the boiler and, if necessary, the heating
installation (¬section10.7).
14.8 Replacing the PCB and/or the display
e
Danger!
Risk of death from electric shock!
Mains connection terminals L and N remain
live even if the continuous voltage on/off
switch is turned off!
> Before carrying out repair work on the
boiler, switch the boiler off using the on/
off button.
> Disconnect the boiler from the power
mains by disconnecting the mains plug
or by de-energising the boiler via a parti-
tion with a contact opening of at least
3mm (e.g. fuses or power switches).
b
Caution.
Risk of material damage caused by incor-
rect repairs.
Using an incorrect replacement display can
cause damage to the electronics.
> Before replacing, check that the correct
replacement display is available.
> Never use another replacement display.
i
Comply with the assembly and installation
instructions provided with the spare parts.

 Loading...