Figure 45. Configure I/O Setup
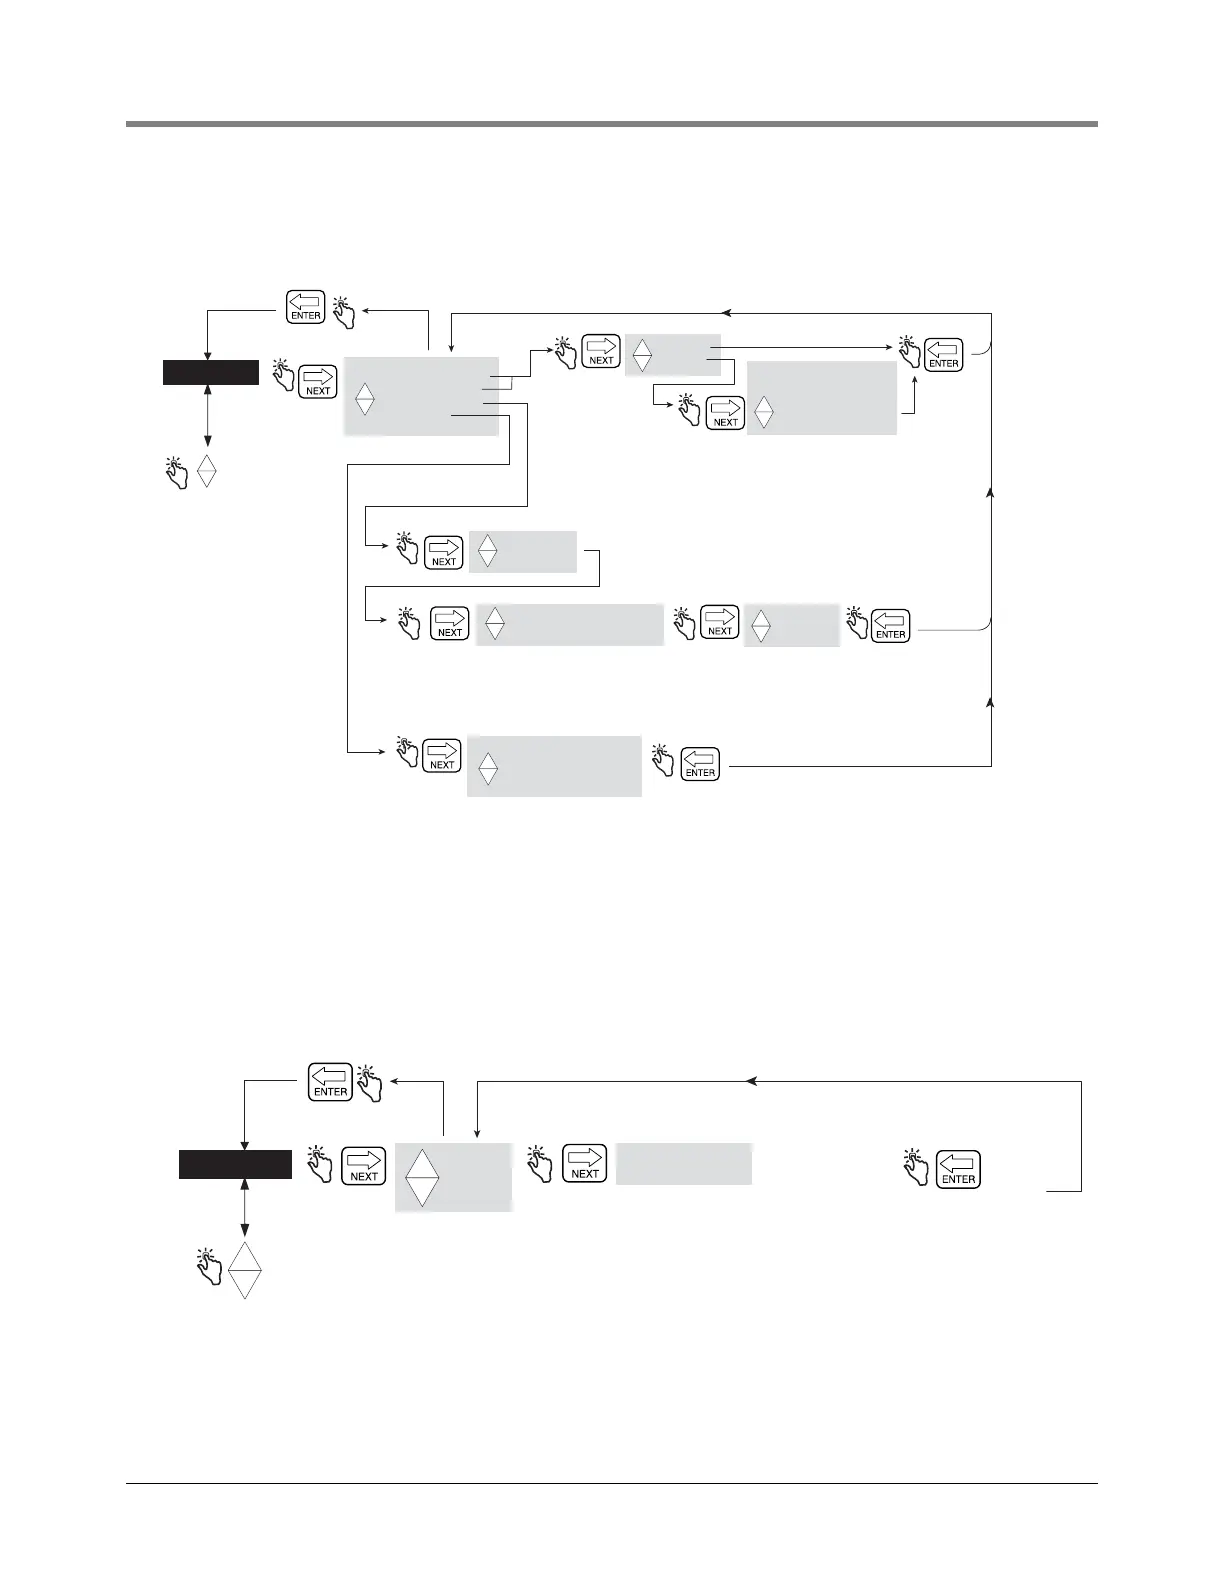
Figure 46. OEM Message Setup
OEM MESSAGE
DELIVERY OPTIONS
REPORT FORMATS
RESTA RT
SECURITY CODE
LANGUAGE
DISPLAY SYNTAX
TEMPERATURE
FUEL SOURCE
METER CALIBRTN
EMERGENCY STOP
REM STA RT/ STOP
REMOTE DISPLAY
INTERLOCK
DISABLE
ENABLE
Press the up/down
buttons to cycle
through remaining
C/C Mode categories
DISABLE
ENABLE
-
+
LOCAL EMR HEAD 1
MASTER ADDRESS 3-32
-
+
-
+
DISABLE INTERLOCK
PRINTER INTERLOCK
PRESET INTERLOCK
TRANSFER INTERLOCK
-
+
-
+
NORMALLY OPEN
NORMALLY CLOSE
-
+
-
+
NOTES:
EMERGENCY STOP (ES) - Once an ES Normally Open is enabled, a switch closure between
terminals 18 and 19 in the Display Head is required to restart. If ES
Normally Close is enabled, a switch open between terminals 18 and 19 in the Display Head is
required to restart.
REM START/STOP - Works with momentary switch inputs in IB - see Installation manual for
terminal position assignments.
For Emergency Stop switch only.
Not for Remote start/stop.
INTERLOCK NOTES:
To enable PRINTER, PRESET, or TRANSFER INTERLOCK, a customer provided switch must be connected to terminals 15 and 16 in the Display Head.
PRINTER INTERLOCK - When Printer Interlock is selected, the customer supplied switch must be closed to Start a delivery.
PRESET INTERLOCK (Requires a preset and presets enabled in the Defaults category of Setup Mode [see Figure 13]) - If Preset Interlock is
selected, when the customer supplied switch is closed, the operator is forced to enter a preset prior to starting a delivery.
TRANSFER INTERLOCK - When Transfer Interlock is selected and the customer supplied switch is closed, the printer label 'Transfer Ticket' is printed on
the delivery ticket.
DISABLE INTERLOCK - When Disable Interlock is selected interlock is disabled regardless of the switch's position (open or closed).
For Remote Display Head you must follow instructions
under Initial Remote Display Setup found on page 30
of this manual.
Note: Master Address 3-32 is for IBNET applications only.
DISABLE
ENABLE
-
+
CONFIGURE I/O