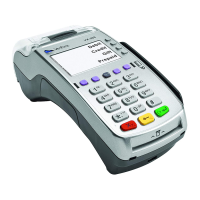
5.1 Cash receipt
Cash receipt is used when a customer pays with cash and you want to print a receipt
from the terminal. Cash receipts are also indicated on batch reports.
Cash receipt is activated in the EDIT menu (2.1).
Making a cash receipt sale:
1. Press MENU F1.
2. Scroll down with LILA2 and choose CASH RECEIPT F3.
3. Select CASH RECEIPT SALE F2.
4. ENTER AMOUNT: Enter the total amount and press Enter.
5. VAT RATE %: Select the VAT rate.
• The terminal prints out the merchant’s receipt and asks whether to print the
customer’s receipt. Press Enter if you wish to print out the customer’s re-
ceipt. Otherwise, press Cancel.
Voiding a cash receipt sale:
1. Press MENU F1.
2. Scroll down with LILA2 and choose CASH RECEIPT F3.
3. Choose CASH RECEIPT VOID F3.
4. ENTER AMOUNT: Enter the total amount and press Enter.
• The terminal prints out the merchant’s receipt and asks whether to print the
customer’s receipt. Press Enter if you wish to print out the customer’s re-
ceipt. Otherwise, press Cancel.
5.2 Extra amount
Extra amount is used for example in restaurants when a customer wishes to leave a tip
for the waiter.
The Extra amount function is activated from the EDIT menu (2.1).
Extra amount options:
No = Extra is not in use.
Only before = Extra amount is given during the transaction.
Only after = Extra amount is printed on the receipt and it is entered afterwards into the
terminal.
Unrestricted = The terminal prompts for extra during the transaction and also prints an
extra line on the receipt.
NOTE! If the card in use is a chip card, you can give the extra
amount only during the transaction.
Entering the extra amount afterwards:
The receipt has an amount marked on the EXTRA line. This amount should be entered
manually into the terminal during the same day as the transaction.
1. Press F1 and LILA 2 three times.
2. Select EXTRA AMOUNT F2.
3. RECEIPT NUMBER: The terminal suggests the number of the last transaction.
Accept by pressing Enter. Otherwise, type the wanted receipt number and press
Enter.
4. EXTRA: Enter the amount and press Enter.
The terminal prints out the merchant’s receipt and asks whether to print the customer’s
receipt. Press Enter if you wish to print out the customer’s receipt. Otherwise, press
Cancel.
5.3 VAT
VAT is activated from the EDIT menu (2.1).
When a transaction is being made, the terminal prompts you to choose a VAT rate for
the transaction. Select the rate from the screen. The terminal prints out the VAT rate on
the receipt.
5.4 Mandatory authorization
Mandatory authorization is activated from the EDIT menu (2.1). When the mandatory
authorization is activated, the terminal automatically authenticates all transactions re-
gardless of the amount or the card type.
5.5 PREAUTHORIZATION
Preauthorization is activated from the EDIT menu (2.1).
With the preauthorization function, the merchant can check the card’s functionality.
This is useful for example in car rentals or hotels.
1. Press F1 and LILA2 three times.
2. Choose PREAUTHORIZATION F3.
3. PLEASE INSERT OR SWIPE CARD: Insert the card into the chip reader or swipe the
card.
4. CREDIT / DEBIT: Choose the payment method.
5. ENTER AMOUNT: The terminal suggests 1 EUR. Press Enter.
6. ENTER PIN: If the card is a chip card, the customer enters the PIN code and presses
Enter
• The terminal connects to the authorization center, makes a provision and
reverses it.
• The terminal prints out the merchant’s receipt and asks whether to print the
customer’s receipt. Press Enter if you wish to print out the customer’s
receipt. Otherwise, press Cancel.
30 31

 Loading...


