3. Clean the electrical and control components off dust with brush or dry compressed air.
4. Check the closing of contactors for arcs or signs of burning. Replace the contactors, if required.
5. Fasten all the electrical connection terminals
6. Check that the sockets and plugs are in good condition. Replace the contactors, if required.
7. If the power cables are damaged, get them replaced by a qualified/certified electrician.
Maintenance of Control System
Appearance checks and simple, functional tests, coupled with handling of control parts needs to be carried out on the
following items:
1. Carry out visual checks on the power transformers and isolation transformers for any burn marks followed by
testing the output voltage (of the indoor unit and outdoor condensers).
2. Check for signs of ageing on the control interface board, control board, temperature and humidity sensor boards,
and fuse boards.
3. Clean the electrical control components and control board to remove dust. Debris, dust, and dirt must be
removed, preferably by a dust removing agent.
4. Check and fasten the Input/Output ports on the control interface board. It should also include the connections
between the control board and control interface boards as well as between the Temperature/Humidity sensor
boards and the control interface board.
5. Check the connection between the user terminals (70#, 71#, 37#, and 38#) and the control interface board.
6. Check the output connections between the control interface board and various components including contactors
and solenoid valves for liquid pipes. Inspect the input connection between the control interface board and
various components, including high pressure switches, heating overtemperature protection switches,
discharging temperature and high-pressure sensors. Specifically, check the inserting terminals such as high-
pressure switches and heating over temperature switch followed by replacing the component if it is loosened or
in poor condition.
7. Replace the faulty electric components such as faulty control fuses (or MCB’s) and control boards.
8. Check the trunking or insulation condition of the control and power cable connected to the condenser from the
indoor unit. Replace the cable, if required.
9. Use a temperature/humidity measuring meter with high precision to calibrate temperature/ humidity sensor.
10. Regulate the setting point. Meanwhile, check the action of the various function components according to the
control logic
11. Simulate and inspect the operation-and-working states of protecting units such as high/low pressure alarm,
high/low temperature alarm, high water level alarm, and over-temperature alarm and over-temperature
protection.
12. Check the sensors.
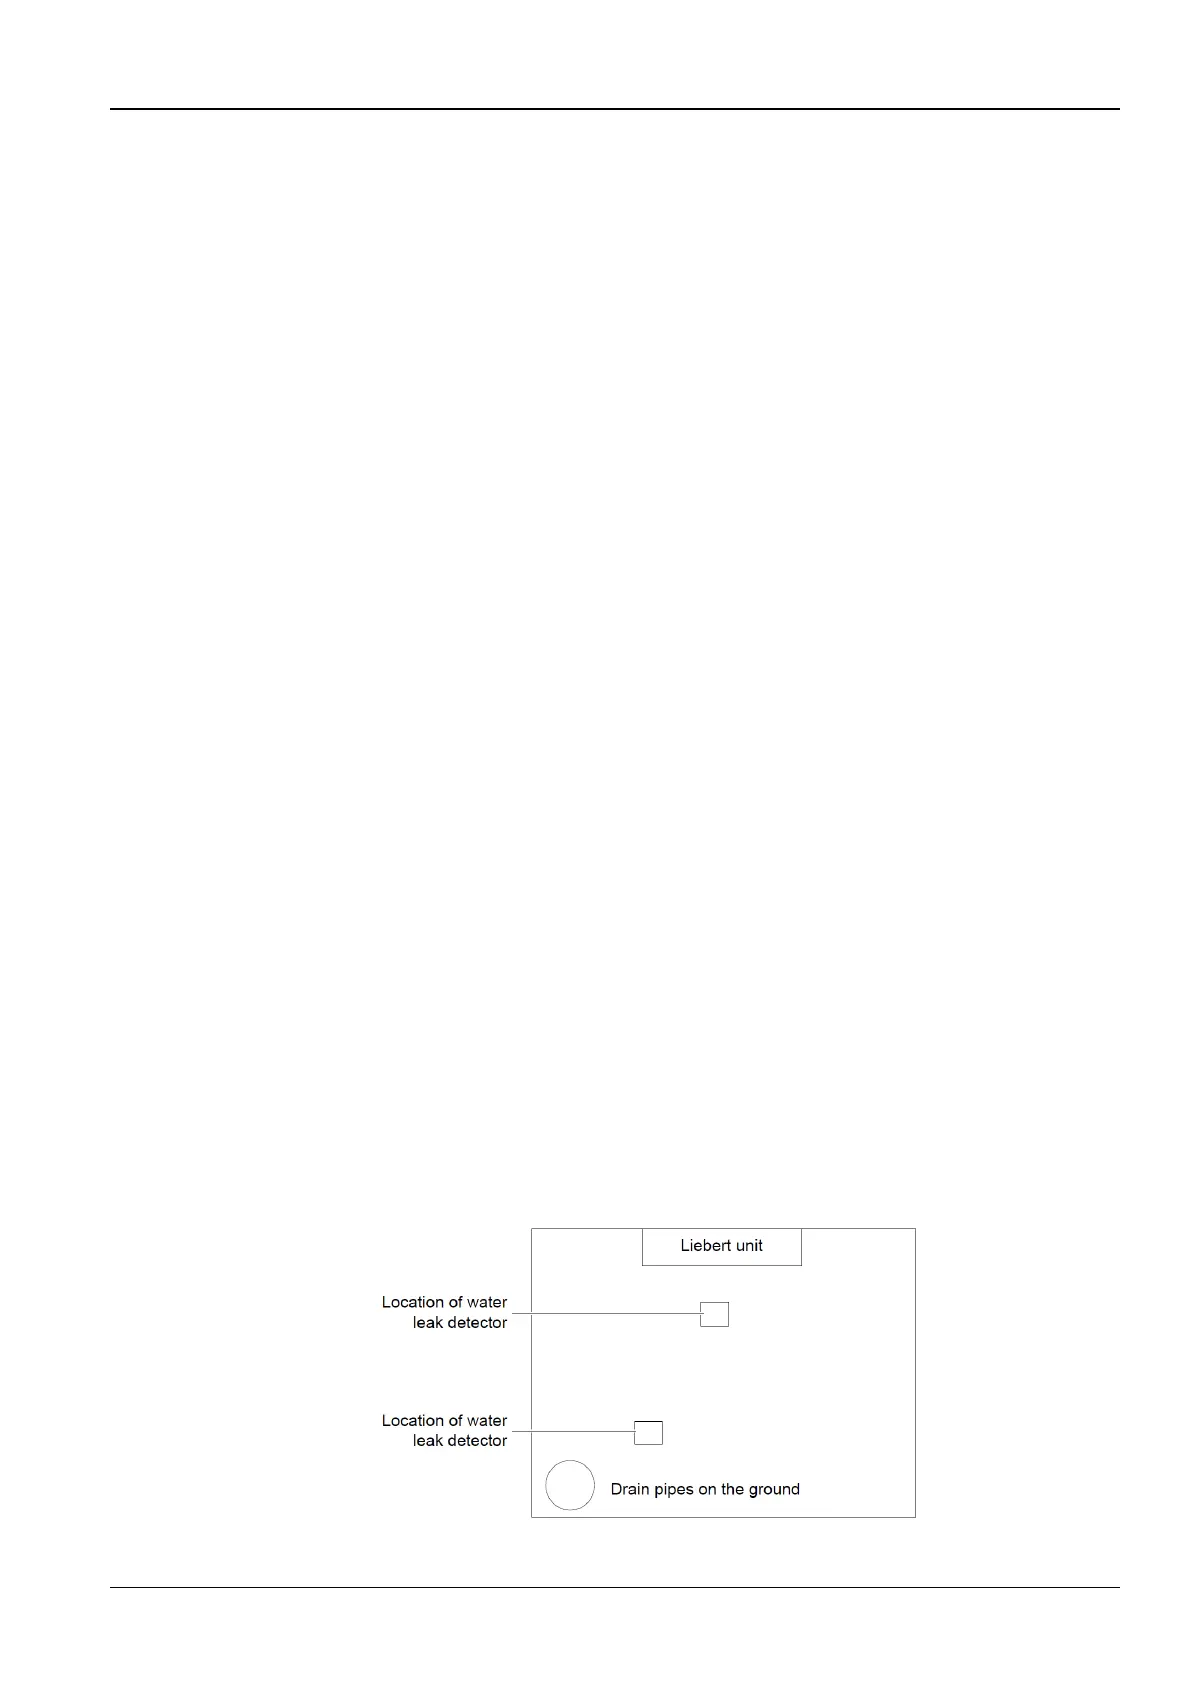
Water Leak Detector
Lay water leak detectors and confirm the alarm information through the controller. The detector should be located
away from any water pool or drainage trench on the floor, 2 to 2.5 meters away from the unit. Do not place it directly
under the machine.
Figure 4-1 shows the recommended location for the water leak detector:
Figure 4-2 Recommended location for the water leak detector