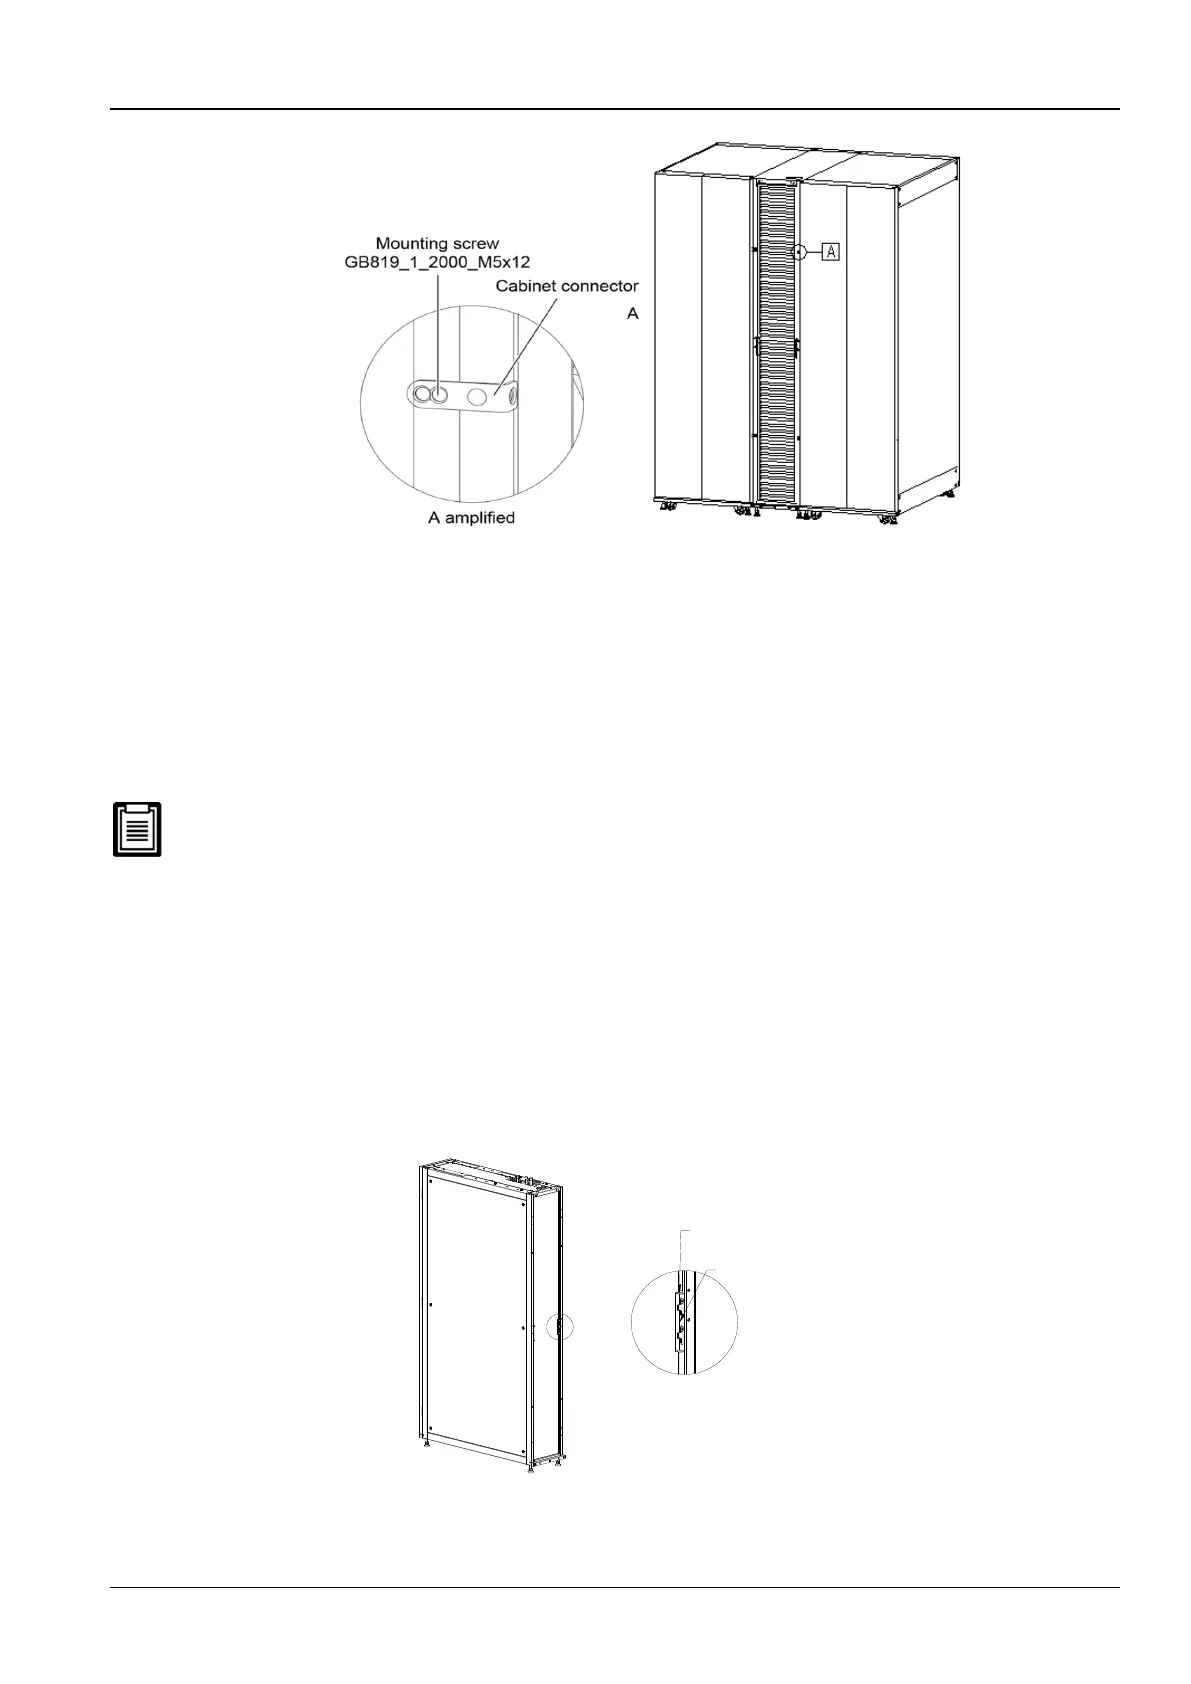
Figure 2-16 Schematic diagram for connecting the cabinet
Install the other 6 cabinet connectors based on the same method.
2.3.5 Piping
The pipes to be included in the Piping process of the AC are listed below:
⚫ Condensed water drainage pipe of the indoor unit;
⚫ Connection of the copper pipe (discharge pipe and liquid pipe) between the indoor unit and outdoor unit;
⚫ Pipe extension kit (optional)
The following points need to be taken into consideration during the Piping process:
⚫ All the joints of the refrigerating pipes must be silver-brazed.
⚫ The selection, layout, and fixing of the pipes will conform to the industry standards and norms.
⚫ Vacuum pumping and refrigerant charging operations, and procedures must conform to the industry standards.
⚫ Pressure drop, compressor oil return, noise return, and vibration must be considered during the designing and
installation process.
Removing Filters
Before the connection of the pipes in the indoor unit, the filters need to be removed.
⚫ Open the rear door of the cabinet to reveal the 2 filters, namely- the top and bottom filters.
⚫ Next, proceed to remove the fixing flake of the top filter. Prior to the removal of the fixing flake, the screws of the flake
need to be loosened. Then, the fixing flake will be removed, followed by removing the top filter.
⚫ Use the same method to remove the bottom filter.
Figure 2-17 depicts the process of removing the filters:



 To Next Page