APPENDIX F. PowerLink3 IP Communicator,
88
D-304762 PowerMaster-10/30 G2 Installer's Guide
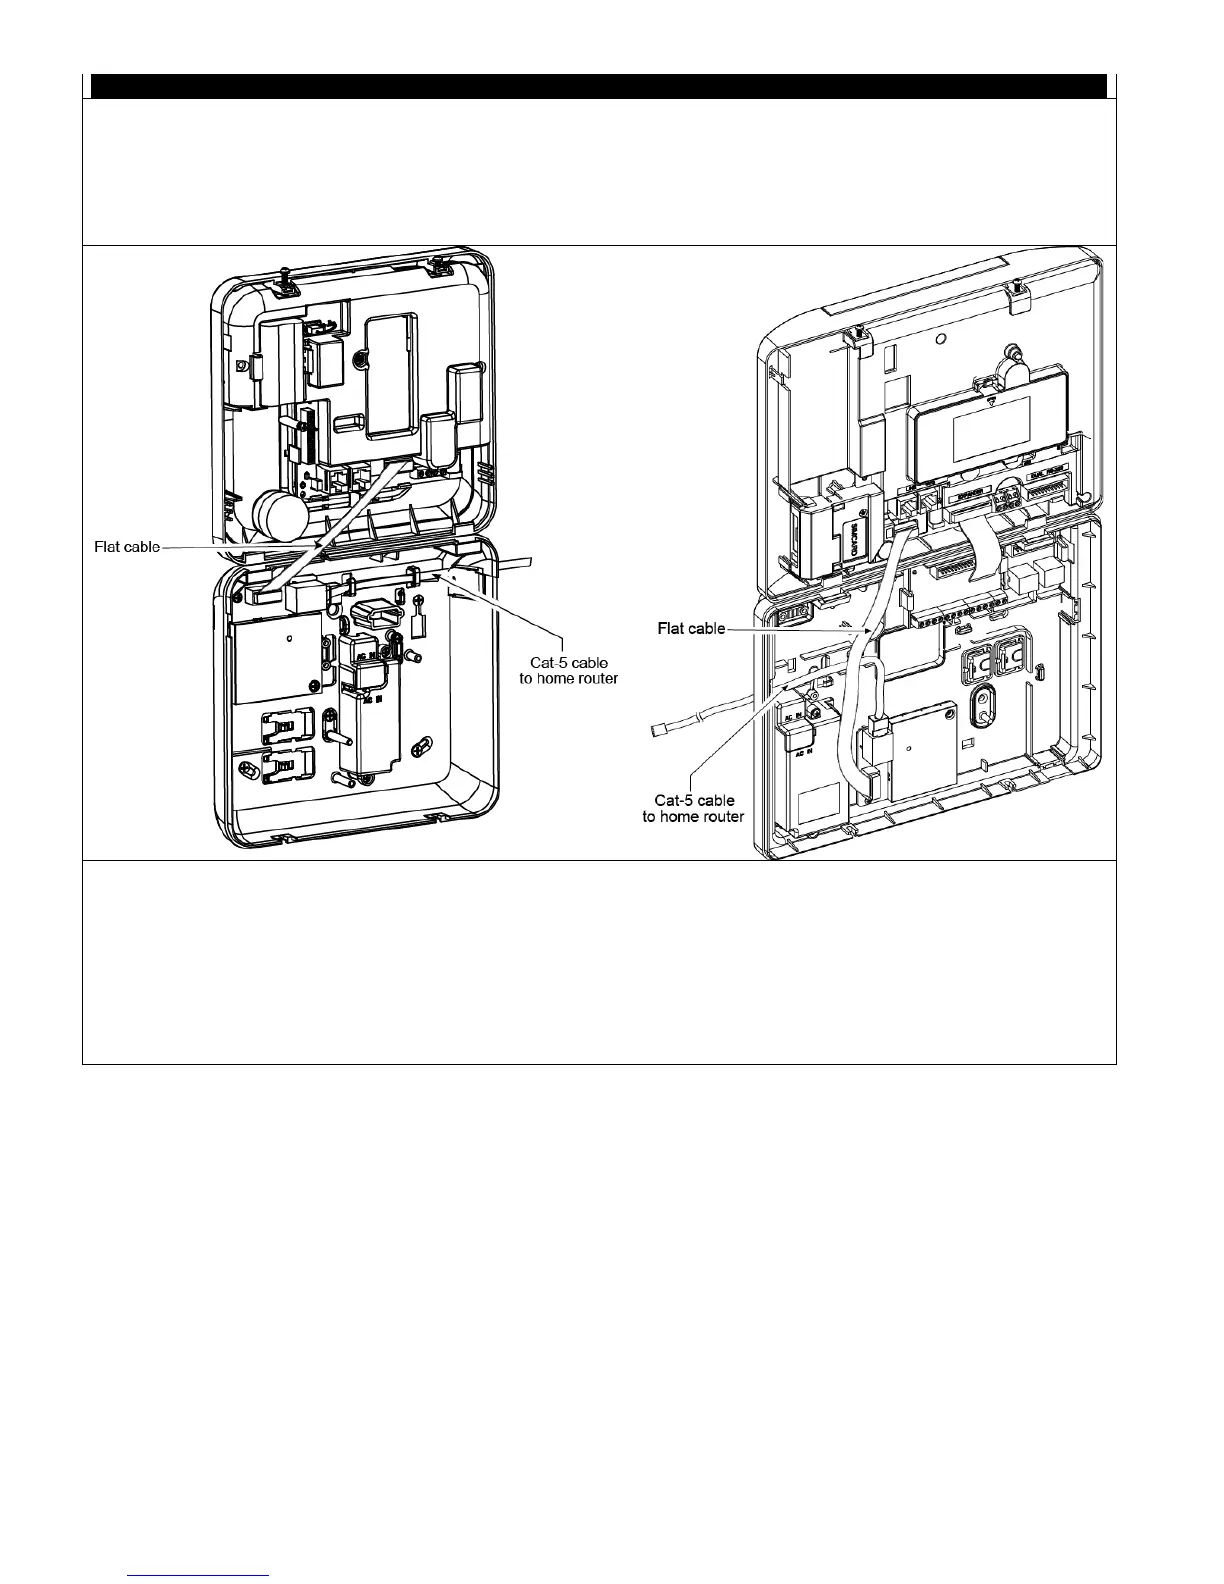
PowerMaster-10 G2:
1. Connect the flat cable from the front panel to the
PowerLink3 IP Communicator.
2. Connect the Cat-5 cable from the PowerLink3 IP
Communicator to the home router:
1. Connect the flat cable from the front panel
to the PowerLink3 IP Communicator.
2. Connect the Cat-5 cable from the PowerLink3
IP Communicator to the home router:
Note: To verify proper operation of the PowerLink3 IP
Communicator, refer to the PowerMaster-10/30 G2 Installer’s
guide, section 5.9.5 “Testing the Broadband/PowerLink
Module”.
Notes:
1. To prevent interference to the antenna, do not route
the Cat-5 cable through the cable entry knockout on
the right side of the panel.
2. To verify proper operation of the PowerLink3 IP
Communicator, refer to the PowerMaster-10/30 G2
Installer’s guide, section 5.9.5 “Testing the
Broadband/PowerLink Module”.

 Loading...


