D-302541 29
(see figure 4.1a)
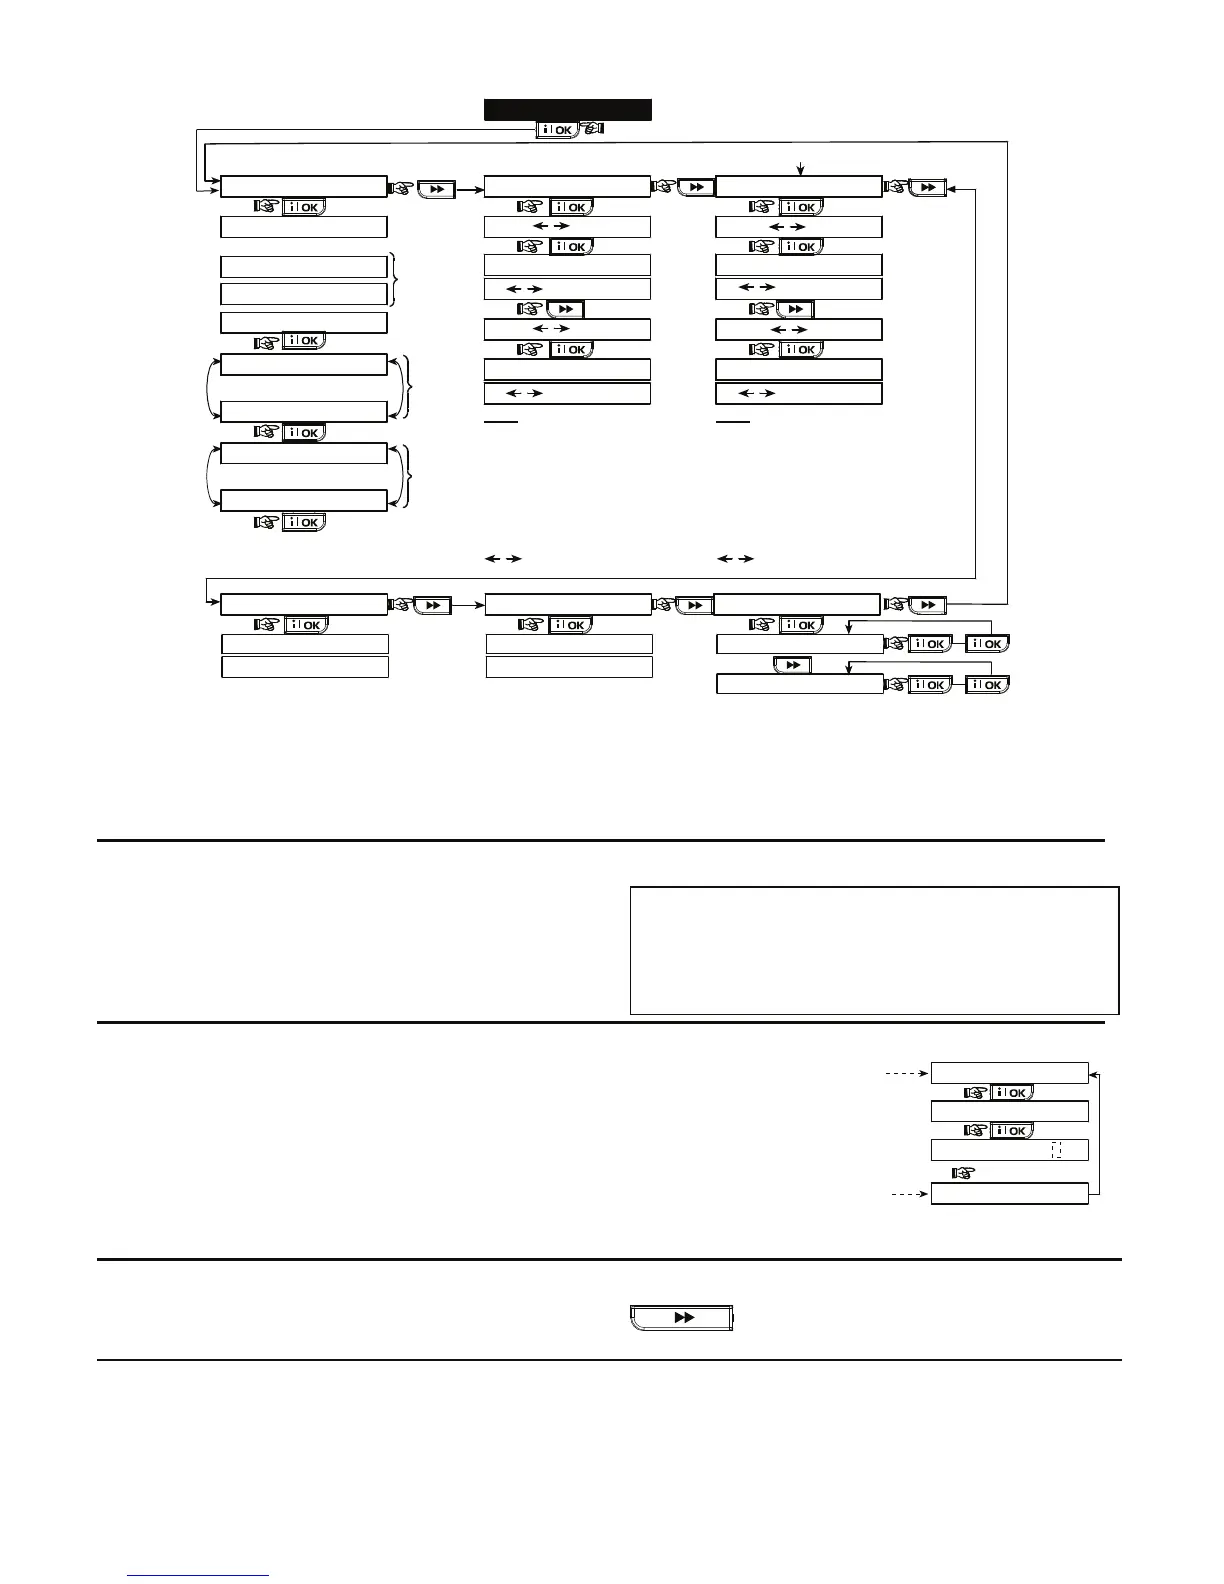
10. DIAGNOSTICS
GPRS CONN. TEST
LAN CONNECT. TEST
PLEASE WAIT... PLEASE WAIT...
UNIT IS OK UNIT IS OK
*
( )
*
( )
When the OK button is pressed, the test result takes
between 15 sec. to 4 mins. before it is displayed,
depending on the severity of the failure.
See par. 4.10.1 for a complete list of possible
GSM/GPRS messages and par. 4.10.2 for a
complete list of possible Broadband Module messages.
*
( )
(Perform walk test)
BATHROOM
DIAG. TESTING
FRONT DOOR
Z1 POOR
Z19 STRONG
(alternating for 5 sec.)
LIVING ROOM
Z2 OK
(alternating for 5 sec.)
Example
of test
result
display
(Each time the OK button is pressed,
the next test result is displayed)
Example
of test
result
display
Example
of test
result
display
DIAG. TESTING
WL SENSORS TEST
S1 CPU
WL SIRENS TEST
S1 CPU=STRONG
WAIT
S2 CPU
PLEASE WAIT...
S2 CPU=STRONG
WL KEYPADS TEST
K1 CPU
K1 CPU=STRONG
WAIT
K2 CPU
PLEASE WAIT...
K2 CPU=STRONG
Note
STRONG/GOOD/POOR/
“NOT OK” (with siren No.,
S1 or S2 before) is
displayed according to the
wireless siren signal
strength).
S1=siren 1. S2 = siren 2.
CPU = Control Panel Unit
= 2 way comm.
Note
STRONG/GOOD/POOR/
“NOT OK” (with keypad
No., K1 or K2 before) is
displayed according to the
wireless keypad signal
strength).
K1=keypad1 K2=keypad2
CPU = Control Panel Unit
= 2 way comm.
NON-PARTITIONING ONLY
LAN RESET OPTION
REBOOT
FACTORY DEFIN.
REBOOT: Resets the Broadband Module
FACTORY DEFIN:
Resets all LAN setting definitions (does not
reset Central Station IP definitions).
Figure 4.10 - Diagnostic Test Flow Chart
4.11 USER FUNCTIONS
This mode provides you with a gateway to the user
functions through the regular user programming menu.
Refer to the User Guide for detailed procedures.
Caution! If after having programmed the user codes the
system does not recognize your installer code, this
indicates you must have programmed a user code that is
identical with your installer code. If so, access the user
menu and change the code that is identical with your
installer code. This will re-validate your installer code.
4.12 RETRIEVING FACTORY DEFAULTS
If you want to reset the PowerMax Pro parameters to the
factory default parameters, you should enter the installer
menu and perform the "FACTORY DEFLT" function, as
described in the right side illustration. To obtain the
relevant parameters defaults, contact the PowerMax Pro
dealer.
Note: For PowerMax Pro with 2 installer codes, INSTALLER
code and MASTER INSTALLER code, only the master
installer code enables to perform factory default function.
12. FACTORY DEFLT
[installer code]
<OK> to restore
ENTER CODE:
PLEASE WAIT ...
Entering to/exit from the FACTORY
DEFLT menu is shown in figure 4.1a
This is a brief display after which all
the factory defaults are retrieved.
4.13 SERIAL NUMBER
The menu "13. SERIAL NUMBER" enables reading the
system serial number for support purposes only. Clicking
enables reading the version of the PowerMax
Pro unit.
4.14 CALLING UPLOAD/DOWNLOAD SERVER
This option allows the installer to initiate a call to the
upload/download server. The server uploads the
PowerMax Pro configuration to its data base and can
unload predefined parameters to the PowerMax Pro
Note:
This option is only used during the installation of
panels monitored by compatible central stations.