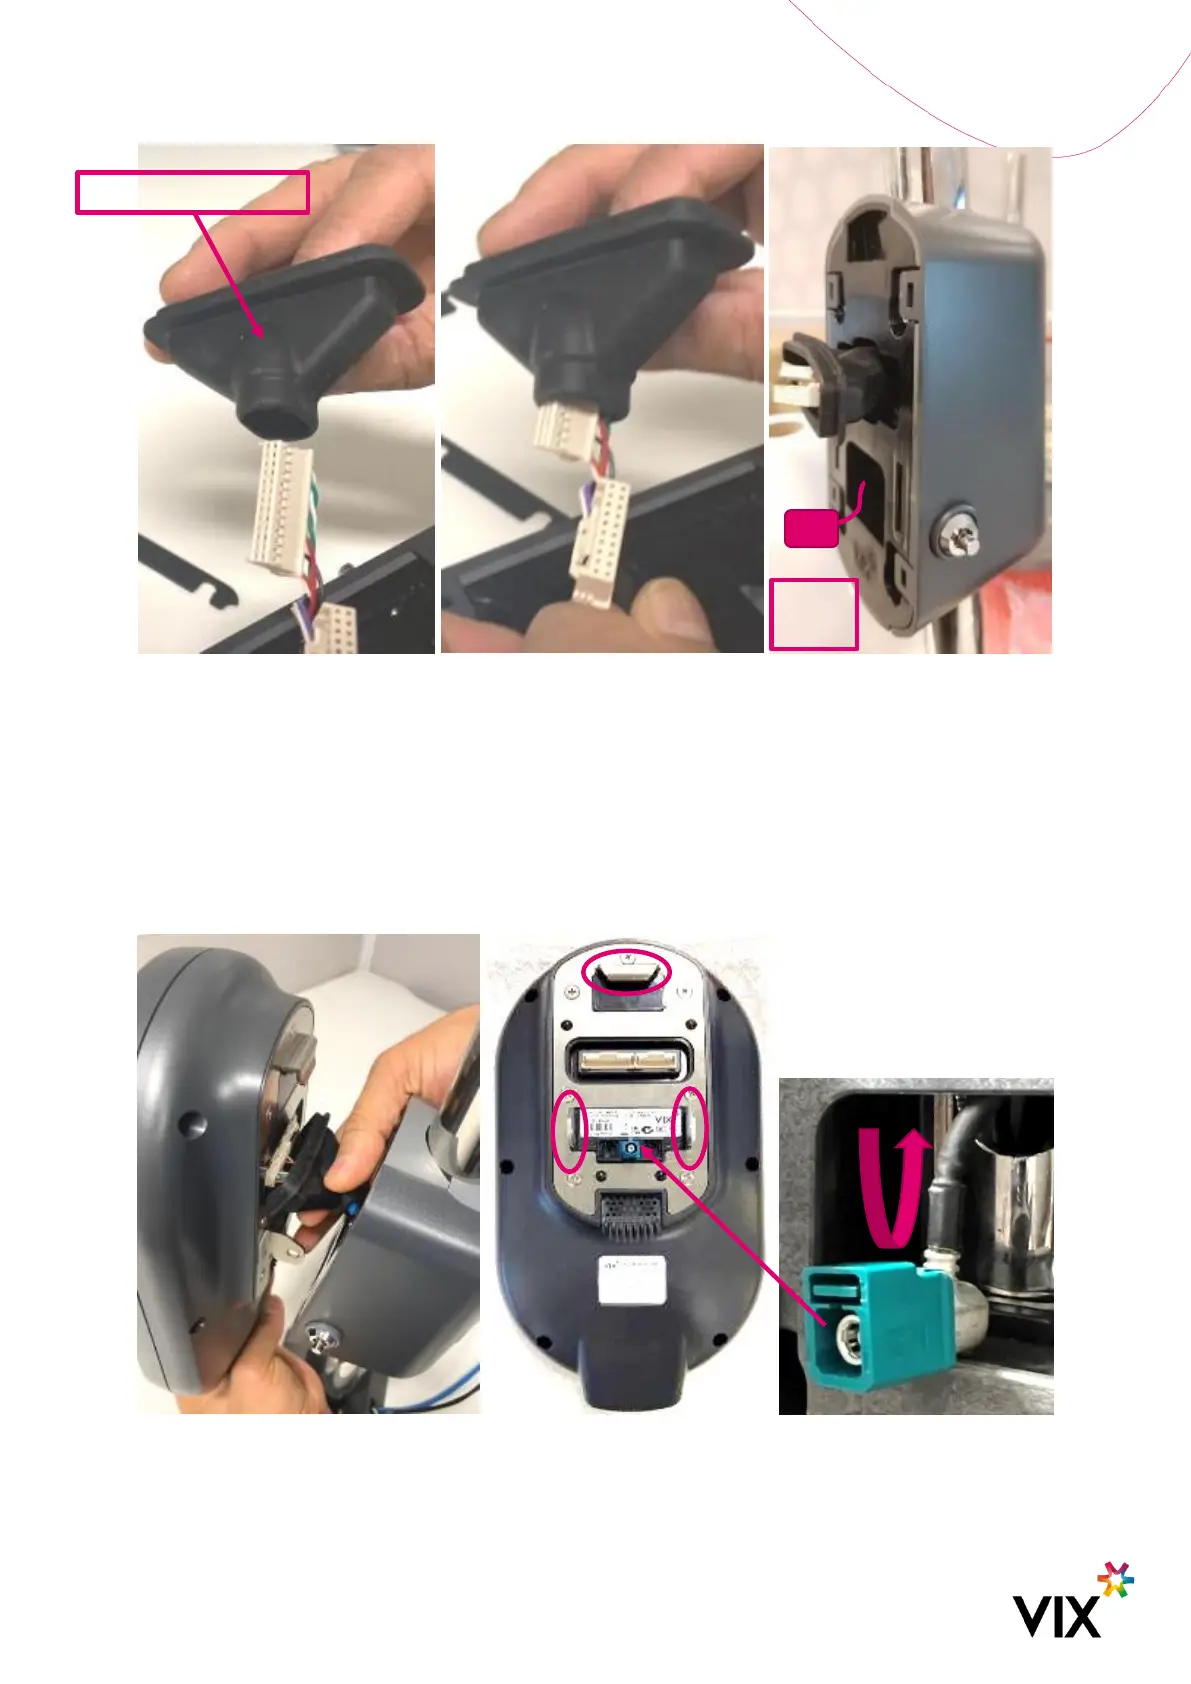
Figure 23: Rubber Boot Installation
6.4 Validator Mounting Instructions
Check that the Adept Validator casing has no corners, sharp edges, or exposed fixings (nuts/bolts) that may
present a hazard to personnel.
1. Carefully connect the cables to the rear of the Adept Validator, including the GPS cable for an Adept
Validator model with GPS.
Figure 24: Adept Validator Cable Connections
2. Mate the Adept Validator to the cradle by aligning the 3 metal plates at the rear of the device (see Figure
24) with the 3 slots on the cradle plate, and pushing in, then pushing down to clip in as shown below.