| Installation
28
|
Puranity TU+ VWR
Chapter 7
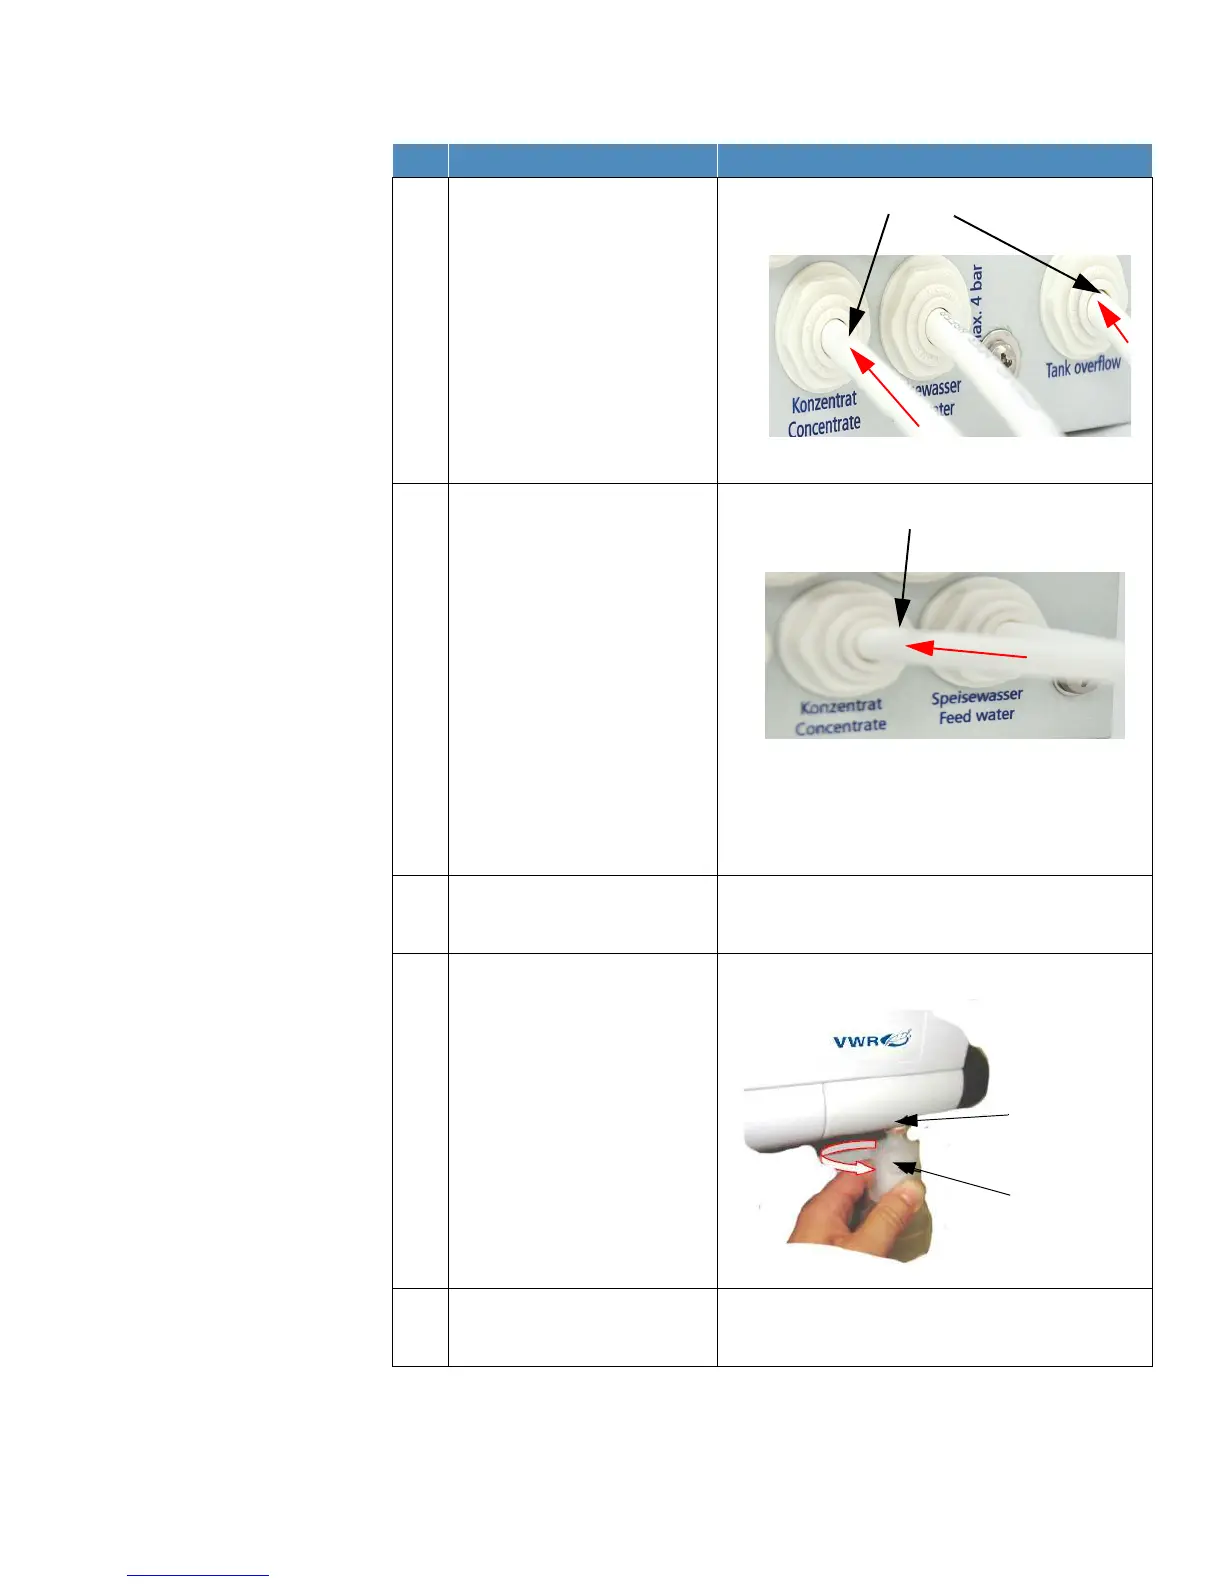
6 a. Attach on the Puranity TU
3+/6+ side panel one piece
of outer diameter 1/4“
tubing to the concentrate
and a second one to the
tank overflow outlet. (see
“Connections of the Puranity
TU 3+/6+ system” on
page 21)
b. Route both AD 1/4“ tubes
with a free gravity fall to the
drain. (see “Illustration of
drain” on page 30)
7 NOTE!
If you are using a Puranity TU 12+
system plug in the outer diameter
1/4“ tube into the concentrate
connector of the Puranity TU 12+
panel. (see “Connections of the
Puranity TU 12+ system” on
page 23). Route the outer diameter
1/4“ tube with a free gravity fall to
the drain.(see “Illustration of drain”
on page 30)
8 Connect the power to the system (see
“Mounting the power pack (voltage
supply)” on page 32).
9 NOTE!
Before screw in the 0.2 µm final filter
onto the 1/4“ thread dispensing
valve outlet, wait until the tank have
the maximum capacity and leave
approx 2-run 3 liters pure water
from the dispensing valve.
10 Open the feedwater tap and check that
there is no leakage on the connectors
and tubes.
Step Action Figure