IP Camera W2(1080P)/W3(720P)
39
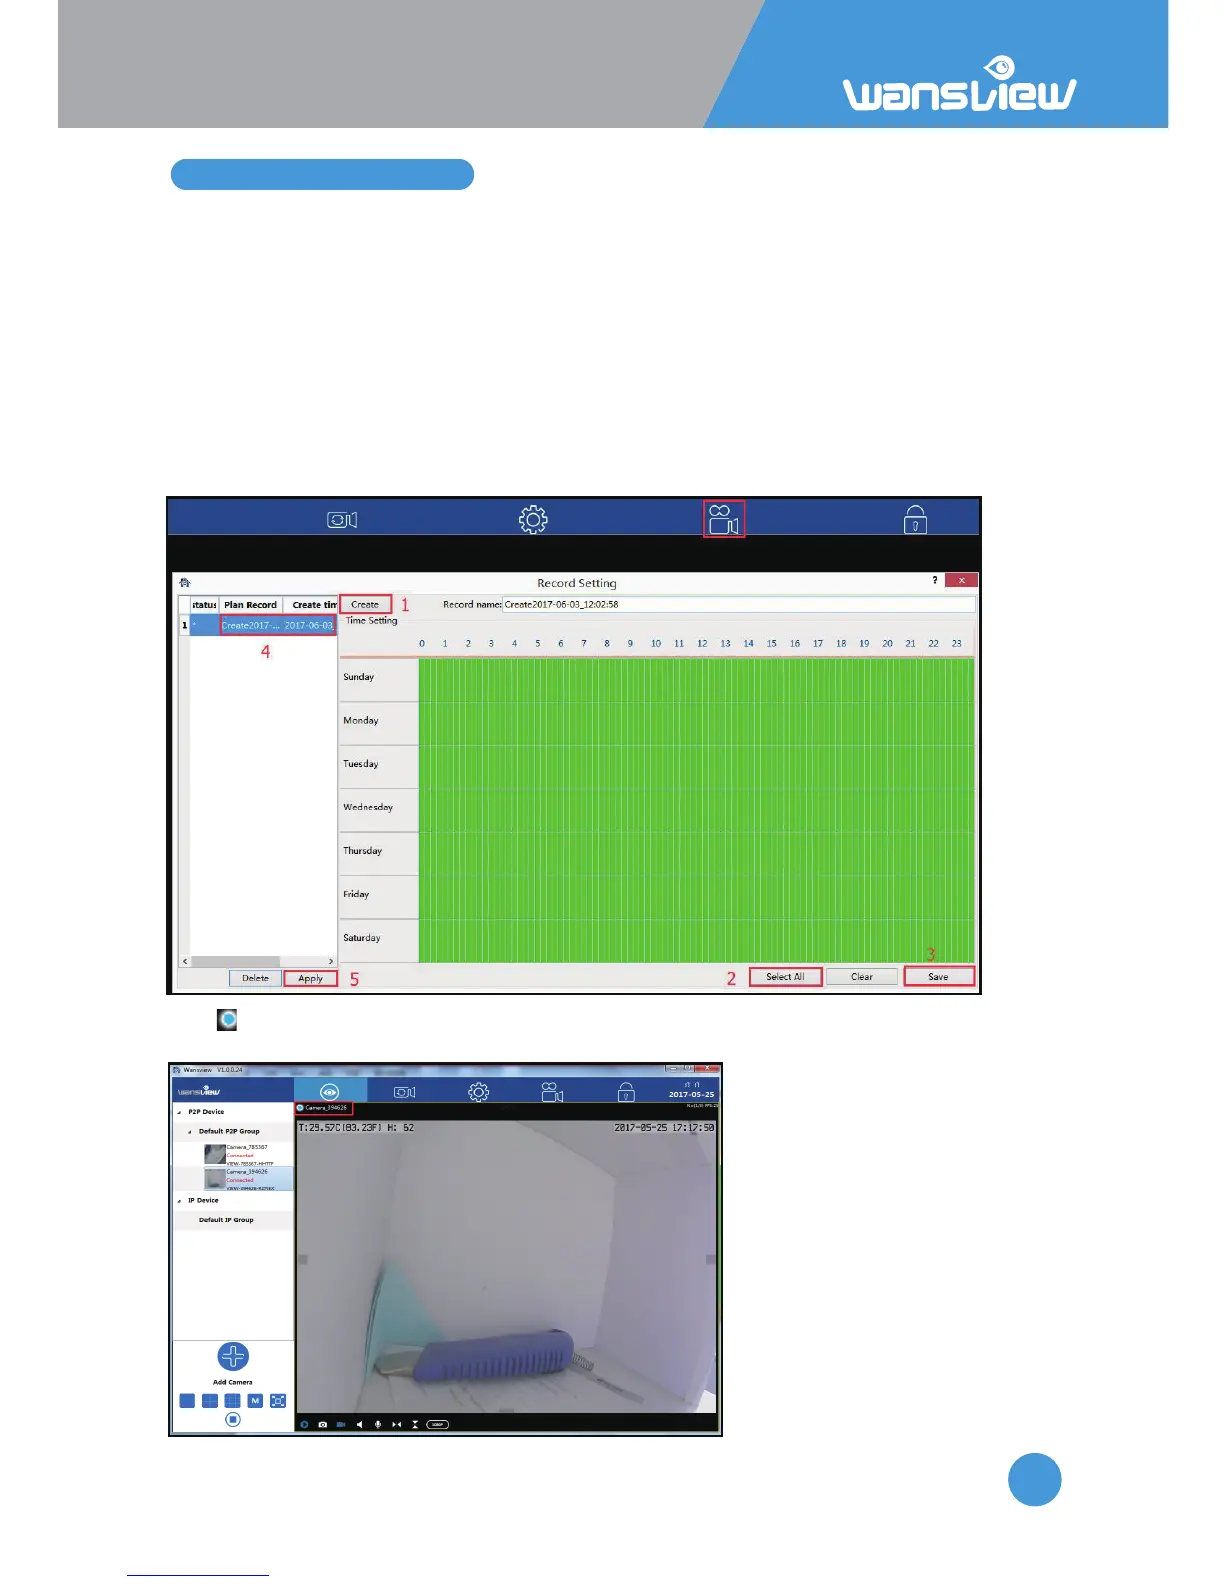
3.6 Scheduled Recording
Before recording to your local computer, please make sure you set up the Record Path on
the “Local Seng”. Then follow the below steps to set up the recording:
1: Click “Create” to create a Record name, it will give you a name
automacally(combinaon of date and me), user can edit the name.
2: Select me: User can “select all” if want to record 24/7, and clear it to choose a specific
me by dragging or single-click the me interval.
3: Save: Save the record name and me interval you set up.
4: Double-click the Record name to choose it as the record plan.
5: Apply: Click “Apply”, a * will appear in front of the Record plan, it means the scheduled
recording is working.
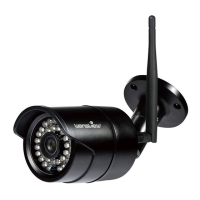
The icon will be shown on live video screen, it means the camera is recording
automacally)