• Each system instrument runs a series of startup tests.
• The host PC assigns an IP address to each of the system instruments.
3. Set the on/off switch on the top right-hand side of the mass spectrometer's front panel to
the On position.
4. Allow three minutes for the embedded PC to initialize.
Tip: An audible alert sounds when the embedded PC is ready.
Tip: The power and operate LEDs change as follows:
• During initialization, the binary solvent manager LED and sample manager LED flash
green.
• After the instruments are successfully powered-on, all power LEDs show steady green.
5. Log on to the waters_connect Hub, and then click the System Console.
6. Navigate to the system control panel within the software.
7. From the Console Navigation pane on the left-hand side of the window, in the System
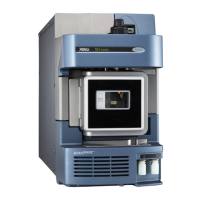
pane, click the instrument (Xevo TQ-S cronos).
8. To pump the instrument, click Maintain > Maintenance > Vacuum > Pump Instrument.
9. Wait for the vacuum to reach the required level.
Note: You can monitor the vacuum status, internal pressures, and turbo pump speed on
the Maintenance pane.
10. To put the instrument into Operate, click Summary > Summary, and then click in the
upper right-hand corner of the window.
The following message appears at the top of the Maintenance pane: Instrument
Health | Ready.
Tip: You can also put the instrument into Operate from the Manual Optimization pane. To
do this, from the Console Navigation pane, click Tune Page > MS Tune Page, and then
click Operate in the upper right-hand corner of the pane.
Result: After you click Operate, these events take place:
• The Operate indicator flashes green.
• The API and collision gas flows start.
• The Operate indicator changes to constant green and the instrument is ready for use.
Requirement: Before acquiring data, ensure that the instrument is pumped down
(evacuated) for at least three hours and in Operate for at least 30 minutes.
January 10, 2022, 715006200 Ver. 01 (previously released as Rev. A)
Page 41