EN
34 5110326C_OI-II_Webasto Live
– Prior to initial start-up, the electrician
must check that the charging station
has been connected correctly.
– Do not connect a vehicle during initial
start-up of the charging station.
– Before starting-up the charging sta-
tion, check the charging cable, char-
ging coupling and the charging station
for visible damage. The charging sta-
tion must not be started up if it is
damaged or if the charging cable/
charging coupling is damaged.
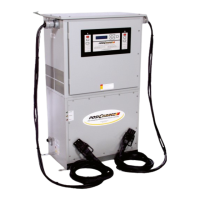
3 Unit description
See also Fig. 1
These operating and installation instructions
describe the Webasto Live charging station.
The exact unit description is indicated on the
type label of the charging station.
3.1 Description of data
interface connections
See also Fig. 2
Legend
USB-A
Modbus (RS 485) external
Micro SIM-slot
RJ 45 (LAN)
USB-B
With the cover open, the data interfaces can
be found on the left-hand side in the con-
nection area. This area is separated from the
power supply area.
3.1.1 USB type A
This connection is used in host mode for a
USB stick for software or configuration up-
dates. This connection supports the 5 V
power supply up to maximum 100 mA.
3.1.2 Modbus
The data connection to a primary electricity
meter can be established for advanced
power management. (see online configura-
tion instructions: https://webasto-
charging.com/documentation)
3.1.3 SIM cardslot for modem
If it is necessary to change the GSM pro-
vider, then the SIM card can be removed
from the SIM card slot (pull out, not auto-
matically ejected by a spring) and an altern-
ative SIM card can be inserted. Prerequisites
for using a SIM card:
– Form factor 3FF (micro SIM)
– Service M2M without PIN, provider en-
abled
3.1.4 LAN
For connecting the charging station to the
network infrastructure at the installation loc-
ation. The charging station can be con-
figured and controlled using this connection
(prerequisite: connection to the back end or
to the local power management system). A
category 5e network cable or higher is re-
commended.
3.1.5 USB type B
Connecting in slave mode for making a USB
connection to a computer for the configura-
tion. When connected to a computer, this
USB connection functions like a network in-
terface, and is used to open the web config-
uration interface.
(see online configuration instructions:
https://webasto-charging.com/
documentation).
3.1.6 WLAN
After completing the start process of the
charging station, you have the option to
connect a WLAN-enabled computer or mo-
bile device to the charging station hot spot
(see online configuration instructions:
https://webasto-charging.com/
documentation)
Only the configuration interface can be
opened using the established connection.
3.1.7 Control cable (Control Pilot)
See also Fig. 3
Legend
Modbus
CP connection (push-in terminal)