EN
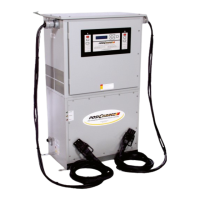
38 5110326C_OI-II_Webasto Live
u
Screw in the supplied strain relief clamp in
the correct position on the charging cable.
NOTE
The strain relief clamp has two posi-
tion options for charging cable ver-
sions 11kW and 22kW.
Ensure that the "11 kW installed" la-
bel for a 11 kW charging cable is not
visible.
See also Fig. 6
u
Fit the strain relief clamp in the correct
mounting position using the supplied self-
tapping Torx screws (6.5x25mm) and
tighten to 5.5Nm. (Attention: Do not
overtighten screws).
u
The strain relief clamp must be flush when
securely screwed in.
NOTE
Perform a tension test on the char-
ging cable to make sure that the
cable cannot move.
u
Screw the antikink protection spiral onto
the sealing clip with a torque of 4Nm.
u
Using the slot-head screwdriver (3.5 mm),
connect the individual cable ends accord-
ing to the specification in the illustration
on the right terminal block with the "out"
label.
u
To do this, insert the screwdriver in the
designated upper opening of the spring
relief for the terminal block and open the
clamping spring.
u
Now insert the individual wire into the
designated connection opening of the ter-
minal block (lower opening).
Charging
cable
Description
Blue N
Brown L1
Black L2
Grey L3
Yellow-
green
PE
Black-white Control cable (CP)
u
Then pull the screwdriver out again and
perform a tension test to make sure that
the individual wires are clamped properly
and fully.
u
Connect the black/white control cable (CP)
to the terminal (contact A). See "Control
cable (Control Pilot) on page 34".
NOTE
Push the white spring contact of the
connection on the right down while
inserting the control cable fully.
u
Perform a tension test to make sure that
the cable is clamped properly and fully.
6.4 The electrical connection
u
Check and make sure that the lead is ten-
sion-free and measures have been taken
to secure against being switched on.
u
Check and comply with all the require-
ments necessary for the connection and
mentioned previously in these instructions
u
Take the cable gland grommets from the
supplied material
u
Push the cable gland grommet over the
lead (note: Ensure that the insertion aid
for the grommet is on the back of the
charging station when in the final installed
state, however, do not position it in the
housing lead-through yet)
u
If a data line is also to be connected, use
the second supplied cable gland grommet
and repeat the above-mentioned step.
NOTE
The bend radius of the data cable
must be taken into account when
connecting the data line. Use an
angle plug or adapter if necessary.
u
Remove the sheathing of the lead. See
"Description of power supply interface
connections on page 35"
u
If a rigid lead is used, bend the individual
wires paying attention to the minimum
bend radiuses so that it is possible to con-
nect them to the terminals without signi-
ficant mechanical stress.
u
Remove the insulation from the individual
wires as per the illustration. (note: Avoid
damage to the copper braid)