CF-4 35
3.3.5 Replacing the V-Belt
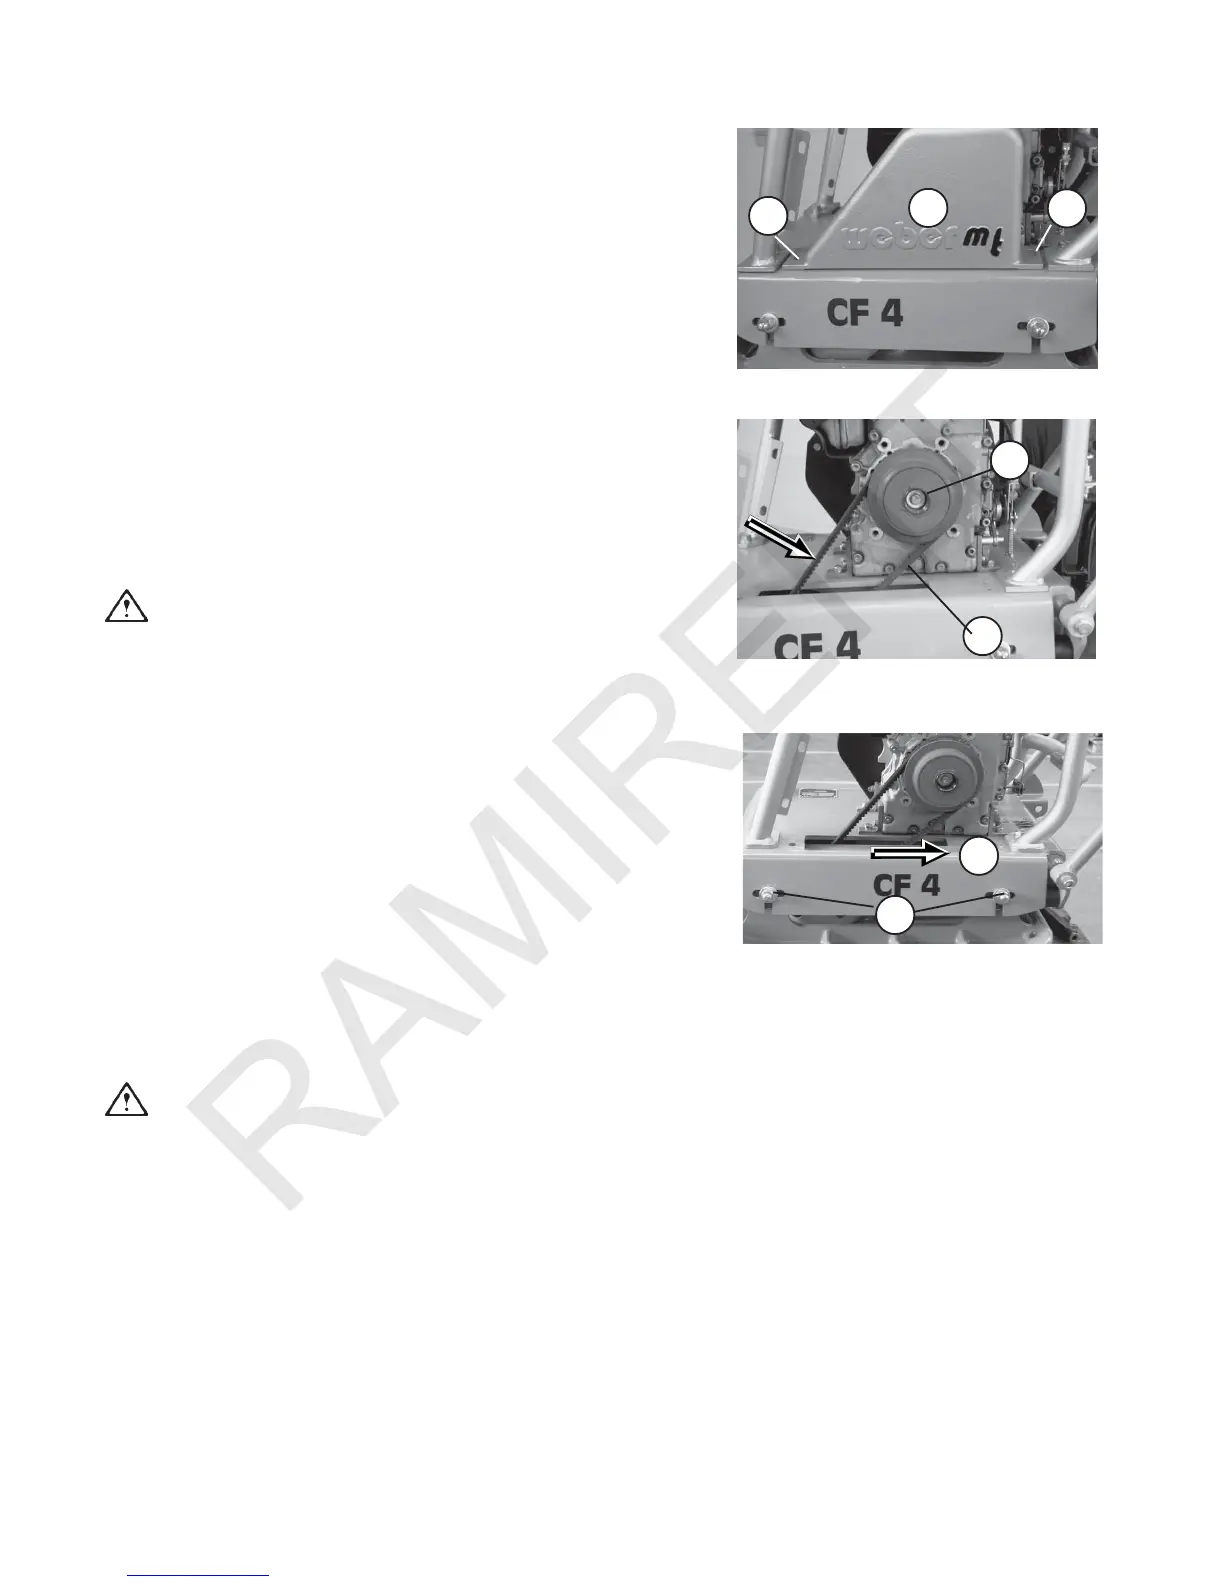
- Remove the V-belt guard (54/1) by loosening the screws (55/2).
- Release the tension as described in paragraph 3.3.4 and remove the
V-belt.
- Put on the new V-belt. (Take care to use a V-belt of the correct length!)
Caution!
Check to ensure that the V-belt is properly aligned, especially after
repair work.
- Tension the V-belt as described in paragraph 3.3.4.
Figure 54
Figure 55
1
2
Figure 56
1
2
2
2
1
3.3.4Checking the Condition and Tension of the
Vibrator V-Belt
- Put the soil compactor out of operation as described in paragraph
2.7.
- Remove the V-belt guard (54/1) by undoing the screws (54/2).
- Check the condition of the V-belt (55/1) (cracks, broken out flanks,
wear).
- In case of excessive wear, replace the V-belt as described in
paragaph 3.3.5.
- Apply a force of approx. 100 N and press the V-belt (55/1) down.
The V-belt's deflection should be approx.10 mm.
If the V-belt's tension is too low, proceed as follows:
- Increase the V-belt's tension by means of the 4 fastening screws
(56/1) of the engine bracket (56/2).
- Retighten the fastening screws (56/1) when the V-belt (55/1) has
achieved the required tension.
Caution!
Take care to properly fit the V-belt on the pulleys (55/2) (belt
alignment).
- Fasten the V-belt guard (54/1) with the screws (54/2).