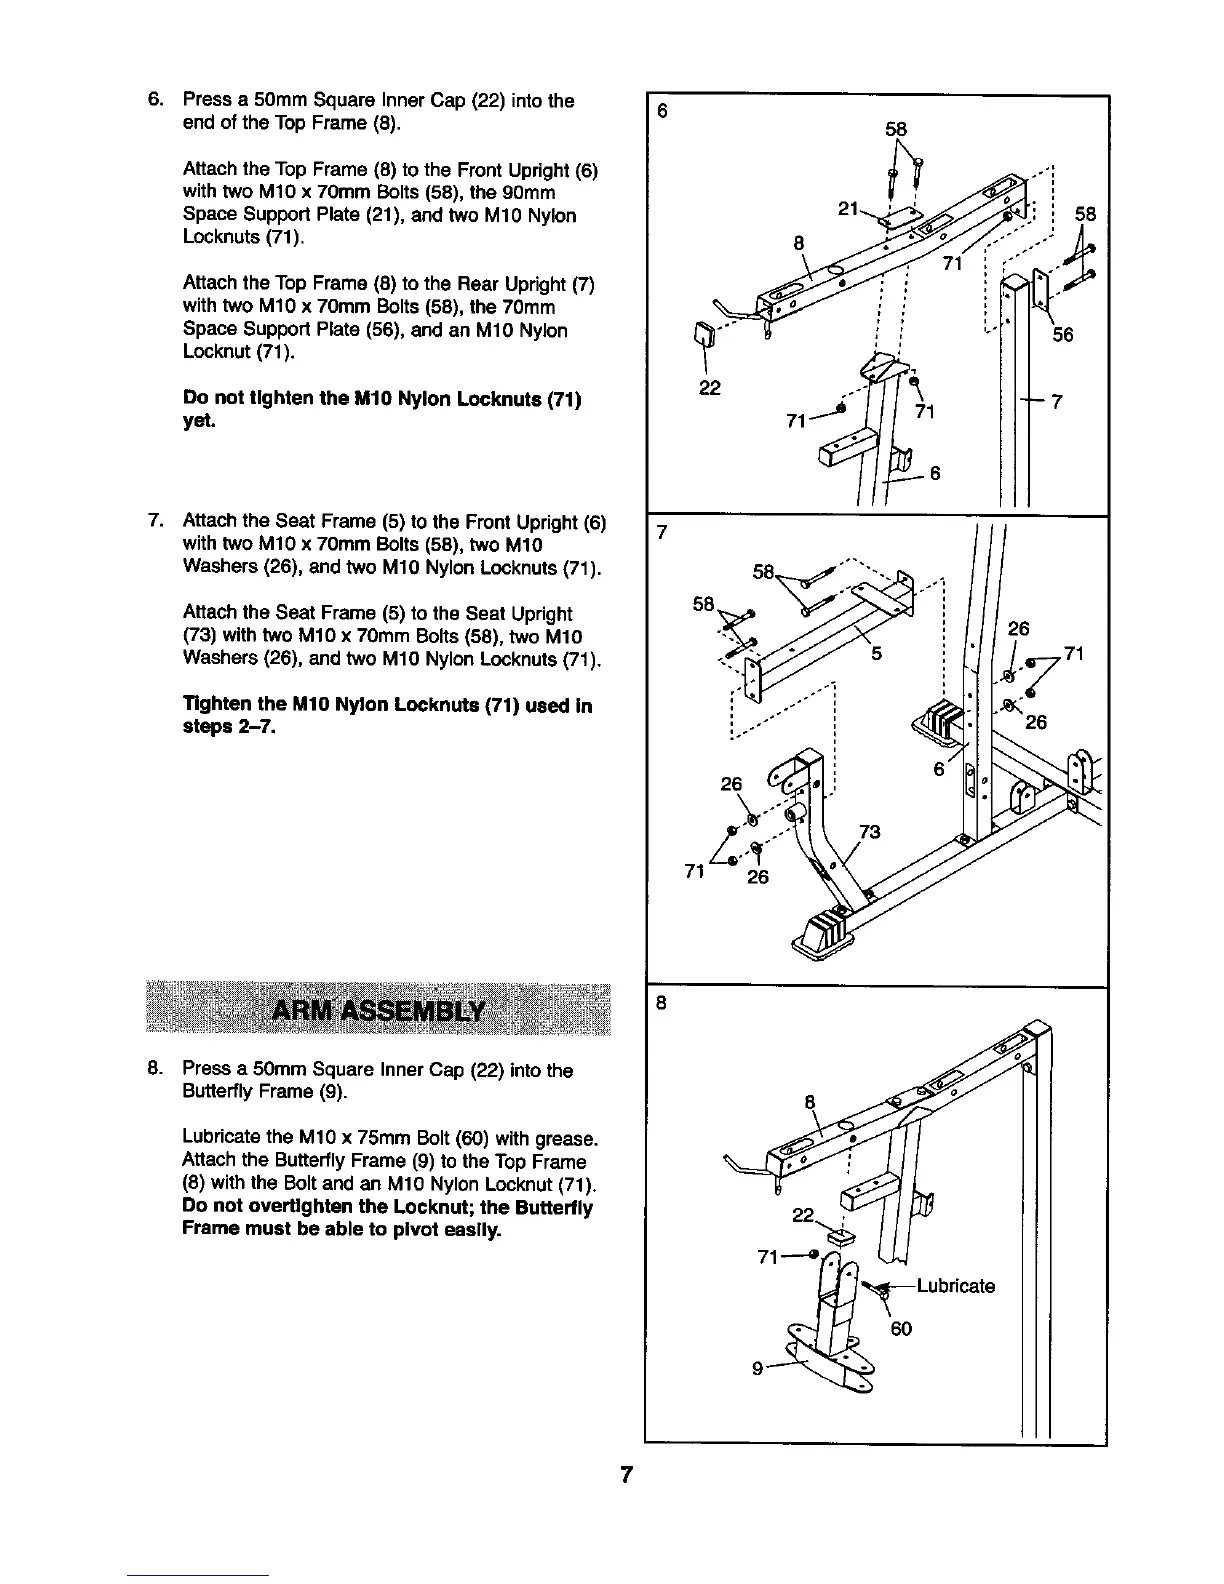
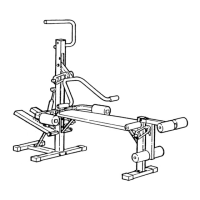
6. Pressa 50mm Square Inner Cap (22) into the
end of the Top Frame (8).
Attachthe Top Frame (8) to the Front Upright(6)
withtwo M10 x 70mm Bolts (58), the 90mm
Space SupportPlate (21), and two M10 Nylon
Locknuts(71).
Attach the Top Frame (8) to the Rear Upright(7)
with two M1O x 70mm Bolts(58), the 70mm
Space Support Plate (56), and an M10 Nylon
Locknut(71).
0o not tighten the M10 Nylon Looknuts (71)
yet.
7. Attachthe Seat Frame (5) to the Front Upright(6)
withtwo M10 x 70ram Bolts (58), two M10
Washers (26), and two M10 Nylon Locknuts(71).
Attach the Seat Frame (5) to the Seat Upright
(73) with two M10 x 70ram Bolts (58), two M10
Washers (26), and two M10 Nylon Locknuts(71).
Tighten the M10 Nylon Locknuts (71) used In
steps 2-7.
8.
Press a 50mm Square Inner Cap (22) intothe
ButterflyFrame (9).
Lubricatethe M10 x 75mm Bolt (60) with grease.
Attach the ButterflyFrame (9) to the Top Frame
(8) withthe Boltand an M10 Nylon Locknut(71).
Do not overtlghten the Locknut; the Butterlly
Frame must be able to pivot easily.
6
58
•0 " i
22 ..-'_
6O
7