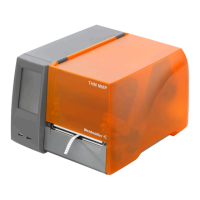
Unpacking and installing devices
2903400000/00/09.202214
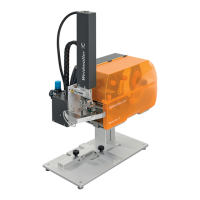
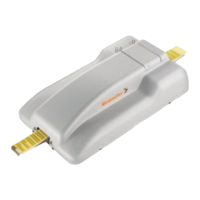
4.2 Fitting the applicator on the printer
► Make sure that the printer is disconnected from the
mains.
► Ensure that the printer is in a stable position.
► Only connect the compressed air once the applicator
has been completely tted.
1
4
5
3
2
6
Image 4.2 Fit the applicator
► Guide the locking pins (1) on the rear of the applicator
into the holes (4) in the printer.
► Push the applicator against the printer.
The applicator’s connector (2) is connected to the printer’s
peripheral connection (5).
► Tighten the knurled screw (6) to secure the applicator.
► Connect the compressed air supply to the connection
(3).
4.3 Connecting the devices
The interfaces and connections are dened in the individu-
al component descriptions.
Connect the labelling system to the mains
► Make sure that the label printer is switched o.
► Insert the power cable in the mains socket (23, Image
3.4).
► Insert the power cable plug in an earthed socket.
Connecting the computer or computer network
ATTENTION
A lack of or insucient earthing can cause faults
during operation.
► Make sure that all computers connected to the label
printer as well as the connecting cables are earthed.
► Use a suitable cable to connect the label printer to the
computer or network.
4.4 Switching on the system
Prerequisites: All electrical connections to the printer as
well as the compressed-air connection on the applicator
must be in place.
► Switch on the printer at the mains switch (22, Image
3.4).
The printer runs through a system test and then shows the
Ready system status on the display (9, Image 3.2). The
applicator moves to the home position and the stamp is
located above in the transfer position for the items printed
by the printer.