16 Repairs: Information and Instructions
27. Make the electrical connections to the power
pack.
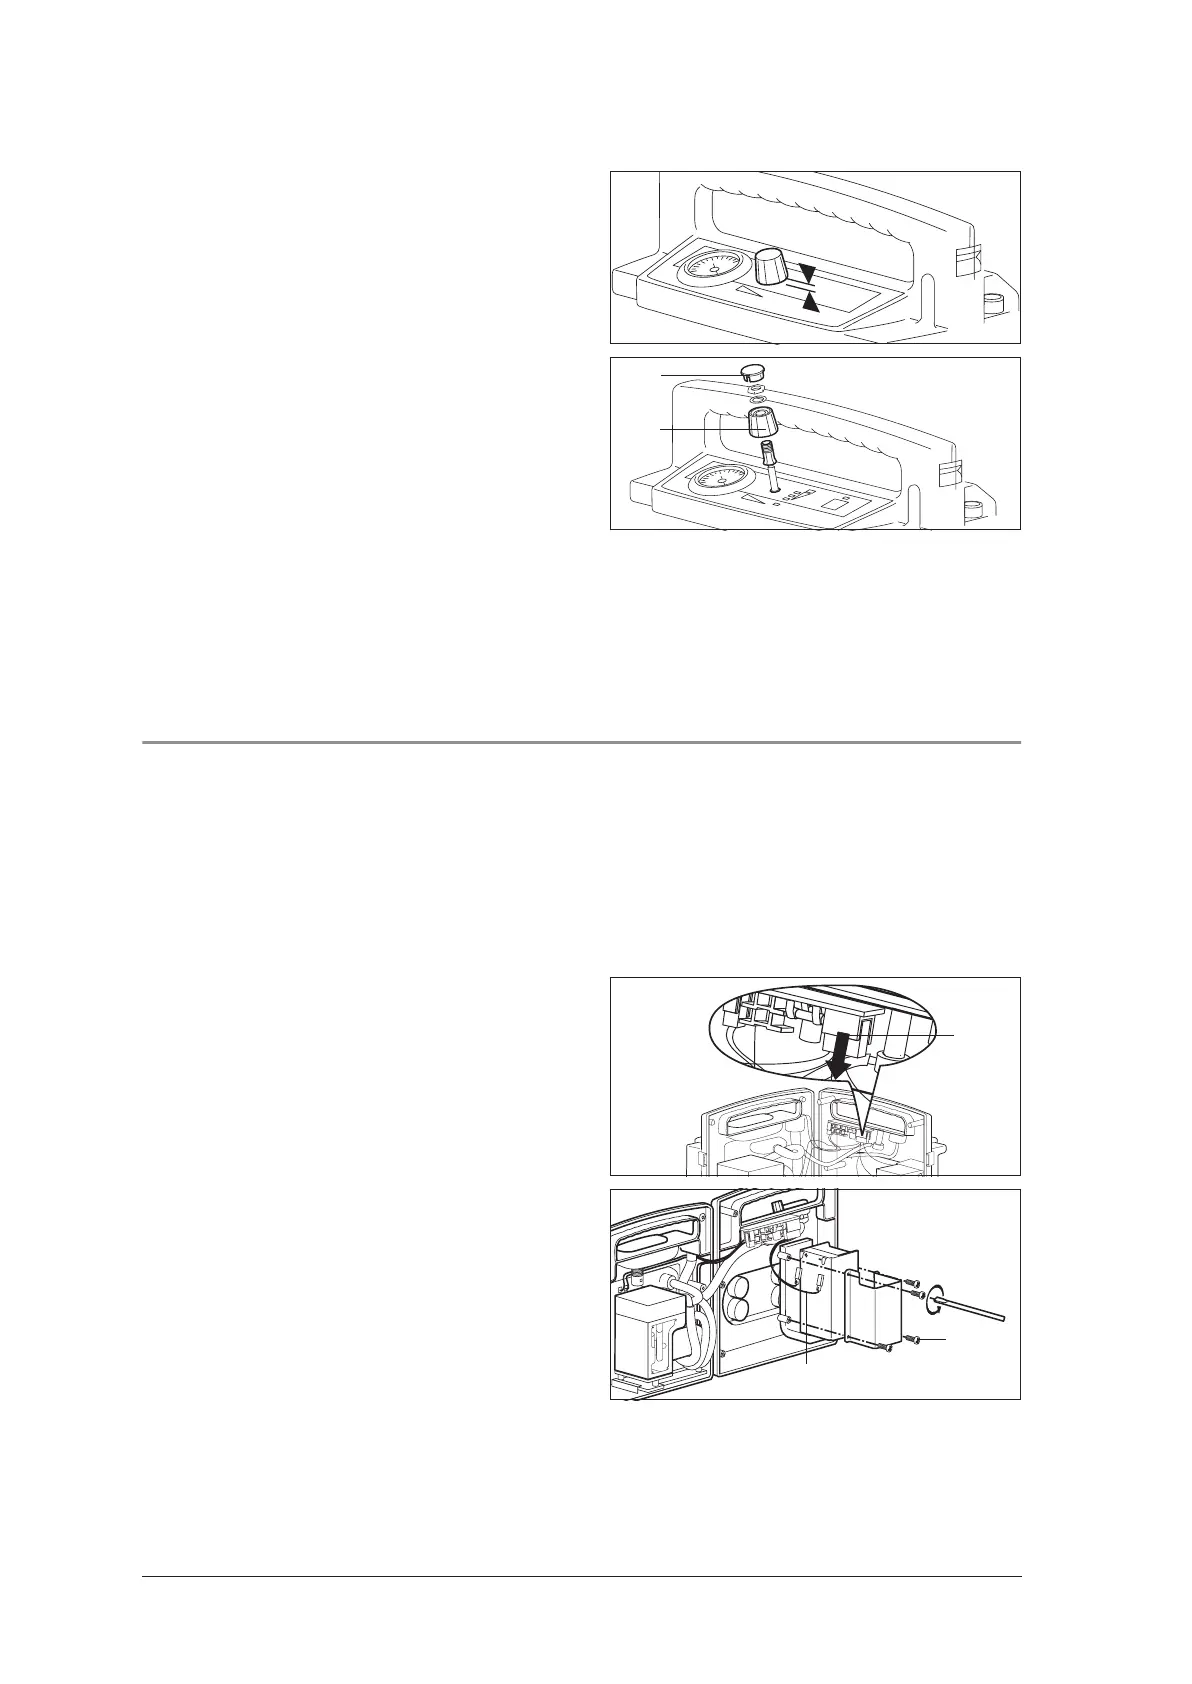
28. .When replacing the knob, ensure that the
gap between knob and keyboard membrane
(with the spindle screwed in) is approx.
1.0 mm.
29. Use a 10 mm tubular wrench to tighten the nut
securing knob 44.
30. Insert cap 45 (slit in cap must match ridge in
knob).
31. Close the device (see ”8.3 Closing the de-
vice“ on page 13).
32. Perform a functional check (see ”6.2 Perform-
ing the functional check“ on page 8).
8.6 Changing power pack
ACCUVAC Basic is fitted with a high-grade lead cell power pack.
Tools and equipment required:
• Phillips screwdriver size 2.
1. Open the device (see ”8.2 Opening the de-
vice“ on page 12).
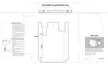
2. Carefully disconnect the power pack connec-
tor 18 (X100) from the circuit board.
3. Unscrew the power pack holder (4 cross-head
screws 41).
4. Detach both leads from the power pack 17.
5. Remove the faulty power pack.
Help protect the environment!
Don’t throw the old power pack in the gar-
bage can – take it to a local collection point
for environment-friendly disposal.
1mm
45
44
X100
17
41