Repairs: Information and Instructions 17
6. Attach the two cables to the connections on
the new power pack: red to plus; black to
minus.
If you accidentally reverse the connections, the
electronic system will be protected by fuse 16
(F2), which will then have to be replaced.
7. Fit the new power pack with its holder, making
sure you do not jam any cables.
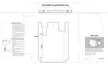
8. Carefully push power pack connector 18
(X100) onto the circuit board until it snaps into
place.
9. Close the device (see ”8.3 Closing the de-
vice“ on page 13).
10. Perform a functional check (see ”6.2 Perform-
ing the functional check“ on page 8).
8.7 Changing fuse F1 or F2
Important!
Avoid touching the electronic components on the cir-
cuit board, as this could damage them (electrostatic
charge).
Tools and equipment required:
• Phillips screwdriver size 2.
1. Open the device (see ”8.2 Opening the de-
vice“ on page 12).
2. Remove the faulty fuse 15/16. The fuses are
identified on the circuit board.
3. Insert a new fuse. Always use approved fuses
(see ”12. Technical Data“ on page 27).
4. Close the device (see ”8.3 Closing the de-
vice“ on page 13).
5. Perform a functional check (see ”6.2 Perform-
ing the functional check“ on page 8).
X100