Repairs: Information and Instructions 21
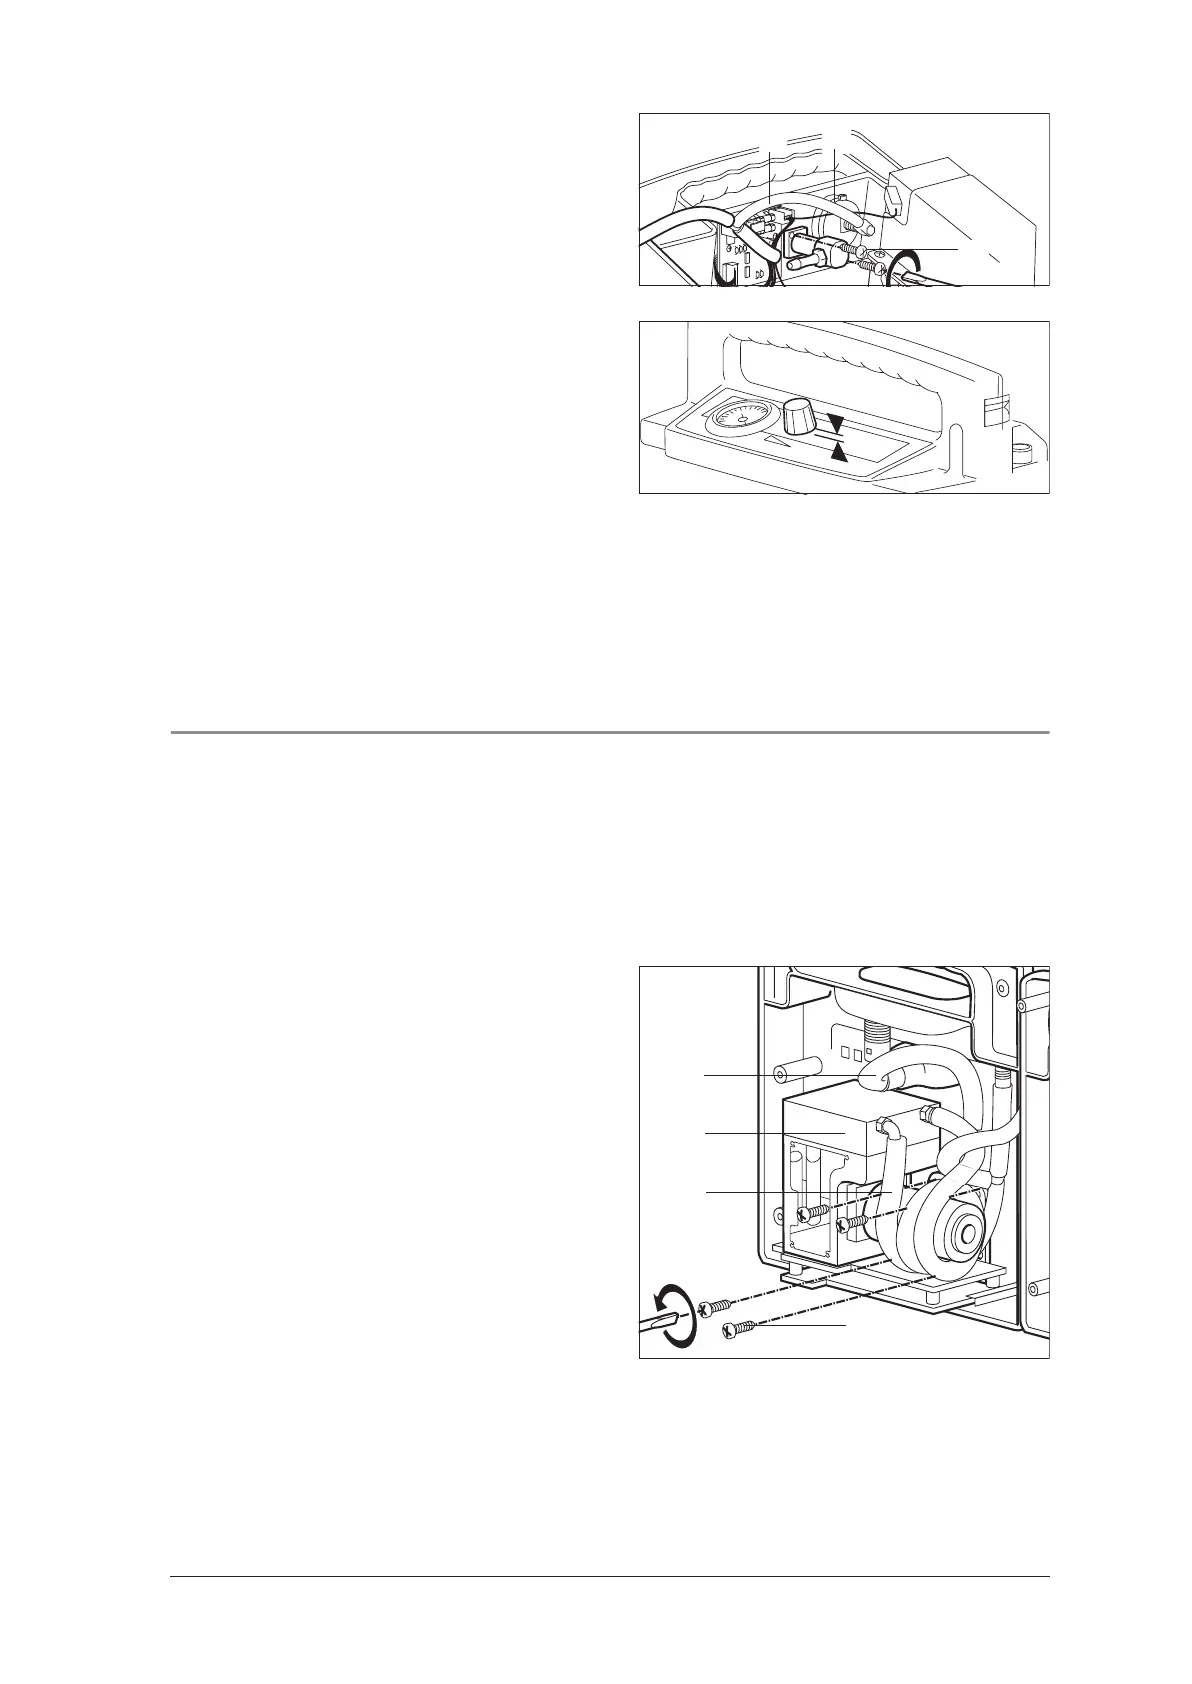
4. Remove tube 58 from vacuum regulator.
5. Unscrew the 2 cylinder-head screws 47 and
remove the faulty vacuum regulator.
6. Fit the new regulator unit 46 in reverse order.
7. When replacing the knob, ensure that the gap
between knob and keyboard membrane (with
the spindle screwed in) is approx. 1.0 mm.
8. Use a 10 mm tubular wrench to tighten the nut
securing knob 44.
9. Insert cap 45 (slit in cap must match ridge in
knob).
10. Close the device (see ”8.3 Closing the de-
vice“ on page 13).
11. Perform a functional check (see ”6.2 Perform-
ing the functional check“ on page 8).
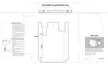
8.12 Fitting new pump
The pump is only available as a complete replacement unit.
Tools and equipment required:
• Phillips screwdriver size 2.
1. Open the device (see ”8.2 Opening the de-
vice“ on page 12).
2. Detach silicone fabric tube 56 from inlet port of
pump.
3. Detach rolled-up silicone tube 57 from muffler
connection.
4. Unscrew 4 screws 41 from support.
5. Detach tube 57 from faulty vacuum pump, at-
tach it to outlet of new pump 44 and wind it
round motor.
6. Finish fitting the new vacuum pump in reverse
order.
7. Close the device (see ”8.3 Closing the de-
vice“ on page 13).
8. Perform a functional check (see ”6.2 Perform-
ing the functional check“ on page 8).
47
46
58
1mm
57
56
41
44