20 Repairs: Information and Instructions
8.10 Fitting new pressure gage
Tools and equipment required:
• Phillips screwdriver size 2.
1. Open the device (see ”8.2 Opening the de-
vice“ on page 12).
2. Use a 7mm open-end wrench to unscrew the
tube connection from the pressure gauge.
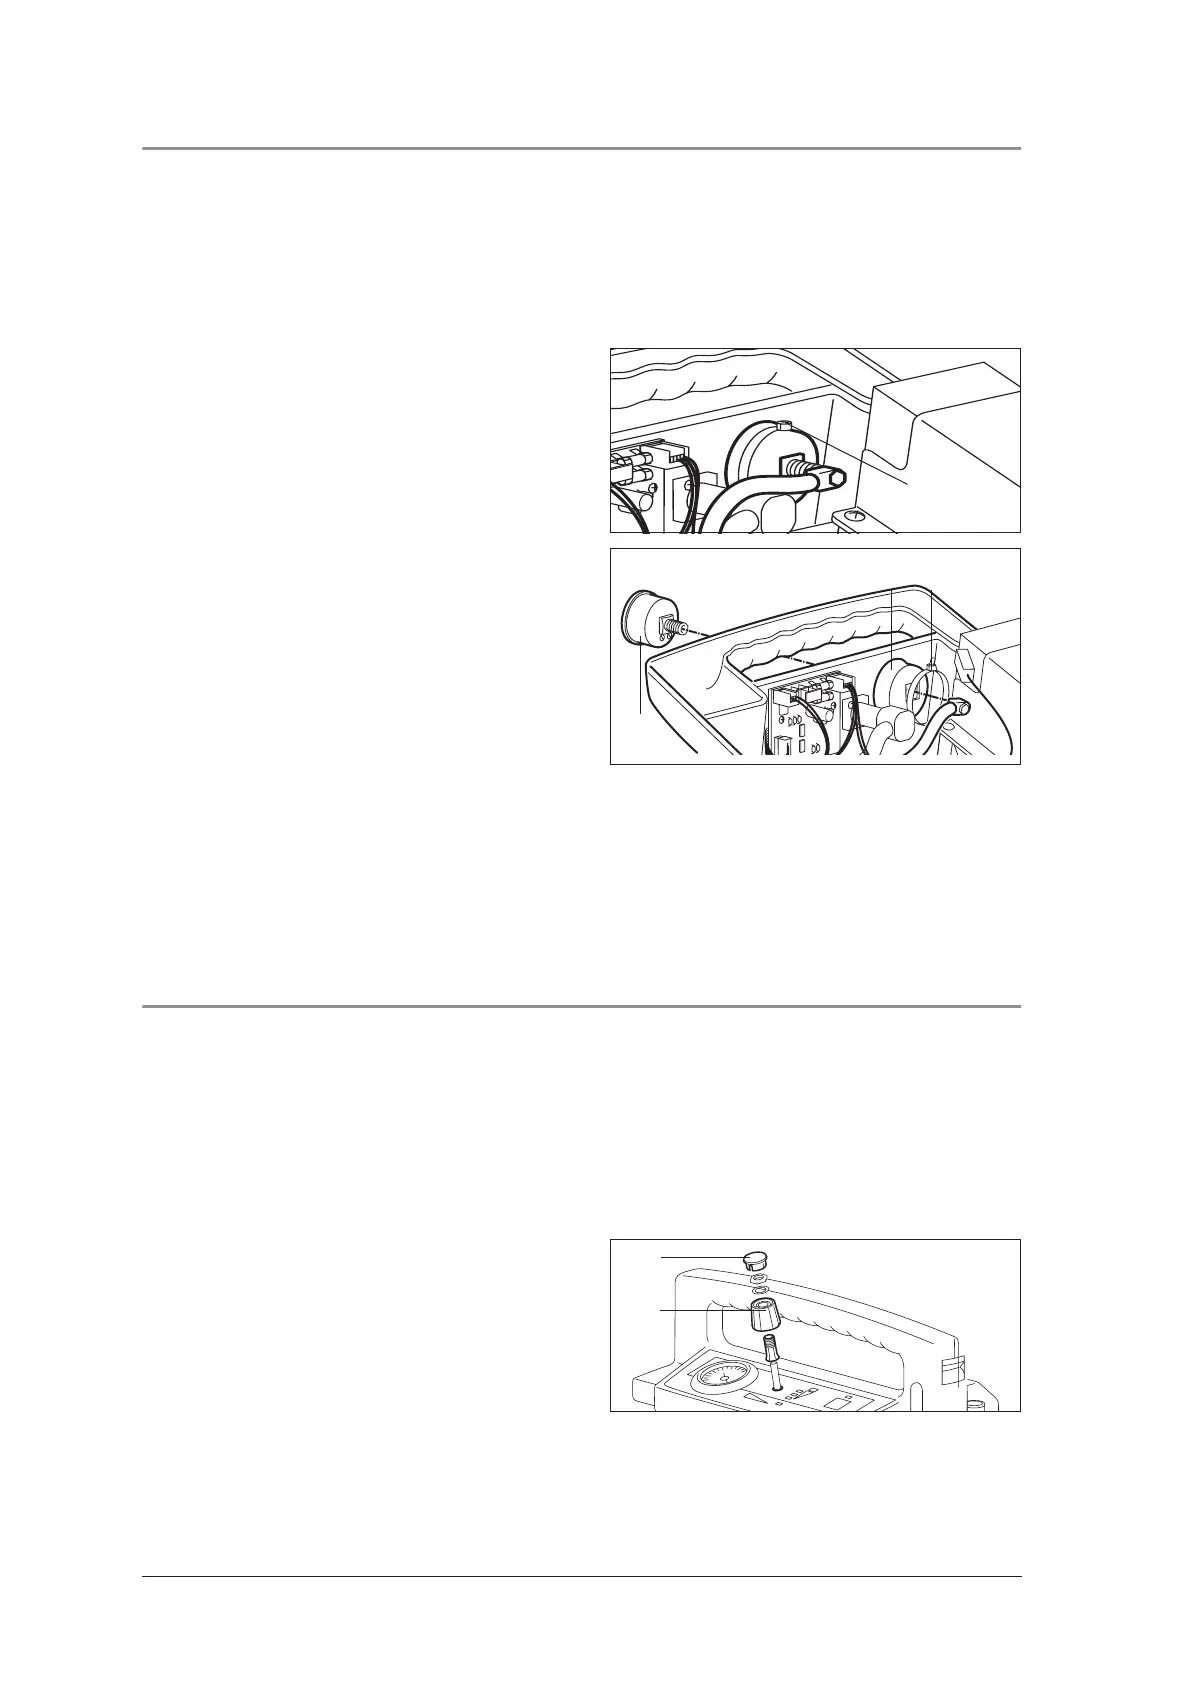
3. Cut open cable tie 43.
4. Carefully push faulty pressure gauge upward
out of resilient ring 42.
5. Using a little methylated spirits, carefully insert
the new pressure gauge 1 downwards into the
resilient ring 42 (making sure to align it correct-
ly). Roll the rubber cuff onto the pressure gauge
with your fingers.
6. Secure the pressure gage by fitting cable tie
43 around the resilient ring.
7. Attach the tube connector to the pressure
gauge using a 7mm open-end wrench.
8. Close the device (see ”8.3 Closing the de-
vice“ on page 13).
9. Perform a functional check (see ”6.2 Perform-
ing the functional check“ on page 8).
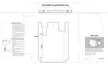
8.11 Fitting new vacuum regulator
Tools and equipment required:
• Phillips screwdriver size 2,
• Tubular wrench, 10 mm.
1. Open the device (see ”8.2 Opening the de-
vice“ on page 12).
2. Carefully remove cap 45 of knob 44, using a
razor blade (for example).
3. Use a 10 mm tubular wrench to unscrew the
knob.
43
42
1
43
45
44