Repairs: Information and Instructions
19
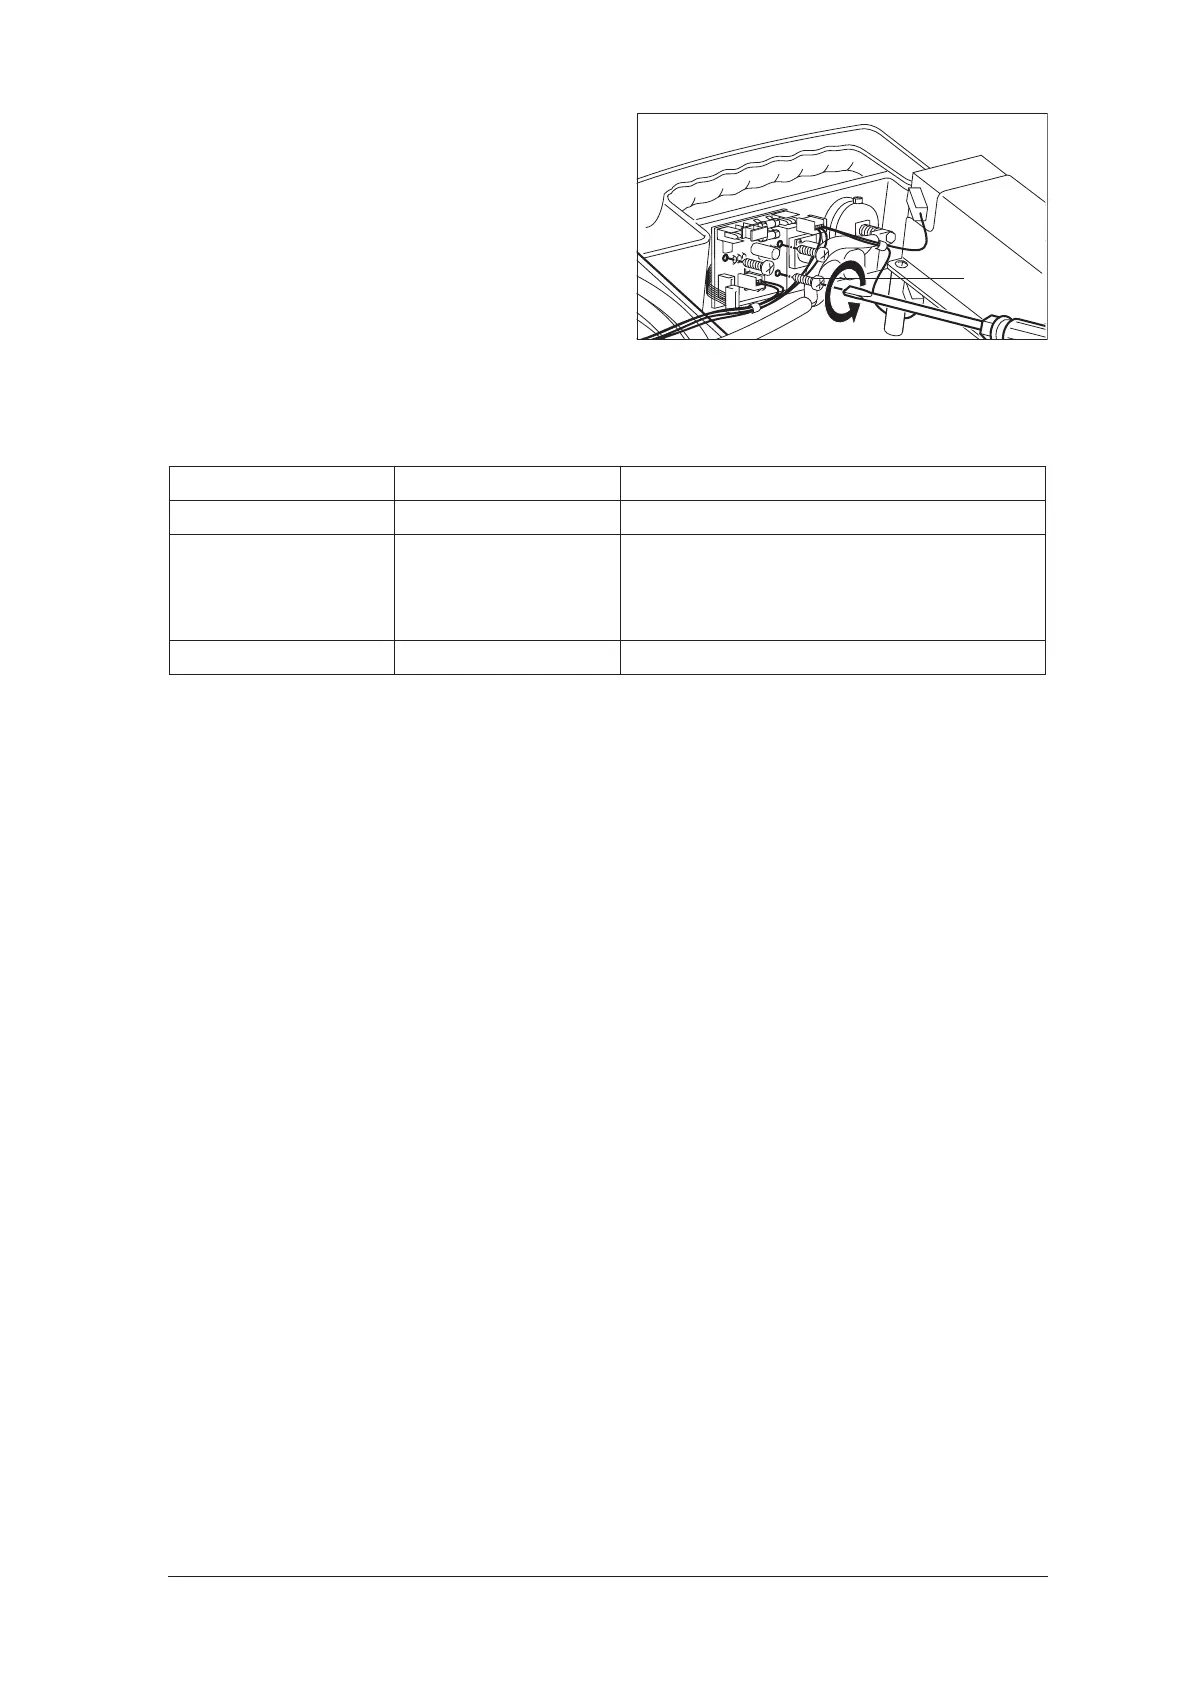
4. Unscrew circuit board (3 screws
52
).
5. Insert the new circuit board in reverse order.
Important!
The lengths of tubes WM 10766 and WM 10765 are not compatible with all circuit boards. The over-
view below shows you the cases in which you will have to adapt the length of the tubes:
Carefully connect electronic power pack con-
nector
X101
. Then route connecting cable so
it does not come into contact with the pump.
Important:
• Do not connect electrical power pack
connector
X100
yet.
• Wait half a minute to allow the capacitors on the
circuit board to discharge.
6. Carefully connect the electrical power pack
connector
X100
.
7. Close the device (see ”8.3 Closing the de-
vice“ on page 13).
8. Perform a functional check (see ”6.2 Perform-
ing the functional check“ on page 8).
Old circuit board New circuit board Action
WM 10780 Index
≤
C WM 10780 Index
≤
C No modification required
WM 10780 Index
≤
C WM 10780 Index > C
Use tubes with new lengths:
– WM 10766 Index > a (42 mm instead of 50 mm)
– WM 10765 Index > a (208 mm instead of
200 mm)
WM 10780 Index > C WM 10780 Index > C No modification required
52