.
34 © Weldclass 2019 | E.&O.E. | Edition 2.2
7.3 Lift TIG Operation
NOTE: Lift TIG operation requires an optional trigger control TIG torch, argon gas cylinder & regulator.
NOTE: The WF-255MST is a DC (Direct Current) output welder only, this means that it is unable to TIG weld
reactive metals such as Aluminium alloys and Brass (which require AC output). DC TIG output is suitable for
steel, stainless steel and copper.
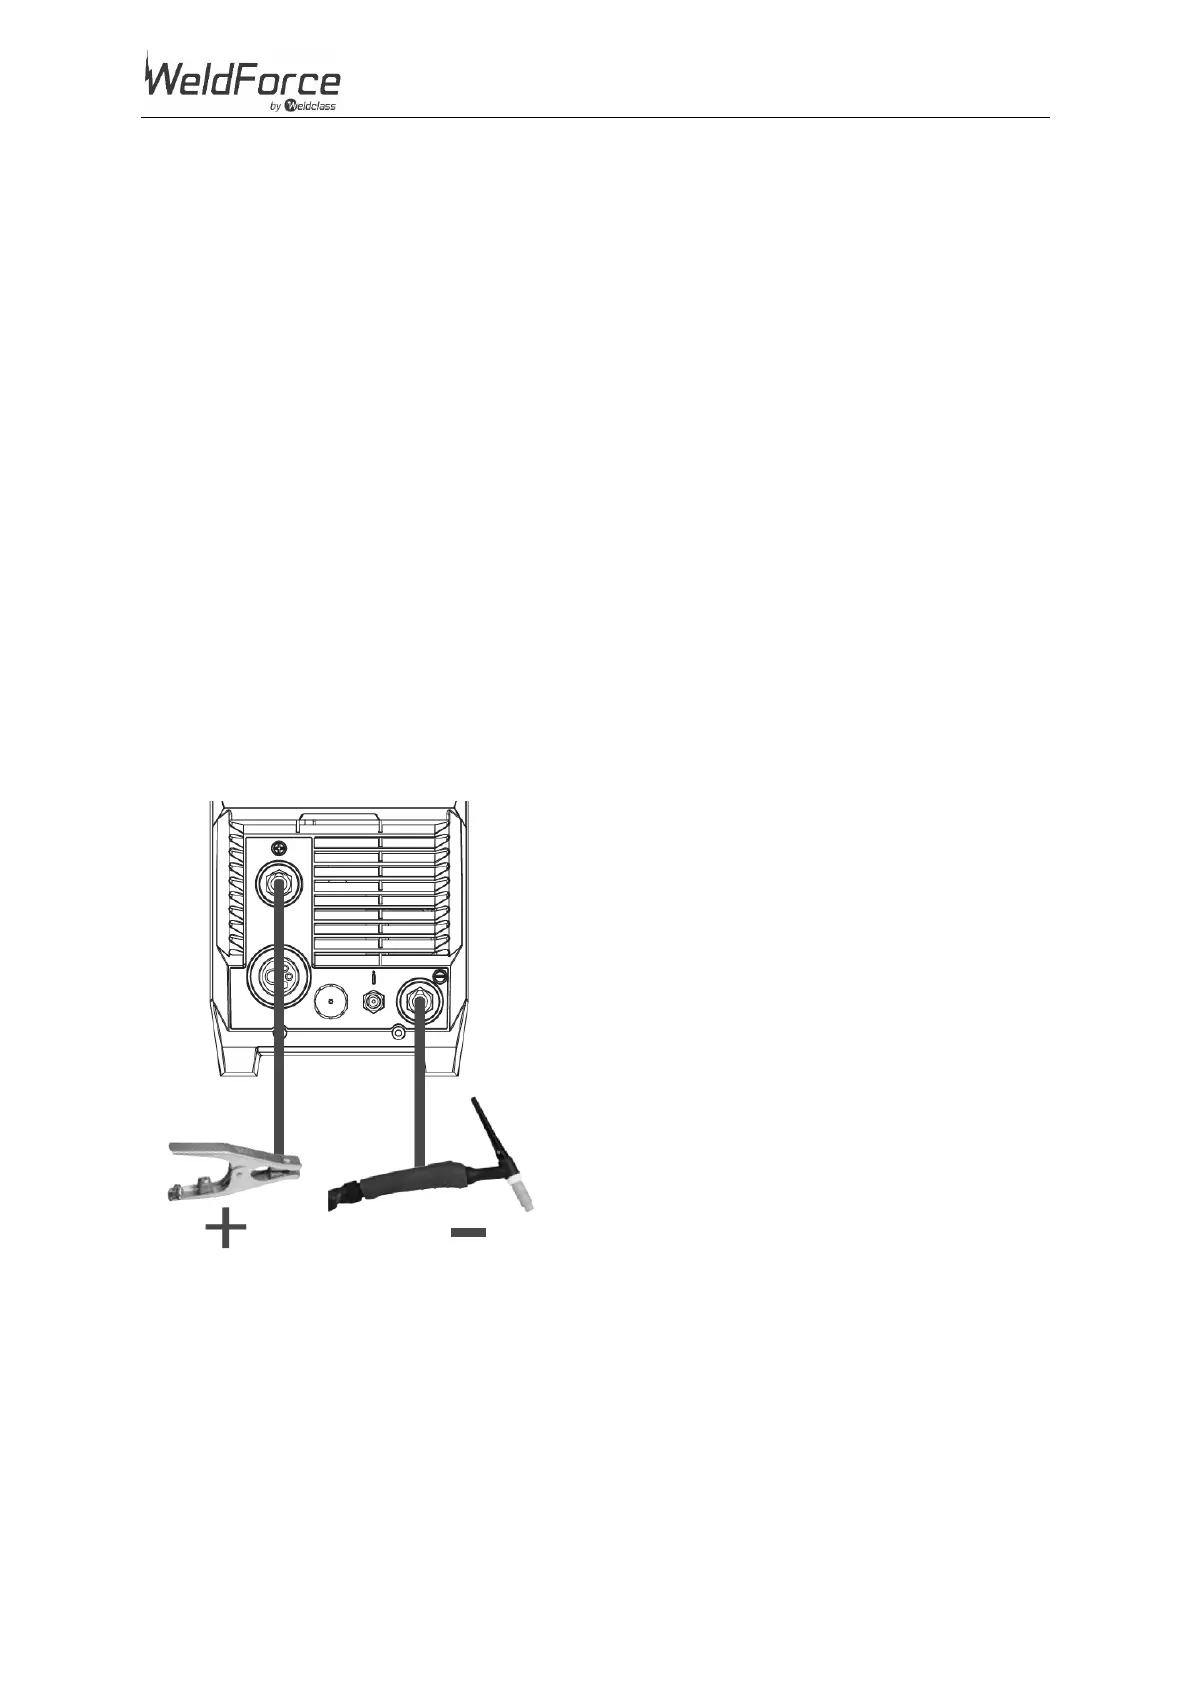
1. Connect the earth cable to the Positive (+) Welding Power Output Socket (3)
2. Connect the earth clamp to the work piece. Contact with the work piece must be firm contact
with clean, bare metal, with no corrosion, paint or scale at the contact point.
3. Insert TIG torch power connection into the Negative (-) Welding Power Output Socket (7)
4. Connect TIG multi-pin connector to the TIG Control/Spool Gun connection socket (5)
5. Connect TIG torch gas line to the TIG Torch Gas Connection (6) on the front of the machine.
Ensure all connections are tight.
6. Open gas cylinder valve and adjust regulator. Press ‘Test Gas’ button (30) to initiate flow of gas
through the TIG torch. Flow should be between 5-10 l/min depending on application.
7. Connect the machine to suitable power. Switch the mains power switch (23) to ‘I’ to power up
the machine.
8. Set welding process selector to ‘TIG’ (refer to 4.1)
9. Select the required output current using the Right Adjustment Knob (32). The Right LCD Digital
Readout (38) will display the set amperage output.
10. Adjust special Function settings if required (refer to 4.3)
11. You are now ready to weld!
Figure 23