MULTI- ZONE / FROZEN FOOD VENDOR • 3576 • 4222618A | 7
3 WIDE SNACK/CANDY/FOOD TRAY
1. Pull the tray out until it
stops.
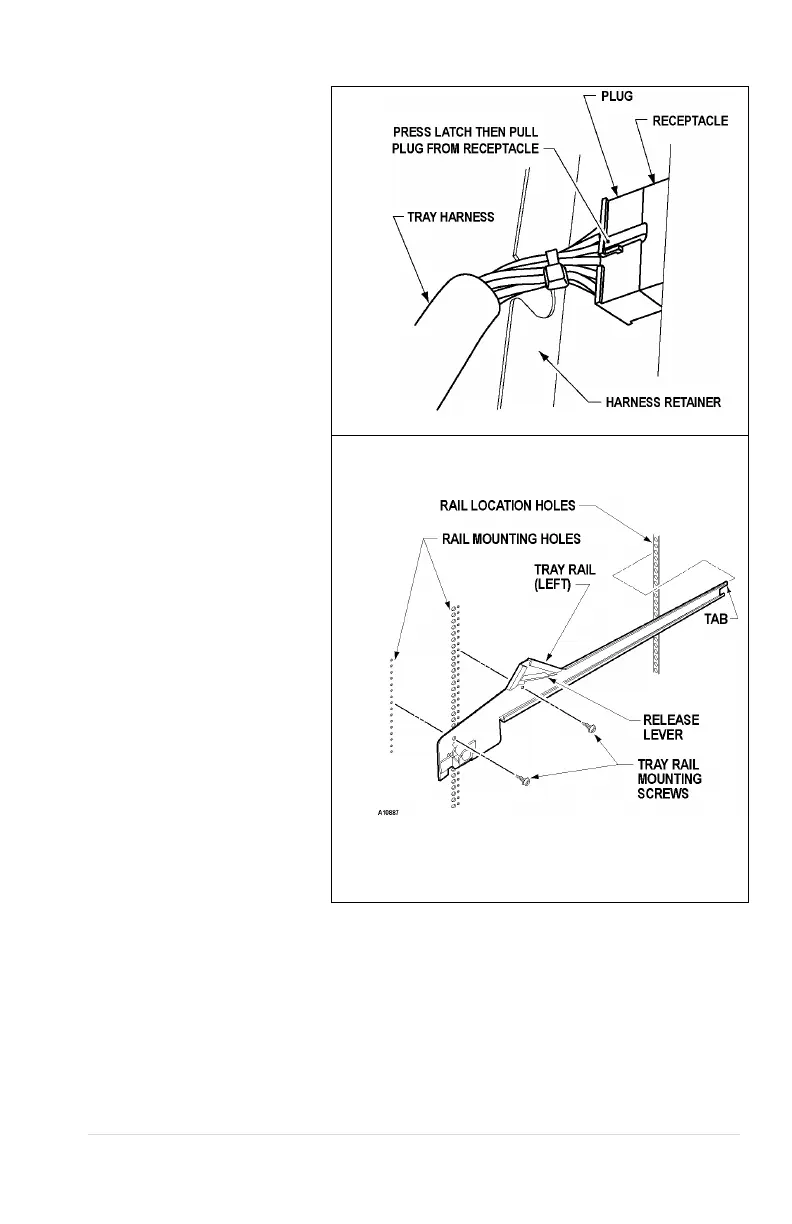
2. Locate the harness
retainer on the right
sidewall. See Figure 5a.
Pull the tray harness out of
the harness retainer.
3. Unplug the tray plug from
its receptacle on the right
side wall.
4. Lift up on the front of the
tray and pull slightly
(approximately 1.5 cm (.5
in) forward to clear the tray
stop.
5. Locate the release lever on
the left and right tray rails.
See Figure 5b. Swing the
release levers all the way
up to unlatch.
6. Lift up on the rear of the
tray and remove it from the
vendor.
7. Relocate both left and right
tray rails from the left and
right side walls.
8. Remove tray rail mounting
screws.
9. Pull each rail forward to
disengage its rear tab from
the hole in the rear wall.
See Figure 5b.
10. Relocate both left and right
rails by reversing step 7.
Rails must be level front
to back and left to right.
11. Replace the tray by placing
its rear rollers on the left
and right rails and lifting up
on the front of the tray as
you push it back
12. Swing the tray rail release
Figure 5b. Tray Rails
13. Install the tray plug into its receptacle on the right side wall.
14. Re-engage the tray harness into its harness retainer.
15. Test vend the tray in its new position to assure that the tray plug is properly seated.
 Loading...