93
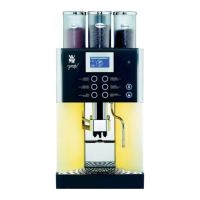
Insert the connector of milk intake hose 16 into the connec-
tion provided on the underside of the combination spout 7.
Then push the milk intake hose into the guide on the under-
side of the combination spout 7 to fasten the milk intake
hose 16 to the combination spout 7.
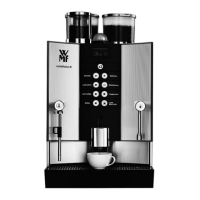
Next, feed the milk intake hose 16 through the clamping
valve 13 mounting. To do this, pull both ends of the milk
intake hose 16 forward and press down into the mounting.
Then guide the metal nozzle of the milk intake hose 16
through the hole which is on the left next to the clamping
valve 13. Finally, insert the metal nozzle of the milk intake
hose 16 into the milk tank supplied (e.g. in the
WMF auxiliary cooler or Tetra Pak).
Always make sure the milk tanks are topped up or replaced
in good time, to ensure correct operation of the coffee ma-
chine.
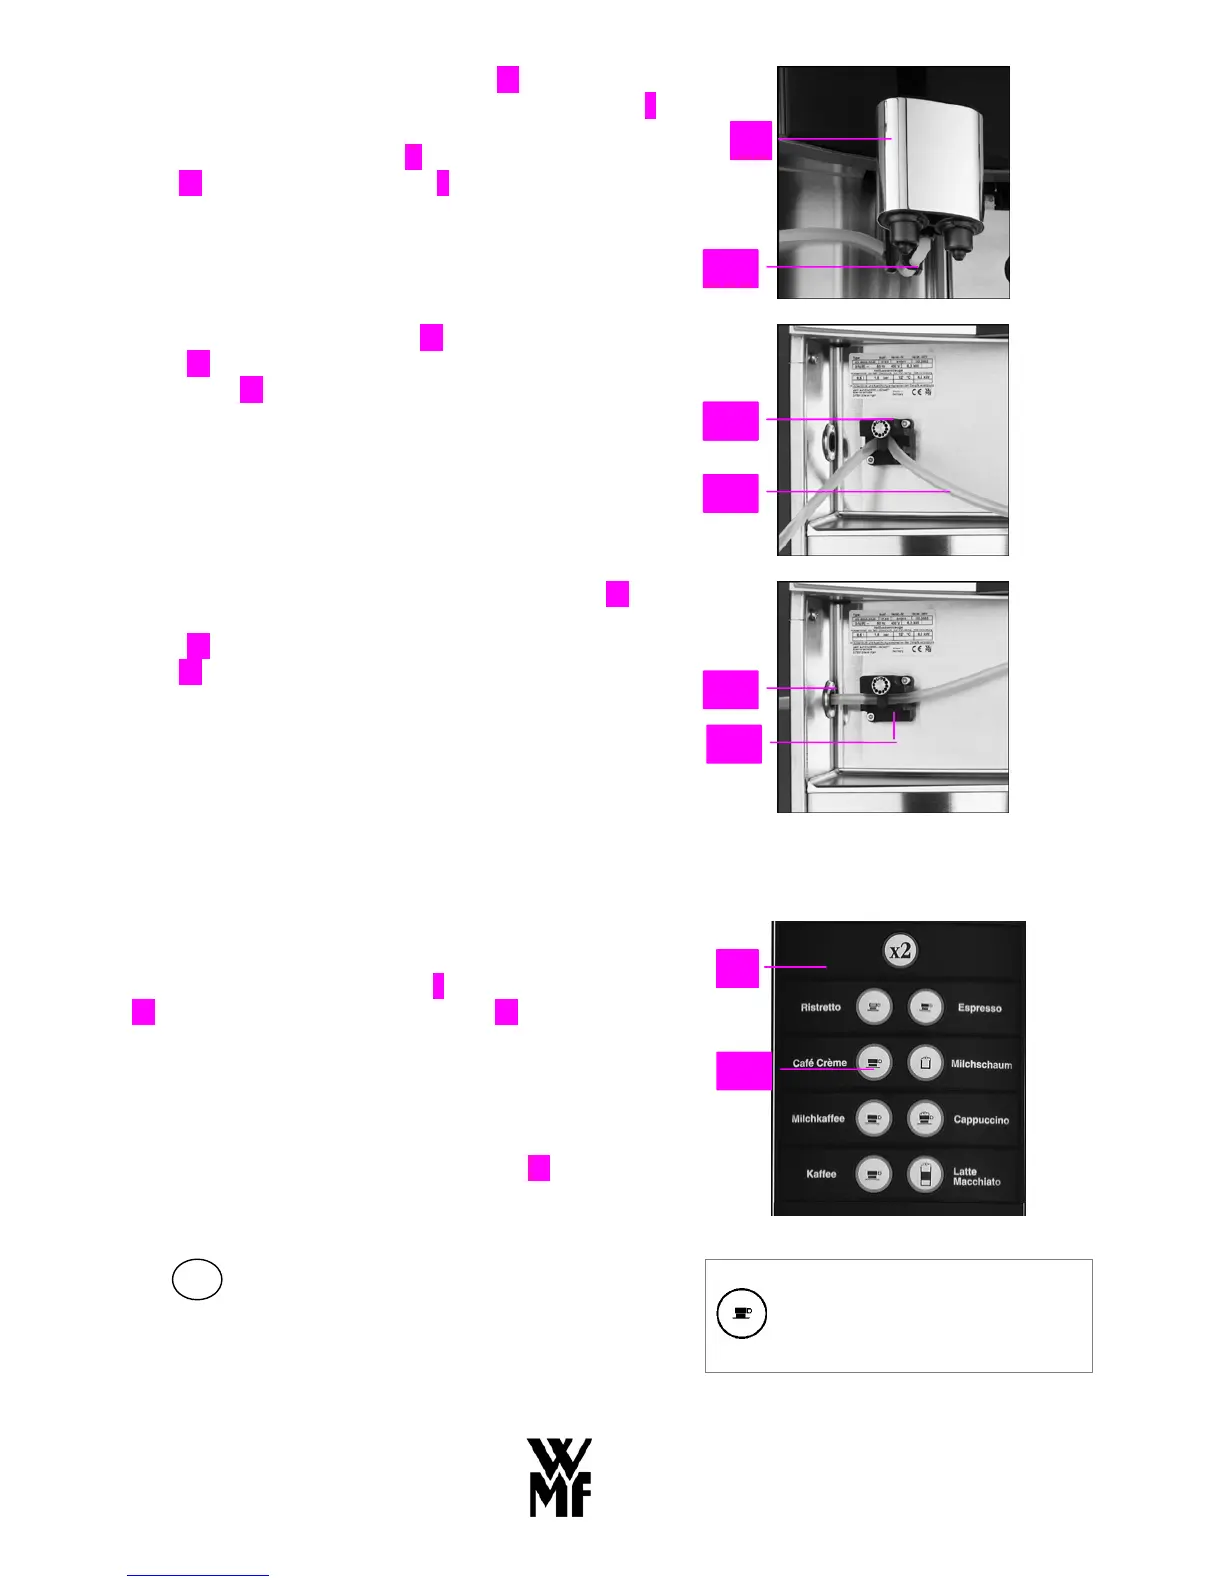
7.4 Beverage key selection and labelling
Depending on the machine version chosen, you have either
5 or 9 beverage keys and one hot water key at your dis-
posal (shown here: control panel 5 with 9 beverage keys
17). You can assign each beverage key 17 individually
with your chosen coffee beverages. Around 40 pre-set
standard beverages are provided for you (see chapter 8.2.8,
page 121) or alternatively you can choose your own set-
tings.
You can label the individual beverage keys 17 with differ-
ent beverage symbols which your local WMF customer
service engineer can replace according to your require-
ments.
The 2x key gives you access to a second level of keys.
By selecting this key before pressing one of the beverage
keys, you can either prepare an additional beverage alterna-
tive or call up the two-cup function automatically.
Example: additional beverage alternative
1 cup Espresso
7
16
1313
16
16
13
5
17
 Loading...