20 | Page
Slide the OTR switch down. The unit will vibrate 3 times and will begin recording audio and video.
To Deactivate Video Recording:
Slide the OTR switch up. The unit will vibrate once and stop
recording.
During Video Recording you can:
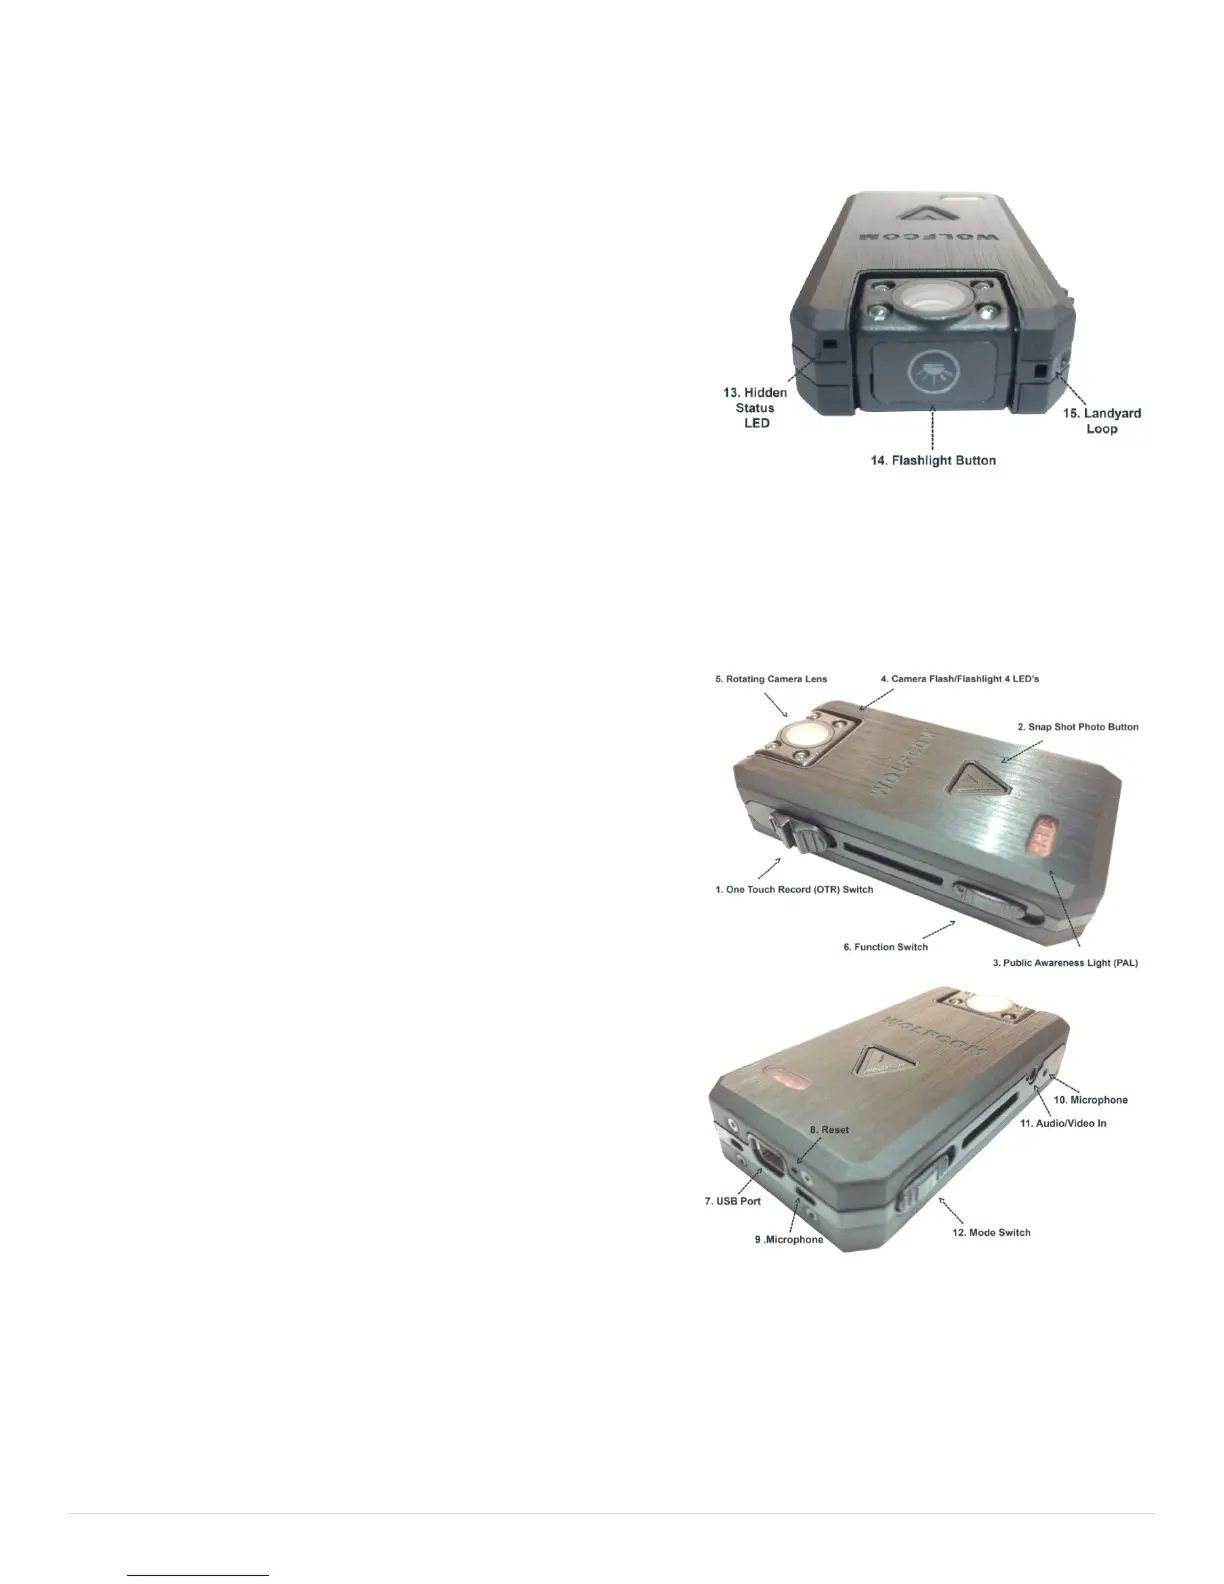
• Activate and Deactivate the flashlight by pressing the
flashlight button (14)
• Silently snap a photo by pressing the Snap Shot button
(2). The Vision allows the unit to snap photos while
simultaneously recording video.
• Confirm whether or not the unit is recording video by
checking the Status indicator light (13). Steady Red=
Recording in Progress, Yellow=Unit is charging. Green=Unit is fully charged.
Warning* while recording video please do not move the Mode switch or the Function switch as it may cause
the unit to freeze. If this happens, the unit will have to be reset by inserting a pin into the reset hole (8) and
clicking the button inside.
How to Take Digital Photos:
First make sure that the Function Switch (6) is set in the up
position. The Function Switch (6) should be set to Normal
Mode. Slide the Mode Switch (12) to Photo mode. This tells the
Unit that you would like for it to take photos.
To Take a Photo:
Slide the OTR switch down. The unit will vibrate 3 times and
will power on. Aim the camera and hold it steady. When you
are ready to snap a photo, press the (2) Snap Shot button
once. The camera flash will activate and a photo will be taken.
After you have finished taking photos, be sure to power off the
unit by sliding the OTR switch up.
Tip* You can snap as many photo's as you like. As the
camera has a slow shutter speed, please be sure to hold the
camera steady when you snap a photo. Photo files will be
stored as a .JPG file in the memory.
How to use the Voice Recorder:
First make sure that the Function Switch (6) is set in the up position. The Function Switch (6) should be set to
Normal Mode. Slide the Mode Switch (12) to Audio Mode. This tells the unit that you would like for it to record
Audio.
To Begin Recording Audio Only:
Slide the OTR switch down. The unit will vibrate 3 times and will begin recording audio. The status light will
(13) stay a solid red indicating that recording is in progress.
 Loading...