23 | Page
Configuration Setup and User guide for:
Easy Mode Pages 23 to 26
The following are instruction on connecting your unit to the PC to configure settings and choose the Operating
Mode.
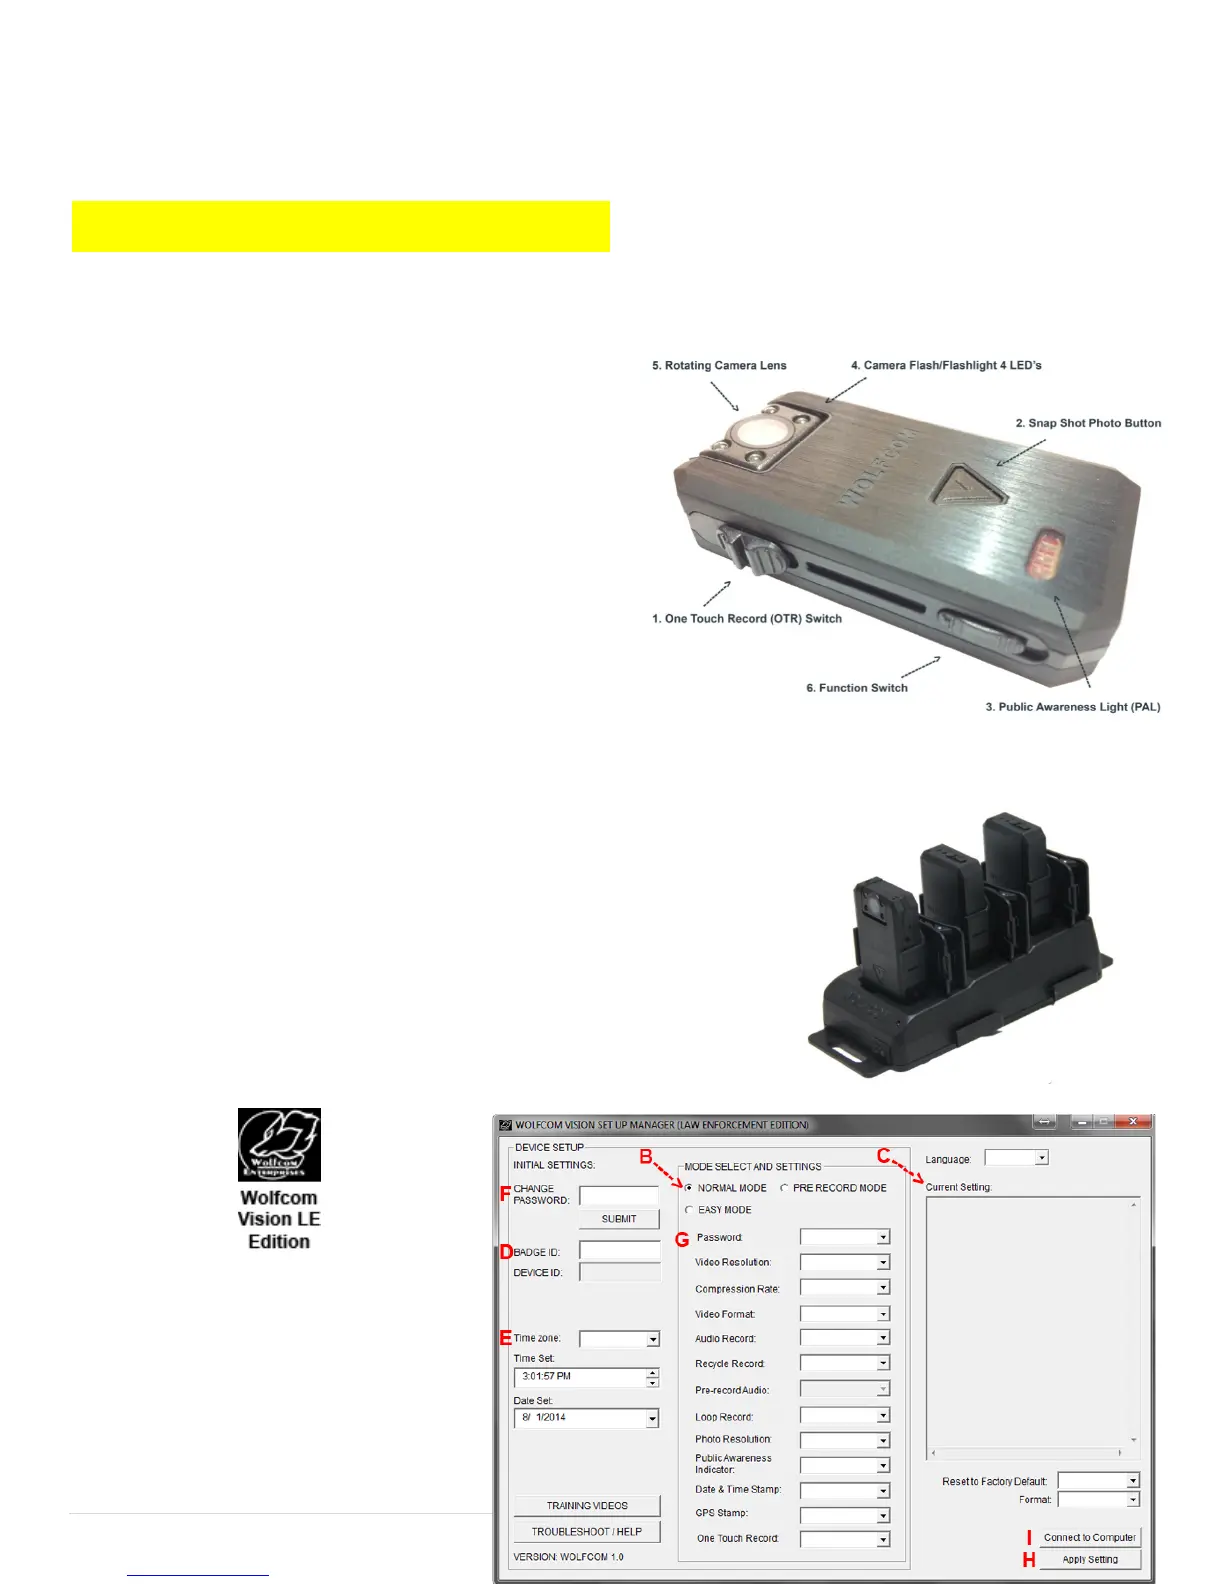
1. First make sure that the OTR Switch (1) is in the up
position and that the unit is powered off.
2. Next make sure that the Function Switch (6) is set to
the up position.
3. Plug the supplied 10 pin USB cable into the bottom of
the unit and the other end into the USB port on your
computer.
4. Power on the unit by sliding the OTR Switch (1) Down
and the unit will power on.
If your unit came with a docking station, insert the
Wolfcom Vision into any available port on the docking station. Make sure that the docking station is powered
on and that the docking station is plugged into the PC via a 10 pin USB cable. Also make sure that the docking
station is powered by the included power supply.
IMPORTANT* The USB cables that are included with your unit are
specially designed with a 10 pin connection. Using a 3rd party USB cable
will not work and may damage the unit. Please be sure to only use the
cables that came with your unit.
4. Click on the Wolfcom Vision Setup Manager icon on your computer
desktop. You should see an Icon that looks like this:
5. The Wolfcom Vision Setup Manager
will open.
6. With the Wolfcom Vision plugged into
the PC via the 10 pin USB cable or
docked into the docking station, press
the OTR switch down. The unit will
vibrate 3 times and settings that are

 Loading...