29 | Page
video recording and will no longer be used to snap photos.
In Pre-Record Mode, You'll only be able to record Video only. You will not be able to use the Audio Voice
Recorder feature or the Digital Camera feature.
Powering the unit on:
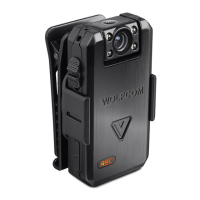
To power on the unit, slide the OTR switch (1) down. The
unit will power on and will begin buffering in Stand By mode.
The status light (13) will flash red indicating that the unit is
on Standby.
To Activate Video Recording:
Press the Snap Shot Button (2) or V button one time. The
unit will vibrate 3 times and will begin recording video. The
status light (13) will stay steady red indicating that the unit is
on recording video.
To Deactivate Video Recording:
Press the Snap Shot Button (2) or V button one time. The
unit will vibrate once and stop recording.
During Video Recording you can:
• Activate and Deactivate the flashlight by pressing the
flashlight button (14)
• Confirm whether or not the unit is recording video by checking the Status indicator light (13). Flashing
Red= Unit is on buffering and on Standby mode. Steady Red= Recording in Progress, Yellow=Unit is
charging
How to Charge the unit:
Plug the supplied 10 pin USB cable into the bottom of the unit and the other
end into the USB port on your computer or to the wall. The status LED on
the top of the unit will turn "Yellow"(charge). Once the Status LED turn
"Green" it means that the unit is fully charged.
If your unit came with a docking station, insert the Wolfcom Vision into any
available port on the docking station. Make sure that the docking station is
powered on and that the docking station is plugged into the wall using the
included power supply.
IMPORTANT* The USB cables that are included with your unit are specially
designed with a 10 pin connection. Using a 3rd party USB cable will not work
and may damage the unit. Please be sure to only use the cables that came with your unit.
 Loading...