24 | Page
currently configured onto the unit will populate in the CURRENT SETTING Window (C).
7. Select Easy Mode (B)
8. Next, enter the badge number (D) if desired.
9. If you are an Admin and would like to password protect the unit, enter the password desired and click on the
Submit button. If you have multiple units, please be sure that all the units have the same password.
10. If you have decided to password protect your unit, then select the Password (G) to "ON" to enable the
password. If you have decided NOT to password protect the unit, then change the selection to "Off".
11. Please be sure to set the desired settings on the unit by clicking on the arrows of the drop down box for all
the other options and making your selection.
12. Be sure to select your Time Zone (E). Please see Time Zone Map on page 45 to select your correct time
zone.
13. After you have selected your desired settings, click "Apply Settings" (H) to save the new settings onto the
Wolfcom Vision.
14. Press up on the OTR switch to power the unit off and remove the 10 Pin USB Cable or remove from the
docking station. Your unit is now ready for use.
15. If you have multiple units that you need to configure, simply plugged the 10 Pin USB connector onto the
unit or if using a docking station, insert the unit into one of the slots of the docking station. Then repeat steps
one through 14.
Viewing Video, Photo, or Audio files on the unit.
if you have files on the Wolfcom Vision that you would like to view or transfer onto your PC or other media
storage device, simply follow steps 1 through 6 then click the "Connect to PC" (I) button. Once you do, the
Wolfcom Vision Setup manager will close and the file window will open up allowing you access to the files. You
can now copy or download, or delete the files. If the Setup Manager asks for a Password, enter the admin
password to gain access to the files. *Note if you purchased the Wolfcom Manager Software, it will
automatically download and organized all of your assets for you. There will be no need to use the Wolfcom
Vision Setup Manager to download files to your PC.
For a detailed explanation of all possible settings in the Set
Up Manager go to page 42 for the Settings Guide.
Using The Wolfcom Vision in Easy Mode
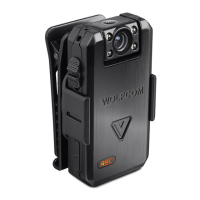
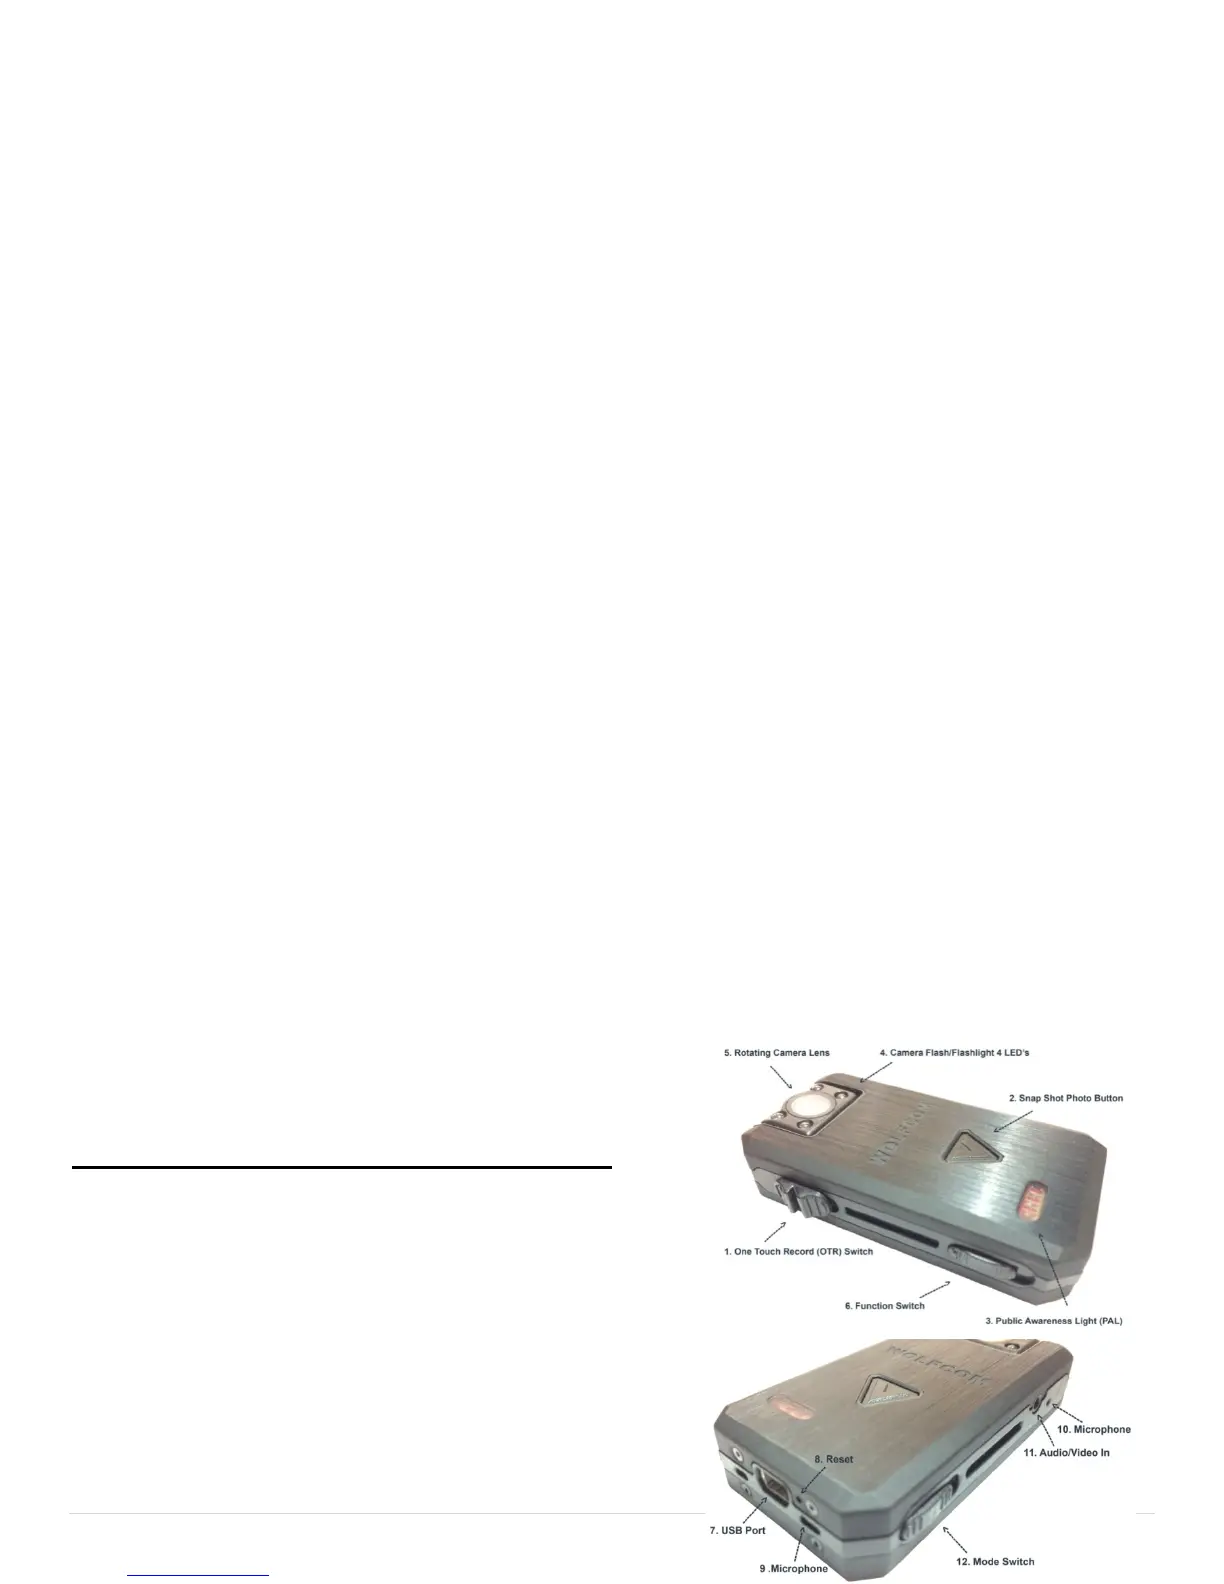
Now that the unit is operating in Easy Mode, the Function
Switch (6) and the Mode Switch (12) are now disabled and
will no longer work. Only the OTR switch (1) and the Snap
Shot button (2) will be usable.
In Easy Mode, You'll only be able to record Video. You can also
snap photos during video recording.
To Activate Video Recording:
 Loading...