INSTALLATION
6 720 648 726 (2011/07)
19
8INSTALLATION
This section explains how to install the boiler in a
professional manner.
8.1 INSTALLING THE BOILER
Observe the installation distances of the concentric flue
gas system in the separate flue gas system manual.
B Before starting installation check that the carrying
capacity of the wall is sufficient for the boiler weight.
B Remove the packaging and dispose of it in an
environmentally manner.
B Measure the installation height (Æ chapter 7
"Dimensions of boiler", page 17).
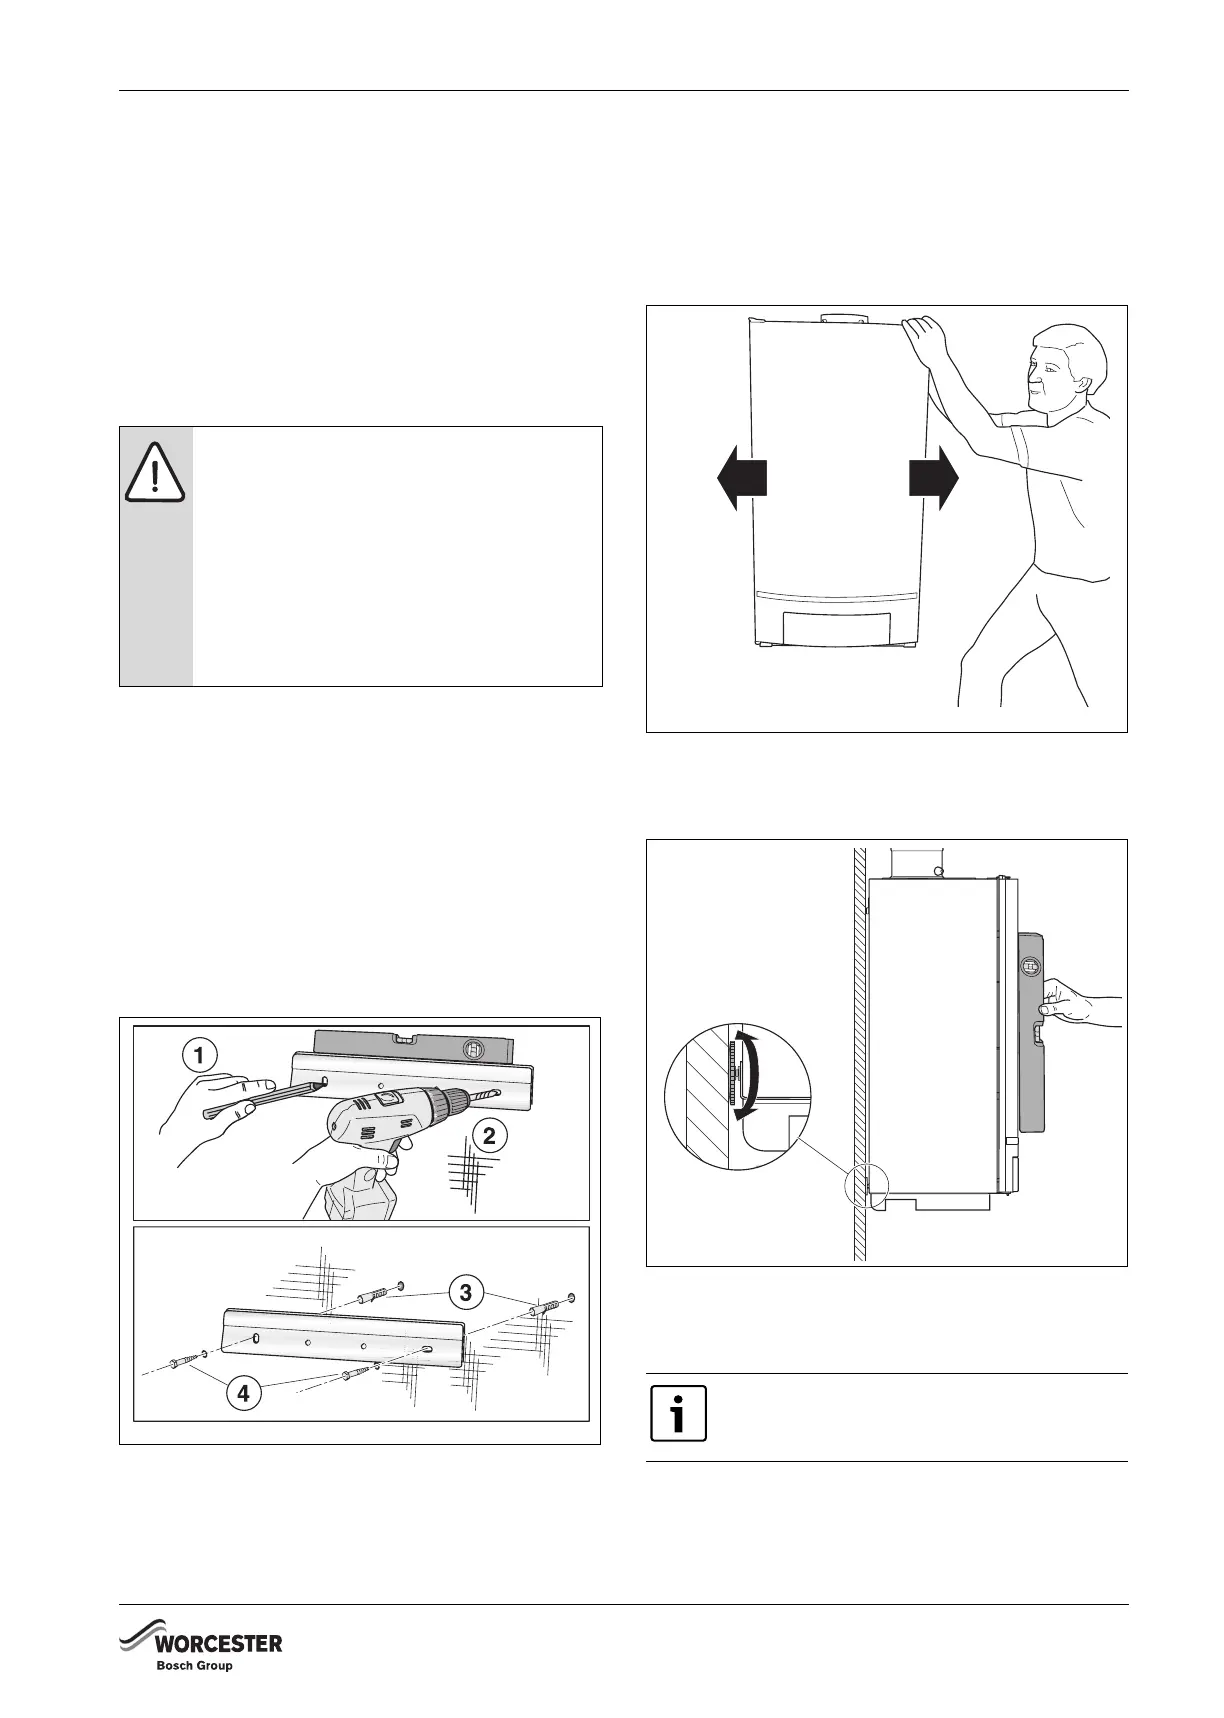
B Mark out both holes using the wall bracket (step 1)
using a spirit level.
B Drill 2 holes in the wall (step 2).
B Insert the 2 enclosed plugs in the drilled holes
(step 3).
B Install the wall bracket, using the 2 enclosed screws
(step 4).
Fig. 8 Installing the wall bracket
B With two people, lift the boiler by holding it by its
back and by the transport rail at its bottom and install
it on the wall bracket (Æ fig. 3, page 15).
B Slide the boiler into place (Æ fig. 9).
Fig. 9 Sliding the boiler
B Level the boiler using the set screw and a spirit level
(Æ fig. 10).
Fig. 10 Aligning the boiler with the set screw
B Remove the protective covers from the bottom of the
boiler (Æ fig. 11).
CAUTION: Damage to the installation.
B Do not remove the polystyrene foam
bottom slab, otherwise the connection
injectors might be damaged.
B Do not lift the boiler by holding it by the
door over the BC10 (Æ section 5.1).
B During installation work, cover the boiler
and the flue gas adapter to prevent site
dirt from entering.
6 720 648 726-008.1TD
Some residual water from final testing may
leak away.
6 720 648 726-009.1TD
6 720 648 726-010.1TD
 Loading...