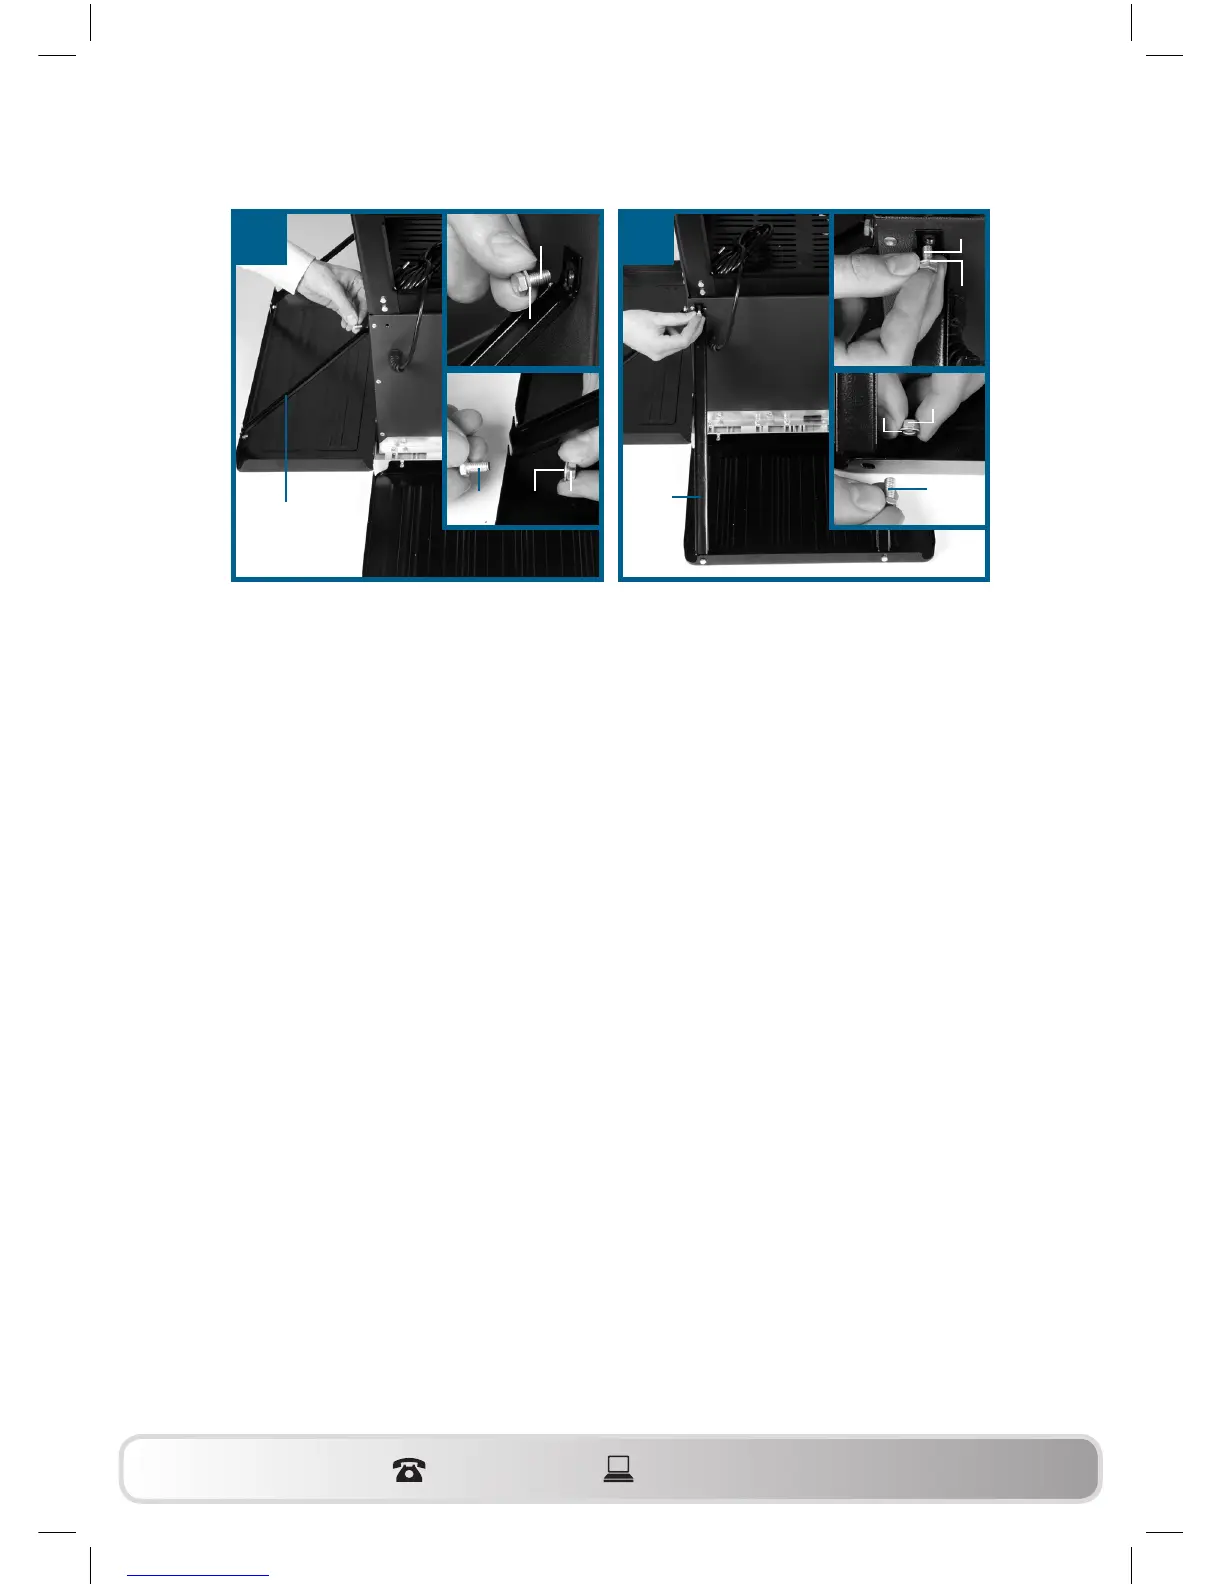
5.3 Fitting / removing the saw blade guard (Fig. 2, 15-16)
• When assembling the equipment for the first time, you must first fit
and adjust the splitter. To do so, proceed as described in Section
5.5.
• Place the saw blade guard (2) together with the screw (24) on top of
the splitter (4) so that the screw is snug in the oval hole (25).
• Do not tighten the screw (24) too far – the blade guard must be able
to move freely.
• Fasten the extractor hose (3) to the extractor adapter (16) and to the
extractor socket of the blade guard (2). Fasten the hose with the hose
clip to the extractor adapter (16) (Fig. 2, 16). Connect a suitable chip
extraction system to the extractor adapter (16).
• To dismantle, proceed in reverse order.
Important! The saw blade guard (2) must always be lowered over
the workpiece before you begin to cut.
5.4 Changing the table insert (Fig. 17-18)
• To prevent increased likelihood of injury, the table insert should be
changed whenever it is worn or damaged.
• Take off the saw blade guard (2) (see 5.3).
• Remove the 2 countersunk head screws (26).
• Take out the worn table insert (6).
• Fit the replacement table insert by following the above in reverse.
13 14
c
a
23
c
a
b
c
a
c
a
23
b
WZTS_1700_AUS_SPK7.indb 24 21.05.12 15:55